


Refrigerant Recharge / Leak Repair in Plano
The leak found and repaired before any refrigerant goes in – because a recharge alone won't keep your home cool.
What’s Covered on This Page
- A Refrigerant Recharge Almost Always Means There Is a Leak
- Signs Your System Is Losing Refrigerant
- When It Is Not a Refrigerant Problem
- What Happens During a Refrigerant Recharge / Leak Repair Visit
- What Drives the Cost of Refrigerant Recharge / Leak Repair
- How long does a refrigerant recharge and leak repair visit usually take?
- Will adding refrigerant myself fix the problem?
- Can I keep running my AC if I think refrigerant is low?
A Refrigerant Recharge Almost Always Means There Is a Leak
If your AC is running but your house in Plano keeps creeping warmer, low refrigerant is one of the first things to check. Refrigerant recharge / leak repair is how we fix it, and the most important word in that phrase is “leak.” Your system is sealed. The refrigerant moves in a closed loop between the indoor coil and the outdoor unit, carrying heat out of your home over and over. It isn’t supposed to run out. If the level is low, it got out through a hole, a crack, or a loose fitting.
That’s why a top-off alone isn’t a repair. Adding refrigerant without fixing the leak is like pumping up a tire with a nail in it. It feels fine for a while, then you’re right back where you started and paying for refrigerant again. On a Plano summer day, when your system runs almost nonstop, a small leak can drain the charge faster than you’d expect.
Here’s what low refrigerant often looks and sounds like from your side:
- Air from the vents feels cool-ish but not cold, even with the thermostat set low.
- Ice or frost on the copper line at the outdoor unit, or on the indoor coil.
- The system runs much longer than it used to and never quite reaches the set temperature.
- A hissing or bubbling sound near the indoor or outdoor unit.
- Your electric bill climbs while your comfort drops.
Leaks tend to show up in a few familiar places. The indoor evaporator coil can develop tiny pinholes over time. Service valves and their small valve cores can loosen or wear. Copper lines can rub against framing or the unit cabinet until they wear through. The outdoor coil can take damage from hail or a string trimmer. In many Plano homes, the indoor coil sits up in the attic, where summer heat is brutal on equipment, so it’s worth checking closely.
There are honest exceptions, which is why we say “almost always.” A system that was undercharged when it was installed can run low without ever leaking. Refrigerant also has to be recovered and replaced when certain parts are swapped out. Outside of those cases, low refrigerant points to a leak.
So when you call us for low refrigerant, the job is to locate the failed part, repair or replace it, and verify the system runs correctly. That’s the difference between a visit that fixes your AC and one that just delays the next breakdown. Most of these calls come down to a single common failure that gets fixed on the first visit.
Signs Your System Is Losing Refrigerant
The warning signs we covered above are real, but they aren’t proof. Plenty of other AC problems look a lot like low refrigerant. Knowing the difference can save you a service call, or help you describe the problem clearly when you do call.
Before you assume you’ve got a leak, take a few minutes to rule out the easy stuff:
- A clogged air filter. When air can’t move across the indoor coil, the coil gets too cold and can ice up, just like it does when refrigerant is low. If your filter is gray and caked, swap it and give the system time to recover.
- Thermostat settings. Make sure it’s set to Cool, the fan is on Auto, and the batteries aren’t dead. It sounds simple, but it’s worth a look.
- A dirty outdoor unit. Cottonwood fluff, grass clippings, and dust packed into the outdoor coil make the system work harder and cool less. That’s a cleaning job, not a refrigerant job.
- Closed or blocked vents. Shutting off too many rooms or pushing furniture over returns can choke airflow and make cooling feel weak.
If you’ve checked those and the problem is still there, a few patterns point more strongly toward refrigerant loss.
The first is a slow slide. Low refrigerant usually doesn’t hit all at once. Your house cooled fine last summer, a little worse this spring, and now it can’t keep up in the afternoon. A sudden total stop, where the outdoor fan won’t spin or the unit just hums, more often points to an electrical part like a capacitor. That calls for AC capacitor replacement or AC electrical repair, not a recharge.
The second is a problem that comes back. If someone added refrigerant before and your cooling was great for a few months, then faded again, that’s about as clear a sign of a leak as you’ll get. The charge didn’t vanish on its own. It went out the same hole it went out last time.
The third is ice that returns with a clean filter. Frost on the lines or coil can come from poor airflow or from low refrigerant. If you’ve already fixed the airflow and it still ices up, refrigerant moves to the top of the list.
Some signs are easy to miss in Plano homes because the indoor coil sits up in the attic. You won’t see frost on a coil you can’t see. Instead, watch for water where it shouldn’t be. When ice on an attic coil melts, it can overflow the drain pan. A water stain on the ceiling below the unit, or a drip from the secondary drain line outside, can be the first clue that the coil has been freezing up. Sometimes it’s a clogged drain, which is handled with AC drain line cleaning. Sometimes it’s a coil that’s icing because the charge is low.
One thing you can’t do from your side is measure the charge. Checking refrigerant takes gauges, temperature readings, and EPA certification to handle the refrigerant itself. What you can do is notice the pattern and rule out the simple causes. That way, if you do call, you’ll already know it’s worth the visit.
When It Is Not a Refrigerant Problem
A lot of people call asking for a recharge when refrigerant has nothing to do with it. Adding refrigerant to a system that isn’t low won’t help. Too much refrigerant can make an AC cool worse and work harder. Here are the cases where you need a different fix, or no fix at all.
Your system is at its limit on the hottest days. Most home AC systems are built to hold a set gap between the outdoor and indoor temperatures. On a scorching August afternoon in Plano, your house may drift a few degrees above the thermostat setting even though the air from your vents is cold and the system runs fine. That’s normal. It isn’t a leak. If the house catches up in the evening and stays comfortable the rest of the day, your AC is doing its job. If it falls behind every day, even in mild weather, the system may be the wrong size for your home. A cooling load calculation is how you find out.
The air is cold, but some rooms aren’t. Cold air at one vent and warm, weak air at another usually points to the ductwork, not the refrigerant. In homes where the ducts run through the attic, a flex duct can get crushed, sag, or pull loose from a fitting. When that happens, you end up cooling the attic instead of the bedroom. Duct sealing or duct and vent repair takes care of that. For upstairs rooms that are always hotter than downstairs, zoning can help balance things out.
Airflow is weak everywhere, even with a clean filter. If very little air comes out of every vent, the problem is often the blower motor that pushes air through the house, or an indoor coil caked with dust. Those call for blower motor repair or evaporator coil cleaning. Refrigerant won’t move more air.
The compressor itself has failed. The compressor is the pump in the outdoor unit that moves refrigerant through the system. If it’s worn out or shorted, the charge can read normal and you’ll still get no cooling. That’s AC compressor replacement, a bigger repair that gets quoted on its own.
Sometimes there really is a leak, and fixing it still isn’t the smart move. Here’s when you should think twice before you pay for leak repair:
- The indoor coil has several pinhole leaks, not just one. Patching one spot often means the next one shows up soon after.
- The system has needed refrigerant more than once, and it’s getting up in years.
- The leak is in a major part, like a coil or the compressor, on an older unit that’s also had other repairs.
In those cases, it may make more sense to put that money toward a new system. Financing is available on larger repairs and replacements. Either way, you should get a straight comparison of both options, with the price for each, before you decide. That choice belongs to you.
Ready when you are – get in touch today.
Call Today, Get Service Today. Xtreme Air Services — West Plano is ready to help.
What Happens During a Refrigerant Recharge / Leak Repair Visit
A real leak repair visit has three jobs: find the leak, fix it, and prove the system works. A quick top-off skips the first two. Here’s what a proper repair looks like, so you know what you’re paying for.
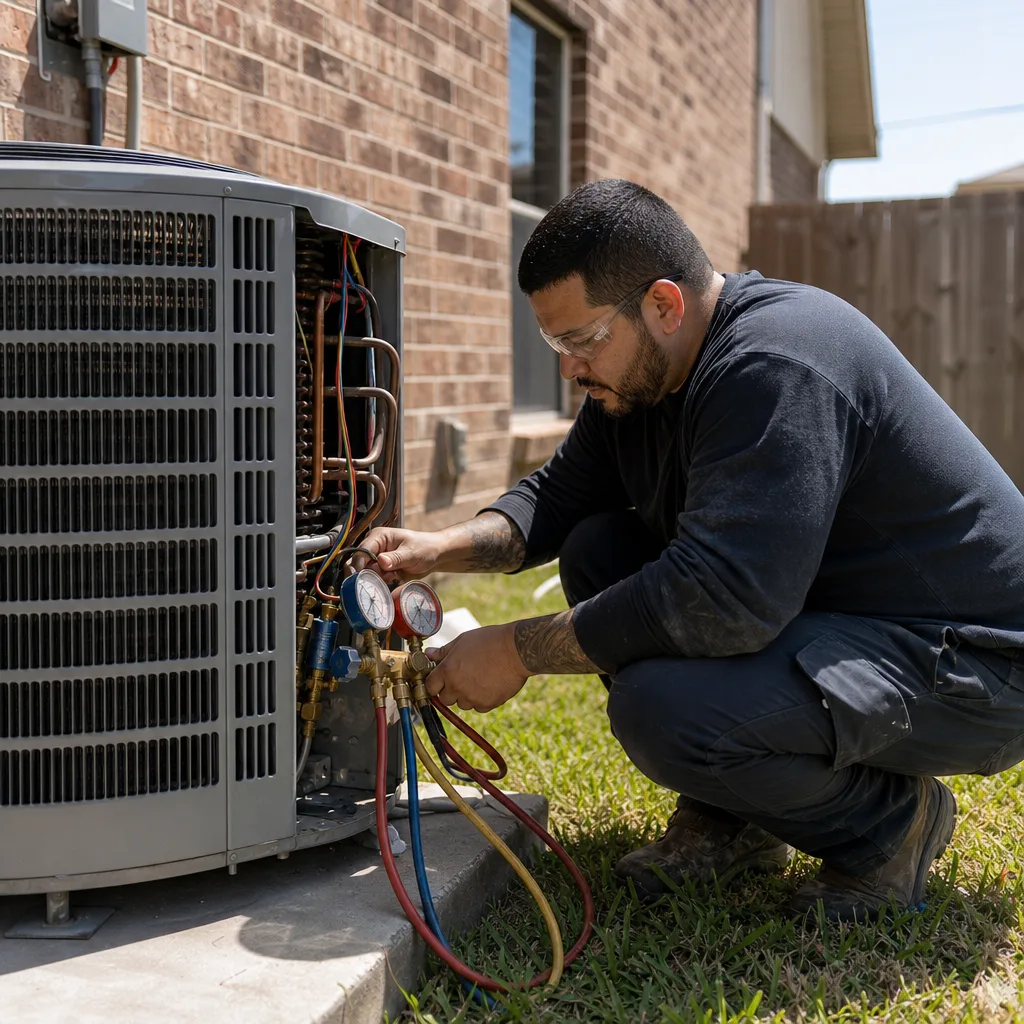
First, the charge gets checked. Before anyone adds refrigerant, a technician should confirm the system is low. That means connecting gauges and taking temperature readings on the lines at the outdoor unit. If the numbers are normal, the problem is something else, like the airflow or compressor issues covered above. Adding refrigerant then would only make things worse.
Next comes the leak search. This takes skill and patience. Common ways to track down a leak include:
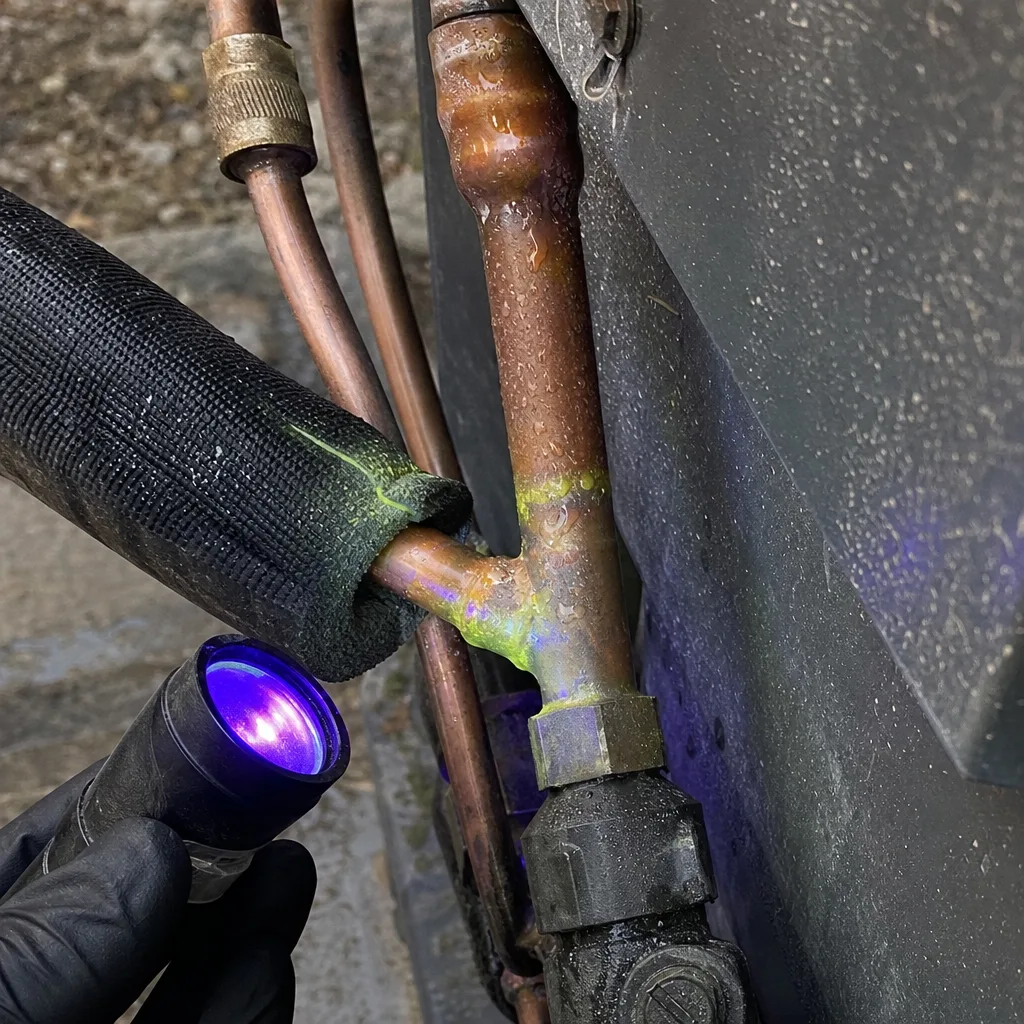
- An electronic leak detector that picks up tiny amounts of refrigerant in the air near coils, valves, and joints.
- A soap-bubble solution brushed on fittings and valves, which foams where gas is escaping.
- Pressurizing the system with nitrogen to find leaks that only show up under pressure.
- A careful visual check for oily spots, since refrigerant carries oil with it and leaves a stain where it gets out.
In a lot of Plano homes, this means time in the attic, where the indoor coil sits. On a summer afternoon that attic can be far hotter than outside, so expect the technician to need clear access. Moving boxes away from the attic stairs and the unit before the visit helps.
Once the leak is found, you get the price before any work starts. With us, that’s upfront flat-rate pricing that you approve first. No meter running while someone hunts around your attic. If the problem turns out to be a major part, like a coil or the compressor, that gets quoted separately so you can decide what makes sense.
Then the repair. The fix depends on what failed. A leaking valve core can often be replaced. A worn spot in a copper line can be cut out and brazed, which is a kind of high-heat soldering for copper. A coil with a pinhole may need evaporator coil repair or a replacement coil.
After the repair, the system gets charged the right way. When a system has been opened, the proper practice is to pull a vacuum first. That removes air and moisture that can damage the inside of the system. Then the correct amount of refrigerant goes in, matched to what the equipment calls for. Most home systems use a refrigerant called R-410A. Some newer systems use a newer type called A2L, which has its own handling rules. Your technician will know which one your unit needs from the label on the outdoor unit.
Last, the system gets tested. This step separates a repair from a guess. The job isn’t done until we verify the system runs correctly, with the right pressures and cold air coming from your vents. Testing and cleanup are part of the job, so you shouldn’t find bits of insulation or copper left behind.
You can help the visit go faster by sharing a few details when you call: when the cooling started fading, whether anyone has added refrigerant before, and if you’ve seen ice or water stains. That history often points straight toward where the leak is hiding.
Watch Our Video
See How We Handle Refrigerant recharge / leak repair in Plano
Xtreme Air Services — West Plano
What Drives the Cost of Refrigerant Recharge / Leak Repair
Here’s the straight answer on price. Most jobs we do run $250 to $800. That covers the most common call: find the failed part, repair or replace it, recharge the system, and verify it runs correctly. Most of these come down to a single common failure fixed on the first visit.

The wider range for this kind of work is $250 to $1,500. Where your job lands depends on what the technician finds once the leak is located.
- How bad the failure is. A loose or worn valve core is a small fix. A line that has rubbed through against the framing in your attic takes more cutting, brazing, and time.
- Part cost and availability. Some parts are easy to get the same day. Others cost more or take longer to track down.
- Your equipment’s age and brand. Older systems and certain brands can need parts that are harder to find or priced higher.
- More than one failure. Sometimes the leak isn’t alone. If a second part has also failed, that adds to the total.
- Timing. For a lot of companies, a night or weekend call costs extra. With Xtreme Air Services, there’s no extra charge for nights or weekends, so a Saturday leak costs the same as a Tuesday one.
The type of refrigerant matters too. Your system will use R-410A or one of the newer A2L types, and the job covers both the leak repair and the charge. Either way, you’ll see the full price and approve it before work begins.
So you’re not guessing, here’s what that price includes and what it doesn’t.
- Included: diagnosis, labor, the standard replacement part, plus testing and cleanup.
- Not included unless quoted separately: additional failed parts, major components, code upgrades, or permits.
That second line is where surprise bills usually come from with other contractors. If a major part like a coil or compressor turns out to be the real problem, you get a separate quote and decide from there. Nothing gets added quietly.
There’s a $26 to $99 service-call fee to get a technician to your home. If you go ahead with the repair with Xtreme Air Services, that fee is credited toward the repair. You’re not paying twice.
On financing: it isn’t typically offered for a smaller job like this, since most leak repairs fall in that $250 to $800 range. Financing is available on larger repairs and replacements. That’s worth knowing if the leak turns out to be one of the bigger cases where a new system makes more sense.
Frequently Asked Questions
Common questions about Refrigerant recharge / leak repair
How long does a refrigerant recharge and leak repair visit usually take?
It depends on how fast the leak is found, but plan for a technician to spend real time checking the charge, searching for the leak, and testing the system afterward. A simple valve core fix moves quickly, while tracking an attic coil leak with nitrogen or an electronic detector takes longer. You’ll get a price before any repair starts, so there are no surprises mid-visit.
Will adding refrigerant myself fix the problem?
No, adding refrigerant on your own just hides the problem for a short while. Your AC is a sealed system, so a drop in charge almost always means refrigerant is escaping through a leak somewhere in the coil, valves, or lines. Checking and handling refrigerant also requires gauges and EPA certification, so it isn’t a DIY job like topping off a car.
Can I keep running my AC if I think refrigerant is low?
You can, but running a low system for too long risks bigger damage, like ice building up on the coil and water overflowing into your home. If you’re seeing weak cooling, frost on the lines, or a hissing sound, it’s worth getting it checked before the small leak turns into a bigger repair.
Ready to Get Started?
Call (469) 217-9095 Today, Get Service Today.