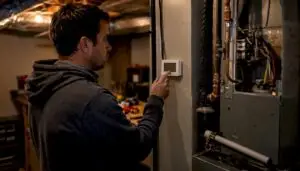


A solid commercial plumbing inspection checklist covers supply piping, drains, traps, valves, water heaters, backflow prevention devices, fixtures, pumps, and outdoor drainage. Run a quick visual pass monthly, a functional test quarterly, and a full-system inspection annually. Any defect you find gets photographed, tagged by severity, and logged as a CMMS work order before you leave the building.
Quick walk-through pass/fail checks:
- Visible leaks or active drips at exposed fittings, elbows, and valve stems
- Static water pressure at a hose bib or test port (normal commercial pressure range)
- Floor drains: water seal present, no odor, no debris blocking the grate
- Backflow preventer: no leaks at relief ports, test cocks capped, no bypass piping
- Water heater T&P relief valve: discharge pipe unobstructed and properly routed
- Fixture operation: flush toilets, run faucets, check for running or phantom-flush cycles
- Sump and booster pumps: auto mode active, no alarm lights, no visible leaks
Any defect rated above “minor” gets a CMMS work order opened the same day. A photo, an asset ID, and a severity tag are the minimum three fields. Facilities teams that document inspection findings consistently catch many common plumbing issues on a short monthly pass, reserving the annual deep inspection for systemic or hidden problems.
Table of Contents
- How should you run a commercial plumbing inspection?
- What should you look for on exposed piping and fittings?
- How do you test drains, traps, and waste lines?
- Are your valves labeled, accessible, and actually working?
- What are the critical safety checks for water heaters and boilers?
- How do you stay current on backflow prevention compliance?
- What fixture and appliance checks catch the most water waste?
- How do you measure water pressure and interpret the results?
- What signs tell you the sewer or vent system needs attention?
- How do you inspect pumps, grease traps, and specialty equipment?
- What should you inspect on exterior plumbing and site drainage?
- How should you document inspection findings for CMMS and audits?
- When should you escalate, and what diagnostic tools help?
- Key Takeaways
- Why disciplined inspection records change the repair equation
- Xtremeairservices handles commercial plumbing inspections in the Dallas area
- Useful sources and standards for commercial plumbing inspections
- FAQ
How should you run a commercial plumbing inspection?
Who runs it and when. A trained onsite facilities technician handles monthly visual checks and quarterly functional tests. A licensed plumber steps in for annual full-system inspections, pressure testing, backflow certification, and any diagnostic work involving concealed piping or combustion equipment. That division keeps costs reasonable while keeping the work within the right scope of practice.
Recommended inspection cadence from facility-management guidance:
- Monthly: Visual walk-through of accessible piping, fixtures, and drains typically 30 to 90 minutes for a small to mid-size facility
- Quarterly: Functional tests, backflow visual check, water quality spot-check, pump auto-mode test
- Annual: Full-system inspection, licensed backflow testing, water heater service, sewer scope if warranted
PPE and safety basics. Wear slip-resistant footwear and nitrile gloves for drain and trap work. Apply lockout/tagout before opening any valve on a pressurized system for service. Confined-space entry rules apply to any below-grade vault or pit. Gas-fired equipment requires combustion-air checks and a CO detector nearby; never probe a flue or combustion chamber without proper training.
CMMS integration. Name photo files with the format YYYYMMDD_AssetID_Location so they sort chronologically and link directly to the asset record. Tag every defect as Minor, Repair, or Urgent. Schedule follow-up work orders from the inspection report rather than from memory. Linking inspection items to asset records lets you track repair history and spot recurring failures before they become emergencies.
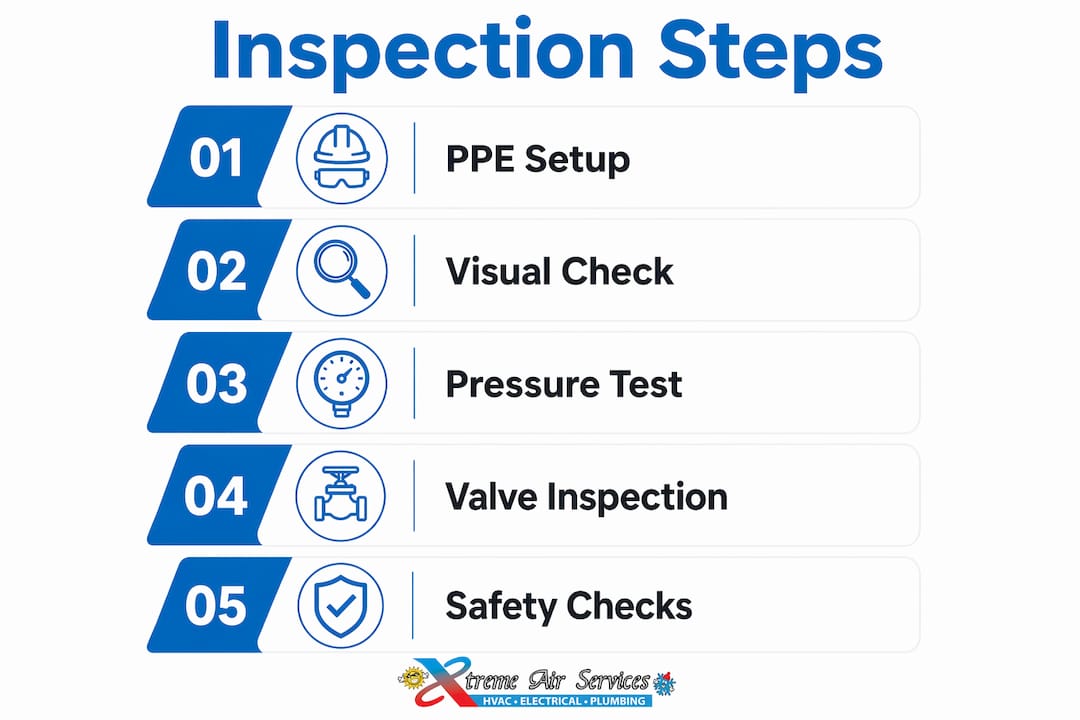
Pro Tip: Run inspections on the same week each month and tie them to utility bill review. A spike in water consumption that aligns with a new “minor” drip you logged two months ago is the fastest way to justify a repair budget.
What should you look for on exposed piping and fittings?
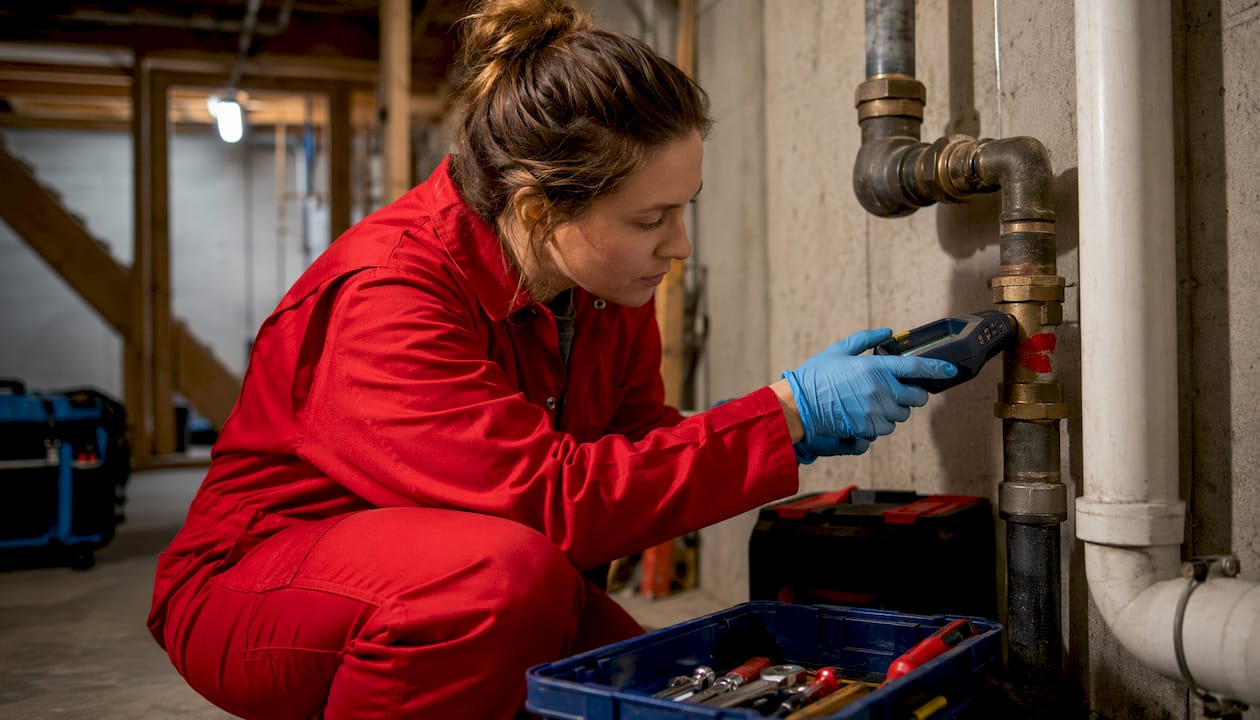
Pipes tell their story visually before they fail. Green or white mineral deposits at copper fittings signal a slow weep. Orange staining on galvanized or black iron means active oxidation. Pinhole leaks often show as dried mineral rings on the pipe surface rather than active drips.
Pipe and fitting inspection checklist:
- Corrosion, discoloration, or staining at joints, elbows, and tees
- Active drips or dried mineral deposits at threaded or soldered connections
- Thermal insulation: intact, no gaps, no moisture-soaked sections on hot-water lines
- Evidence of water hammer (loose strapping, cracked hangers, noise during flush cycles)
- Vibration at couplings and mechanical joints during flow
- Pipe material noted in asset record (copper, CPVC, PEX, galvanized, cast iron) for repair planning
When you find corrosion on a fitting or discoloration across a pipe run, tag it for pressure testing before the next quarterly cycle. Document pipe material and the nearest asset tag in your CMMS. Knowing you have 1980s galvanized supply lines in a wing of the building changes how aggressively you prioritize a pressure drop elsewhere.
Pro Tip: Photograph the suspect joint alongside the closest asset tag in the same frame. When the repair tech arrives, there is no ambiguity about which fitting needs replacement.
How do you test drains, traps, and waste lines?
Slow drains are the most common complaint in commercial buildings, and they are almost always a symptom of something further downstream. The goal here is to catch the issue before it becomes a backup.
Functional drain tests:
- Sink fill-and-release test: Fill the basin, release, and time the drain. Sluggish clearing (sluggish drain clearing time for a standard hand-wash sink) warrants further investigation.
- Single-flush toilet test: One flush should clear the bowl completely with no gurgling from adjacent fixtures.
- Floor drain seal check: Pour water into floor drains that see infrequent use. A dry trap lets sewer gas into occupied spaces.
- Trap primer function: Verify automatic trap primers are cycling; a non-functioning primer is one of the most common inspection failures facilities teams miss.
- Gurgling or odor: Gurgling at one fixture when another flushes points to a venting problem, not just a clog.
For kitchen areas, check grease trap solids levels and record the last pump-out date. Most jurisdictions set a maximum fill level before service is required. When you see recurring slow drains in the same zone, or a floor sink that backs up more than once per quarter, that is the threshold to schedule a sewer camera scope.
Are your valves labeled, accessible, and actually working?
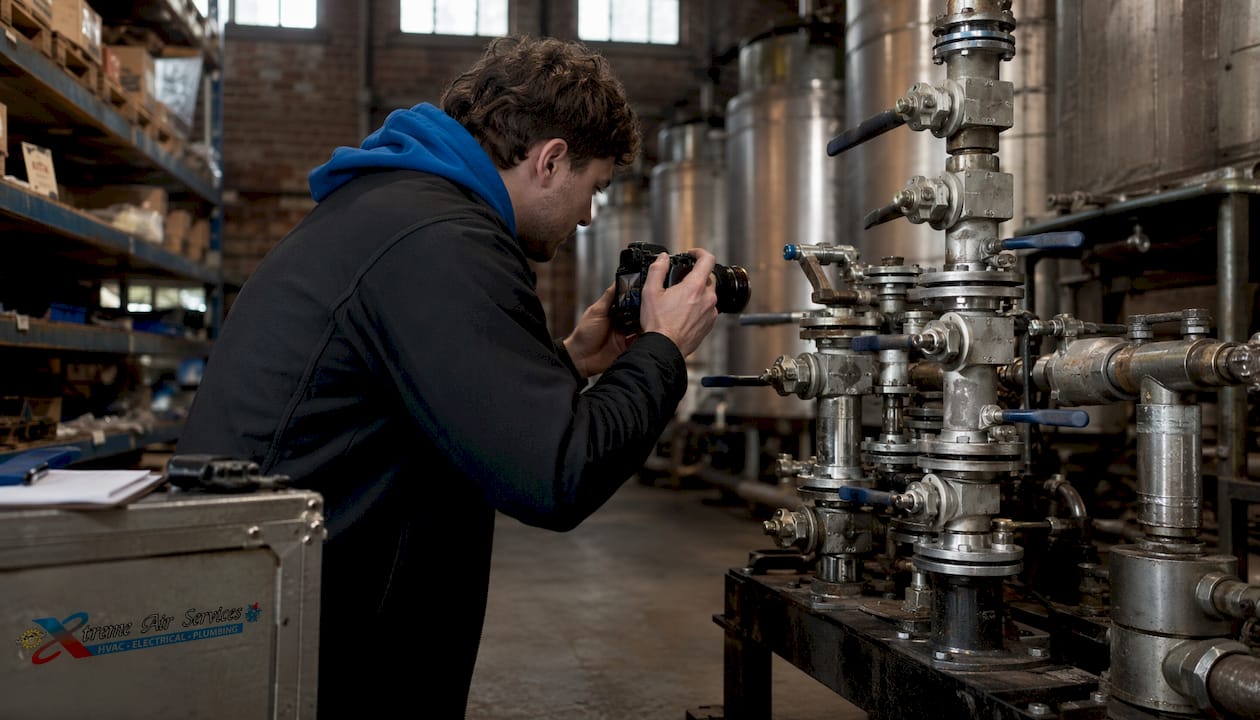
A valve that seizes during an emergency is worse than no valve at all. The goal of valve inspection is not just confirming the valve exists but confirming it will work when someone needs it at 2 AM.
Valve inspection checklist:
- Operate each zone valve and isolation valve through its full range; note any that are stiff, partially seized, or leak at the stem packing
- Test full shutoff on non-critical branch valves where flow can be safely interrupted
- Verify all main shutoffs and zone valves are clearly labeled with durable tags
- Confirm valves are unobstructed (no stored materials blocking access)
- Record valve ID, type (ball, gate, butterfly), condition, and location in the CMMS asset record
- Flag any valve that fails to provide complete shutoff for priority replacement
Quarter-turn ball valves are generally more reliable than aging multi-turn gate valves for isolation purposes. If a gate valve is stiff and has not been operated in years, do not force it; tag it for replacement and note the risk in the work order.
Pro Tip: Keep a photographed valve map stored in the asset record and post a laminated copy near the main mechanical room entrance. During an off-hours leak, the person responding may not be the person who ran the inspection.
What are the critical safety checks for water heaters and boilers?
Water heaters and boilers sit at the intersection of pressure, heat, and combustion. A missed T&P valve issue or a blocked flue is not a maintenance problem; it is a safety event.
Water heater and boiler inspection checklist:
- Check manufacture date and last service date (storage tank heaters typically warrant replacement consideration at 10–15 years)
- Inspect tank exterior for corrosion, rust staining, and evidence of leaks at fittings, relief outlets, and drain valves
- Verify T&P relief valve discharge pipe is unobstructed, properly routed to a safe termination point, and not capped or plugged
- For gas-fired units: inspect flue connections for integrity, check combustion air supply is unobstructed, and look for soot or spillage staining near the draft hood
- Anode rod: record last replacement date; most manufacturers recommend inspection every 2–3 years in commercial applications
- Note sediment-flush schedule; sediment buildup reduces efficiency and accelerates tank corrosion
Never cap or redirect a T&P relief valve discharge pipe. A blocked discharge line turns a pressure-relief device into a pressure-containment device. This is one of the most dangerous field modifications inspectors encounter, and it violates the Florida Building Code (FBC P 504.6.1) as well as equivalent provisions in the International Plumbing Code.
In-depth combustion testing (flue gas analysis, draft measurement) is specialist work. Flag it for a licensed technician rather than attempting it during a standard facilities walk-through.
How do you stay current on backflow prevention compliance?
Backflow assemblies protect the potable water supply from contamination. They also have a testing and certification requirement that facilities teams routinely let lapse.
Backflow prevention inspection checklist:
- Visual check: no leaks at relief valve ports, test cocks capped, no evidence of bypass piping or tampering
- Confirm the assembly type matches the hazard level of the connected system (reduced-pressure zone vs. double-check)
- Retrieve the last test certificate; annual testing is required in most U.S. jurisdictions, with semi-annual testing for high-hazard facilities
- Store test certificates in the CMMS asset record with tester name, certificate number, and test date
- Flag any assembly with an expired certificate for immediate scheduling with a certified tester
- Remove from service and schedule emergency testing or replacement if the assembly shows active leakage or mechanical failure
Expired backflow certification is one of the most common code violations found during commercial property audits. Keeping certificates organized in your CMMS is the difference between a routine renewal and an unplanned water service interruption ordered by the Authority Having Jurisdiction.
What fixture and appliance checks catch the most water waste?
Fixtures are where water waste shows up first on the utility bill. A running toilet in a commercial building can waste thousands of gallons per month before anyone notices.
Fixture inspection checklist:
- Flush each toilet; confirm bowl clears completely, tank fills and stops, and flapper seals (listen for phantom-flush cycling after fill)
- Test each urinal flush cycle; check for leaks at the supply stop and drain connection
- Run each faucet; check aerator condition and flow rate (commercial lavatories typically 0.5 gpm per EPA WaterSense standards)
- Inspect fixture bases and supply connections for slow leaks, mineral deposits, or corrosion
- Record fixture model and last service date in the CMMS for warranty and parts tracking
- For commercial dishwashers and ice machines: check supply line connections, discharge routing, and manufacturer-recommended service intervals
The EPA’s Fix a Leak Week data consistently shows that leaking fixtures account for a significant share of commercial water waste. A dripping faucet or a running toilet is rarely a single event; it is a pattern that compounds across a building with dozens of fixtures.
How do you measure water pressure and interpret the results?
Pressure is the vital sign of a plumbing system. A reading outside the normal range points to a specific problem, and knowing which direction it is off narrows the diagnosis quickly.
Pressure and flow testing steps:
- Attach a pressure gauge to a hose bib or test port; read static pressure with no fixtures running (normal commercial pressure range; readings above 80 psi suggest PRV failure or absence)
- Take a dynamic pressure reading with two or three fixtures running simultaneously to assess pressure drop under load
- Record readings in the asset history with date and test location; a trend of declining static pressure over several quarters points to supply main issues or a failing PRV
- Flow testing: run simultaneous fixtures on the same branch and note whether flow at downstream fixtures drops significantly
- Pressure below 40 psi at fixtures warrants a diagnostic plumber to evaluate PRV condition, supply main capacity, or undersized distribution piping
Pressure fluctuation is often the first sign of a PRV nearing end of life. A PRV aging and showing pressure creep above its set point should be on the replacement list before it fails completely.
What signs tell you the sewer or vent system needs attention?
Sewer and vent problems announce themselves gradually. By the time you have a full backup, you have already missed several earlier warning signs.
Sewer and vent inspection checklist:
- Recurring slow drains in multiple fixtures on the same stack or branch
- Gurgling sounds at floor sinks or toilets when other fixtures drain
- Sewer odor in occupied spaces, restrooms, or mechanical rooms
- Local floor sink backups, especially in kitchen or laundry areas
- Roof vent inspection: check for debris, bird nests, or damaged vent caps that could cause negative pressure in the stack
- Document odor complaints by location and date; a pattern of complaints in one zone is a sewer scope trigger
Sewer camera scopes are the standard diagnostic when slow drains, root intrusion, or offset joints are suspected, with typical pricing for residential-scale lines varying by provider. A scope reveals root intrusion, pipe belly, offset joints, and grease accumulation that no surface inspection can detect.
Pro Tip: Combine sewer scope records with your site’s tree location map and service history. Root intrusion patterns repeat predictably. That data tells you whether lining a section makes more sense than repeated spot repairs.
How do you inspect pumps, grease traps, and specialty equipment?
Pumps and controlled equipment fail quietly until they fail completely. A functional test during inspection is the only way to confirm they will perform when needed.
Pump and specialty equipment checklist:
- Booster pumps: confirm auto mode is active, listen for abnormal vibration or bearing noise, check suction and discharge connections for leaks, review controller alarm history
- Grease traps: measure solids and fat levels against the service threshold; record last pump-out date and service provider
- Sump pumps: test float switch by manually raising the float; confirm backup power (battery or generator) is functional; check discharge routing for blockage
- Condensate pumps: verify float switch operation and discharge line is clear
- Record pump run times and alarm events in the CMMS; a pump that is cycling more frequently than its baseline is either responding to a new load or beginning to fail
Grease trap service frequency depends on usage volume, with commercial kitchens typically requiring regular pump-out. A trap nearing its capacity threshold is overdue regardless of the calendar schedule.
What should you inspect on exterior plumbing and site drainage?
Exterior plumbing problems migrate indoors. A saturated foundation from poor site drainage, or a leaking hose bib that freezes and bursts, creates interior damage that far exceeds the cost of the original fix.
Exterior and site drainage checklist:
- Inspect all exterior hose bibs for leaks, proper anti-siphon devices, and freeze protection (insulated covers in freeze-prone climates)
- Check area drains and curb inlets for debris accumulation and functioning trap primers
- Inspect irrigation system tie-ins and dedicated backflow prevention devices; record last service date and any observed leaks
- Walk the perimeter for standing water, erosion near buried lines, or grade issues that direct water toward the foundation
- Note any exposed or shallow-buried piping that may be vulnerable to vehicle traffic or frost heave
Site drainage problems that cause ponding near the building foundation are worth flagging in the commercial property insurance claim context as well. Chronic water intrusion near the foundation can affect both plumbing and structural systems, and documented inspection records support claim readiness if damage occurs.
How should you document inspection findings for CMMS and audits?
Documentation is what separates an inspection from a walk. Without structured records, findings disappear, repairs get missed, and auditors find gaps.
What to capture per defect:
- Asset ID and location (room, floor, zone)
- Pass/fail status and defect description
- Severity tag: Minor (monitor), Repair (schedule within 30 days), Urgent (schedule within 48 hours)
- Recommended action and estimated cost bracket
- Photo filename linked to the asset record
- Proposed due date for follow-up work order
Example CMMS entry layout:
| Asset ID | Location | Defect | Severity | Action | Due Date |
|---|---|---|---|---|---|
| PLB-042 | B1 Mechanical Room | PRV leaking at bonnet | Repair | Replace PRV | — |
| PLB-107 | 2F Men’s Restroom | Toilet phantom-flushing | Minor | Replace flapper | 30 days |
| PLB-215 | Kitchen | Grease trap at capacity | Urgent | Schedule pump-out | 48 hours |
For property managers handling acquisition due diligence, findings feed directly into a Property Condition Report that categorizes deficiencies for capital expenditure planning. Assembling monthly summary reports that highlight recurring issues and trending assets gives ownership the data to budget proactively rather than react to failures.
Pro Tip: Use the filename format YYYYMMDD_AssetID_Location.jpg for every inspection photo. During an audit, retrieving evidence for a specific asset takes seconds instead of minutes.
When should you escalate, and what diagnostic tools help?
Some findings require a licensed specialist, not a work order. Knowing the escalation triggers before you start an inspection prevents the wrong person from attempting the wrong task.
Escalation triggers (stop and call a specialist):
- Visible uncontrolled leak that cannot be isolated with existing shutoffs
- Standing water inside the building structure
- Active sewer backup in occupied areas
- Failed backflow prevention test or active leakage from a backflow assembly
- Suspected concealed leak (wet walls, unexplained water consumption spike, mold odor)
- Any combustion equipment showing flue spillage or CO alarm
Diagnostic tools and what they reveal:
- Sewer camera: root intrusion, pipe belly, offset joints, grease accumulation
- Thermal imaging: concealed leaks, wet insulation, heat loss at uninsulated hot-water lines
- Acoustic leak detection: pinhole leaks in buried or concealed supply lines
- Pressure/flow test rig: PRV performance, supply main capacity, undersized distribution
A full commercial plumbing inspection typically takes 1–2 hours for many facilities on a monthly visual pass; a full annual inspection of a larger building can run a half-day to a full day depending on system complexity.
Pro Tip: Budget a small annual allowance for proactive sewer scoping on high-risk lines (near trees, aging cast iron, or history of backups). One planned scope costs a fraction of emergency excavation.
Key Takeaways
A structured inspect-document-dispatch process is the single most effective way to reduce emergency plumbing repairs in commercial buildings, and it starts with a consistent monthly visual pass linked directly to CMMS work orders.
| Point | Details |
|---|---|
| Use a three-tier cadence | Monthly visual, quarterly functional tests, and annual full-system inspection covers most commercial facilities. |
| Tag severity at the time of inspection | Minor, Repair, or Urgent tags set the repair timeline and prevent findings from sitting unaddressed. |
| Escalate five triggers immediately | Uncontrolled leaks, active backups, failed backflow tests, standing water, and suspected concealed leaks require a licensed specialist. |
| Keep backflow certificates in the CMMS | Annual testing is required in most U.S. jurisdictions; expired certificates are among the most common code violations found during audits. |
| Xtremeairservices for Dallas-area inspections | Xtremeairservices provides commercial plumbing inspections, backflow testing, and prioritized repair quotes formatted for CMMS integration. |
Why disciplined inspection records change the repair equation
Most facilities teams treat plumbing inspection as a compliance task. That framing undersells it. The real value is in the data trail, not the walk-through itself.
Inspection and maintenance are not the same thing, and conflating them is where programs break down. Inspection documents the condition of a system. Maintenance corrects what inspection finds. When those two activities feed each other through a CMMS, repair costs drop because you are scheduling work before failure rather than after it. A valve tagged “stiff, monitor” in January becomes a planned replacement in March, not an emergency shutoff in July when a tenant’s pipe bursts.
The other thing facilities teams consistently underestimate is how much leverage good documentation gives them. A well-organized inspection record with photos, severity tags, and repair history is the foundation of a capital planning conversation, an insurance claim, and a vendor negotiation. It is also what keeps an Authority Having Jurisdiction from issuing a stop-work order when they find a backflow certificate that expired six months ago.
The inspection-to-maintenance workflow that works in HVAC applies equally to plumbing: inspect on a schedule, document every finding, dispatch repairs by severity, and review trends quarterly. The buildings that avoid expensive reactive repairs are not the ones with newer systems. They are the ones with better records.
Xtremeairservices handles commercial plumbing inspections in the Dallas area
When an inspection turns up defects that need a licensed plumber, or when your facility is due for a full annual inspection with backflow testing and documented findings, Xtremeairservices delivers commercial plumbing services across the Dallas, TX area with reports formatted for CMMS integration.
Every inspection includes photo documentation, severity-tagged findings, and a prioritized repair quote so your team can open work orders the same day. Backflow testing, pressure diagnostics, sewer scoping coordination, and corrective repairs are all available under one service relationship. Recurring inspection plans are available for facilities that want a predictable schedule without managing multiple vendors. Contact Xtremeairservices to request a site-specific inspection quote or to set up a recurring maintenance plan that keeps your plumbing system audit-ready year-round.
Useful sources and standards for commercial plumbing inspections
- CCPIA Commercial Property Inspection Checklists and Field Guides — Downloadable field guides and inspection checklists from the Certified Commercial Property Inspectors Association; covers system-by-system inspection criteria for commercial buildings.
- CCPIA Plumbing Fixture and Commercial Restroom Inspection Checklist — Specific fixture-level checklist for restrooms; useful for ADA compliance checks and fixture condition documentation.
- CCPIA Inspecting Restrooms at Commercial Properties — Guidance on restroom inspection scope, common deficiencies, and documentation standards.
- CCPIA Commercial Kitchen Inspection: Sinks and Fixture Components — Covers kitchen-specific fixture inspection including grease trap access, sink types, and drainage requirements.
- ICC International Plumbing Code Chapter 3: General Regulations — Primary code reference for material standards, pipe support, and general installation requirements; use to verify compliance criteria during inspections.
- ICC International Plumbing Code Chapter 7: Sanitary Drainage — Authoritative reference for drain sizing, slope requirements, cleanout placement, and trap standards.
- Miami-Dade Building Department Plumbing Inspection Guidelines — Official AHJ checklist covering rough-in, final, and sewer inspections for commercial buildings; useful as a model for what inspectors verify at permit stages.
- NACHI Plumbing Fixture and Commercial Restroom Inspection Checklist — Inspector community resource with practical fixture-level checklist items and discussion of common field findings.
FAQ
How often should a commercial plumbing system be inspected?
Monthly visual checks, quarterly functional tests, and an annual full-system inspection by a licensed plumber cover most commercial facilities. High-use or high-hazard buildings may warrant more frequent backflow and water quality checks.
What does a commercial plumbing inspection typically cover?
A standard inspection covers supply piping, drains, traps, valves, water heaters, backflow prevention devices, fixtures, pumps, and outdoor drainage. Inspectors perform visual and functional tests on accessible components and recommend licensed specialists for concealed or diagnostic work.
When is a sewer camera scope necessary?
Schedule a sewer scope when you see recurring slow drains in the same zone, gurgling at multiple fixtures, sewer odor in occupied spaces, or a floor sink that backs up more than once per quarter. Camera scopes typically run $150–$350 for standard lines.
How do I keep backflow prevention certificates current?
Store test certificates in your CMMS with the tester name, certificate number, and test date. Most U.S. jurisdictions require annual testing; some high-hazard facilities require semi-annual testing. Expired certification is one of the most common code violations found during commercial property audits.
What is the difference between a plumbing inspection and plumbing maintenance?
Inspection documents the condition of the system and identifies defects. Maintenance is the corrective work that fixes those defects. The two should feed each other through a CMMS: inspection findings become work orders, and completed repairs update the asset record.