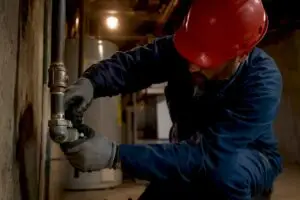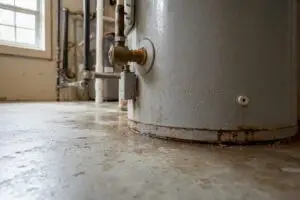


If water is pooling under your heater, it usually means the tank itself has failed or the drain valve is leaking, and both call for fast action. Standing water at the base with no obvious source is the most serious version of this problem: internal corrosion has likely eaten through the tank lining, and that damage doesn’t repair itself.
Before anything else, do three things: shut off the cold-water supply feeding the tank, cut power at the breaker (electric units) or turn the gas control to “off” (gas units), and grab towels or a shallow pan to contain what’s already on the floor. Once the area is safe, wipe the base completely dry and lay a strip of dry paper towel along the bottom seam and around the drain valve. Check it in 15 minutes, then again in a few hours.
- Shut off the cold-water supply valve above the tank.
- Kill power at the breaker or turn the gas control knob to “off.”
- Dry the base completely and place paper towels to catch new drips.
Pro Tip: If the paper towel near the drain valve is wet but the rest stays dry, you’re likely dealing with a $15 part, not a $2,000 replacement. Isolate before you panic.
If water keeps reappearing across the whole base with no fitting you can point to, stop troubleshooting and call a licensed plumber the same day.
TL;DR:
- Water pooling at the base often indicates internal tank failure, especially if the leak appears suddenly and persists after eliminating fittings.
- Use the paper-towel isolation test for 4 to 6 hours to precisely identify whether the leak originates from fittings or the tank interior.
- Repairing drain valves or loose fittings costs generally between $10 and $250, but internal tank failure over 10 years old often warrants full replacement.
- Tank leaks can escalate from slow drips to flooding within 24 to 72 hours, making immediate shutdown and professional diagnosis critical.
- Proper maintenance, including annual flushing, can prevent sediment buildup and internal corrosion that lead to tank leaks later in the unit’s lifespan.
Table of Contents
- Why Is My Water Heater Leaking From the Bottom?
- What Causes a Water Heater to Leak at the Bottom?
- Should You Repair the Leak or Replace the Water Heater?
- How to Stop a Leaking Water Heater From Causing More Damage
- What Does It Cost to Repair or Replace a Leaking Water Heater?
- How Xtreme Air Services Diagnoses and Fixes a Leaking Water Heater
- Key Takeaways
- Get a Licensed Diagnosis Before the Leak Gets Worse
- Sources
- FAQ
Why Is My Water Heater Leaking From the Bottom?
Water at the base of the tank comes from a short list of sources, and finding it means working from the top of the unit down, not guessing at the bottom first. This order matters because water running down the outside of the tank from a loose fitting near the top can pool at the base and look exactly like a tank failure. Plumbing guides recommend checking inlet and outlet fittings, the T&P valve, side ports, and the drain valve before assuming the tank itself has failed.
Here’s the sequence, step by step:
- Check the cold and hot water nipples at the top. These threaded fittings loosen over time from thermal expansion. Tighten gently with a wrench, no more than a quarter turn, and check again in an hour.
- Inspect the temperature and pressure (T&P) relief valve and its discharge pipe. Look for moisture at the valve body or drips coming down the discharge tube.
- Look at side ports. Gas units have a thermocouple and pilot assembly here; electric units have upper and lower heating elements with gasket seals. Both can weep slowly.
- Examine the drain valve at the bottom. This plastic or brass valve is the single most common source of a “bottom leak” that isn’t actually the tank.
- Check the tank seam and body itself. If everything above is dry and the base is still wet, the tank shell or glass lining has likely failed internally.
Once you’ve eliminated fittings visually, run the paper-towel isolation test to confirm which stage is actually leaking:
- Dry every surface completely, including the drain valve threads and the floor beneath the tank.
- Lay dry paper towel strips at each suspect point: under the T&P discharge, around the drain valve, and along the base perimeter.
- Wait 4 to 6 hours without touching the water heater, then check each strip.
- Whichever strip is wet tells you exactly where the water originates, no guesswork required.
This test costs nothing and takes an afternoon, but it saves you from replacing a $2,000 tank when a $12 valve washer would have solved it, or from patching a valve when the real problem is a cracked tank underneath.
What Causes a Water Heater to Leak at the Bottom?
Four causes account for nearly every bottom leak, and each one leaves different clues.
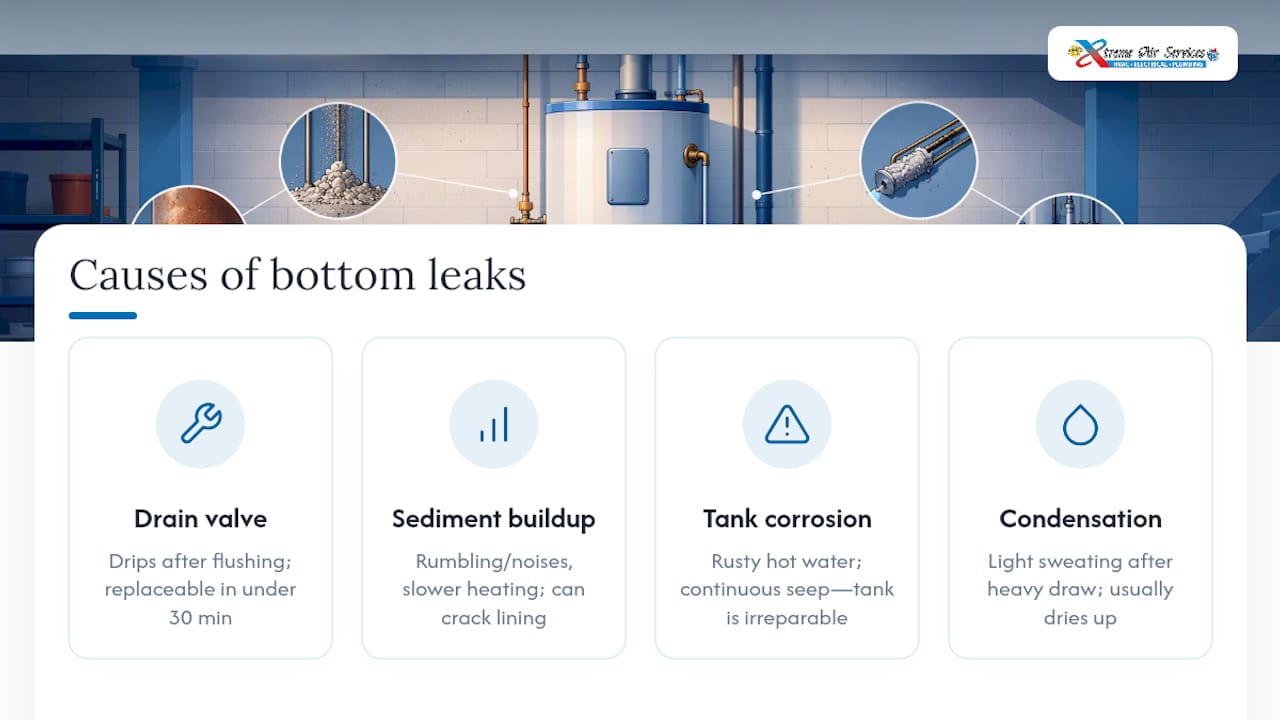
Drain valve failure is the most common and least expensive to fix. The plastic drain valves on many residential tanks develop weak seals after repeated draining or years of mineral exposure. You’ll typically notice drips only after you’ve flushed the tank recently, or a slow weep that starts and stops. A valve can often be tightened, capped, or swapped for a brass replacement in under 30 minutes.
Sediment buildup is a slower burn. Hard water deposits settle at the bottom of the tank and get baked onto the steel or glass lining every time the burner or element fires. Over years, that sediment traps heat against the tank wall, which stresses the lining and can eventually crack it. Signs include a rumbling or popping noise during heating cycles, water that takes longer to get hot, and, eventually, a leak that seems to come from nowhere near the base.
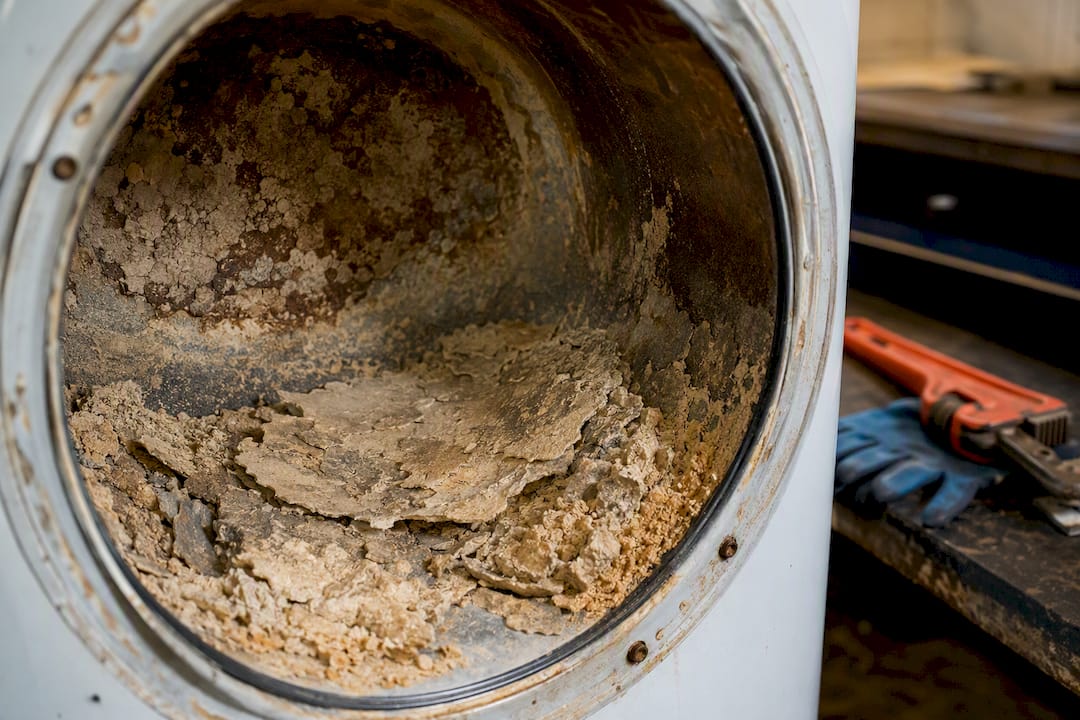
Tank corrosion or seam failure is the one nobody can repair. Once the steel tank or its glass lining corrodes through, water seeps out continuously and the leak rate tends to increase. Rust-colored water from your hot tap, combined with a wet base you can’t trace to any fitting, is a strong signal the tank itself is done.
Condensation gets mistaken for a leak more often than you’d think. A brand-new gas water heater running during cold weather, or right after a big draw of hot water, can sweat visibly on the tank exterior as combustion gases meet a cool tank surface. This moisture is usually light, appears mainly in the first hour or two of a heavy draw, and dries up on its own. It should never pool continuously or show up hours after the burner shuts off.
Bottom pooling with no identifiable fitting leak is one of the clearest signals of internal tank failure, and it’s the one cause on this list that doesn’t get better with a wrench.
Should You Repair the Leak or Replace the Water Heater?
The paper-towel isolation test from the diagnostic checklist is your first decision point. If the wet strip sits at the drain valve or a fitting, you’re almost always looking at a repair. If the base is uniformly wet with no dry zones near any valve or fitting after 4 to 6 hours, the tank has failed internally, and a leak you can’t trace to a fitting is one of the strongest signs the unit is going bad and needs replacement, not patching.
Age and warranty status matter just as much as the test result. Most residential tanks carry warranties of several years, and checking the manufacturer’s data plate against their warranty lookup tool can mean a free replacement tank even after the original purchase, though you’ll typically still pay for labor. Before you approve any repair estimate over $150, find the serial number on the data plate and call the manufacturer.
A few rules of thumb that hold up in practice:
- A tank under 6 years old with a confirmed internal leak is worth a warranty call before anything else.
- A tank over 10 years old that fails the isolation test rarely justifies repair, even if parts are available.
- Rust-colored water from any tap, combined with a wet base, points to replacement regardless of age.
- A rumbling or popping tank that then starts leaking has usually already cracked internally from sediment stress.
Pro Tip: Never let anyone talk you into patching a hole in the tank body itself with epoxy or a clamp kit. Those fixes hold for days, not years, and a failure at 2 a.m. does far more damage than the repair saved you.
How to Stop a Leaking Water Heater From Causing More Damage
Speed matters here. Tanks that start failing internally often go from a slow drip to a steady stream within 24 to 72 hours, so treat any confirmed tank leak as a same-day problem, not a wait-and-see one.
- Shut off the cold-water supply. Find the valve on the cold-water line entering the top of the tank and turn it clockwise until it stops. If that valve is stuck or missing, shut off the main water supply to the house instead.
- Cut the energy source. For gas units, turn the gas control valve to “off,” not just “pilot.” For electric units, flip the dedicated breaker in your panel. Never work around a water heater that’s still energized.
- Drain the tank in a controlled way. Attach a garden hose to the drain valve and route it to a floor drain, a sump pit, or outside rather than letting the tank empty onto your floor. A standard residential tank holds 40 to 50 gallons, and that volume adds up fast on drywall and flooring.
- Protect what’s nearby. Move boxes, electronics, or stored items off the floor near the unit, and lay towels or a shallow catch pan under any remaining drip while you wait for service.
If you smell gas at any point during this process, skip the draining step, leave the house, and call your gas utility’s emergency line before calling a plumber.
What Does It Cost to Repair or Replace a Leaking Water Heater?
Small fixes stay cheap. A replacement drain valve typically runs $10 to $30 for the part, with labor bringing a professional repair to somewhere in the $100 to $250 range depending on your market. A new T&P valve follows a similar pattern, often $15 to $40 for the part. Heating element replacements on electric units run a bit higher because of the access work involved, but they’re still a repair, not a rebuild.
Full replacement is a different budget conversation. Installing a standard 40 to 50 gallon tank water heater typically runs $2,200 to $3,400 total, including the unit, labor, and any permit or code-upgrade costs. Converting to a tankless system costs more upfront, largely because of venting and gas-line modifications, but it also sidesteps future tank-corrosion failures entirely.
A few cost drivers worth knowing before you get a quote:
- Tank capacity and fuel type (gas units generally cost more to install than electric because of venting requirements).
- Code upgrades, such as adding an expansion tank, updated venting, or seismic strapping in some jurisdictions.
- Permit fees, which vary by city but are required for gas water heater replacement in most areas.
- Access difficulty, especially for units in attics, closets, or finished basements.
Permits aren’t optional paperwork you can skip to save money. A licensed plumber pulls the permit, and the inspection that follows confirms the gas line, venting, and pressure relief discharge are all installed to code. Skipping that step can void your homeowner’s insurance claim if the unit ever causes damage down the line, and it can complicate a home sale if an inspector flags unpermitted work later.
Waiting rarely saves money either. A slow drip today becomes a flooded utility closet or garage next week, and emergency same-day replacement almost always costs more than a scheduled one. If your isolation test points to tank failure, book the replacement before the leak accelerates rather than after.
How Xtreme Air Services Diagnoses and Fixes a Leaking Water Heater
A same-day diagnostic visit from Xtreme Air Services starts with the same top-down checklist covered above, run by a licensed technician who can confirm in minutes what might take you hours to isolate. We check your data plate against manufacturer warranty records before recommending replacement, so you’re never paying full price on a unit that’s still covered.
- Gas water heater installation with full permit handling and code compliance.
- Plumbing leak repair for leaks that extend beyond the water heater itself.
Call us immediately if you see a large, spreading puddle, smell gas, or your isolation test comes back wet everywhere. We’ll walk you through warranty status, give you a written estimate on-site, and schedule replacement fast enough to beat that 24 to 72 hour failure window.
A Word on Prevention From Xtreme Air Services
Most of the bottom leaks we get called out for trace back to sediment that built up over years of skipped maintenance. Flushing the tank annually removes that buildup before it stresses the lining, and it takes a technician about 20 minutes during a routine visit. We also recommend keeping your installation paperwork and warranty documentation somewhere you can actually find it. When a tank fails at 6 years old and it’s still under warranty, that piece of paper is the difference between a free replacement and a full-price one. Acting on a small drip now beats an emergency call and rush pricing later.
— Xtreme
Key Takeaways
A water heater leaking from the bottom with no traceable fitting almost always signals internal tank failure that requires replacement within days, not weeks.
| Point | Details |
|---|---|
| Act within hours, not days | Tank leaks can go from a slow drip to a steady stream in 24 to 72 hours, so treat pooling water as urgent. |
| Run the isolation test first | Dry the base, lay paper towels at each fitting, and check after 4 to 6 hours to pinpoint the real source. |
| Drain valve leaks are cheap fixes | Parts run $10 to $30, with professional repair typically landing between $100 and $250. |
| Replacement isn’t optional for tank failure | A wet base with no fitting source, rust-colored water, or a tank over 10 years old usually means it’s time to replace. |
| Xtreme Air Services handles diagnosis to install | Xtreme Air checks warranty status, pulls required permits, and completes gas or electric water heater repair or replacement on a fast timeline. |
Manufacturer and Industry Resources Worth Bookmarking
Before you approve any repair or replacement, a few primary sources are worth checking directly. Manufacturer warranty lookup tools confirm coverage using your unit’s data plate serial number. Rheem’s guidance on failure signs and A.O. Smith’s leak troubleshooting page both walk through the same fitting-by-fitting logic covered here. For a hands-on repair walkthrough, Plumbing Resource’s step-by-step guide covers each valve and fitting in more depth than most homeowners will ever need.
Get a Licensed Diagnosis Before the Leak Gets Worse
Chasing down a bottom leak yourself buys you information, but it doesn’t buy you a warranty check, a code-compliant install, or a permit filed correctly the first time. Xtreme Air Services runs the exact diagnostic sequence covered in this article, then backs it with licensed installation for gas and electric units alike, so you’re not left guessing whether the fix will hold.

If your isolation test already points to a failed tank, or you’d rather have a technician confirm the source in person, schedule a water heater repair visit and we’ll bring warranty verification and a written estimate to your door the same day. For gas units specifically, our gas water heater installation service includes permit filing and code upgrades as part of the quote, not as a surprise line item after the work starts. Reach out today to get a firm appointment window before that slow drip turns into a flooded utility closet.
Sources
- Warranty center — Bradford White
- 5 Signs Your Water Heater Is Going Bad (And What to Do About It) – Rheem
FAQ
How long will a water heater last once it starts leaking?
Once a tank leak is confirmed as internal failure, most units progress from a slow drip to a steady stream within 24 to 72 hours, so plan for same-day or next-day service rather than waiting it out.
Should I turn off my water heater if it’s leaking?
Yes. Shut off the cold-water supply and cut power at the breaker or turn the gas control to “off” as soon as you spot pooling water, regardless of how minor the leak looks.
Can I still shower if my water heater is leaking?
If the leak is confirmed to come from a fitting or the drain valve rather than the tank body, limited use is generally fine until repair, but any leak from the tank itself means you should shut the unit down completely to avoid a sudden, larger failure.
Does a leaking water heater always mean it needs to be replaced?
No. A leak at the drain valve, a T&P valve, or a loose fitting is often repairable for well under $250, but pooling water at the base with no traceable fitting source typically means the tank has corroded internally and needs replacement.