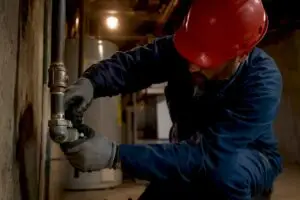


For most Texas homes, the right move is straightforward: seal air leaks first, then add blown-in insulation to reach R-38 to R-49. Reserve spray foam at the roof deck for situations where your HVAC ducts run through the attic or you’re converting the attic to a conditioned space. ENERGY STAR and DOE guidance recommend most U.S. attics reach R-30 to R-60, and local Texas pros commonly target R-38 to R-49 for homes in hot climates to handle summer heat loads.
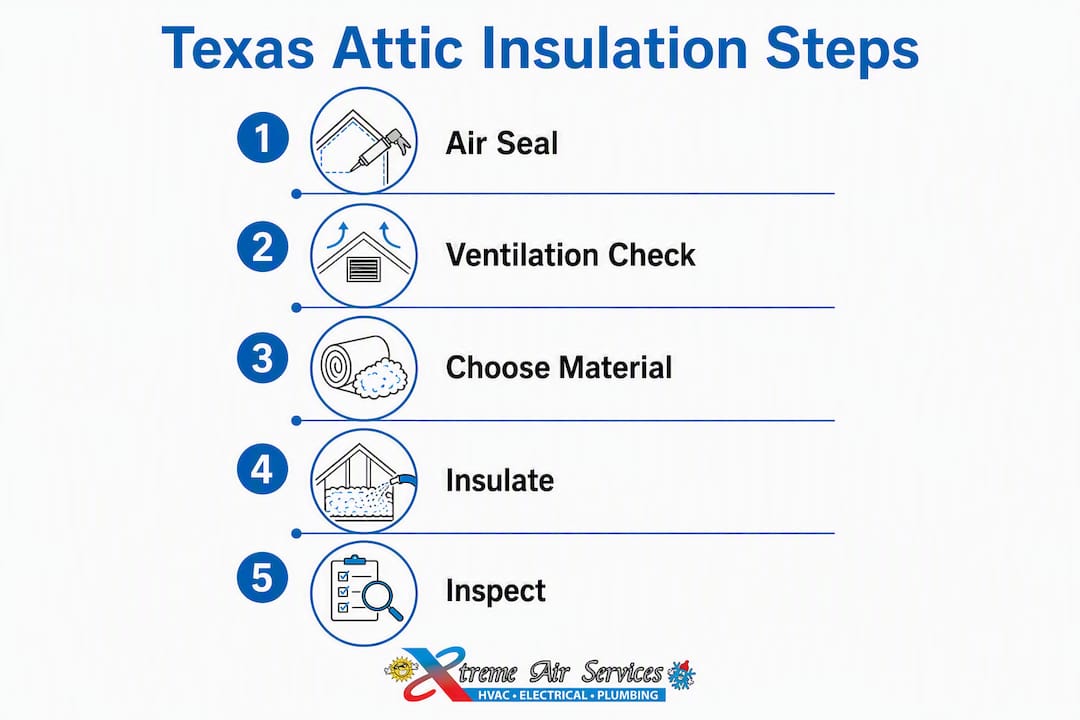
Before you buy a single bag of insulation, run through these three steps:
- Seal air leaks first — top plates, attic hatches, recessed lights, duct boots, and plumbing penetrations
- Verify ventilation is functional — soffit and ridge vents must stay clear after insulation is added
- Add insulation to your target R-value — measure existing depth, calculate the gap, and fill it
If you’re not sure where your attic stands, a quick depth check with a ruler at several points tells you a lot. Xtreme Air Services offers on-site attic assessments across the Dallas area for homeowners who want a measured diagnosis before committing to a project.
Table of Contents
- Which insulation types work best in Texas attics?
- What R-value does your Texas attic actually need?
- Ventilation and air sealing: do these before anything else
- Do you need a radiant barrier in Texas?
- How to tell if your attic insulation is inadequate
- What does Texas attic insulation cost, and when does it pay back?
- Why Xtreme Air Services approaches attic insulation differently
- Key Takeaways
- The mistake most Texas homeowners make with attic insulation
- Ready for a professional attic assessment in the Dallas area?
- Useful sources for Texas homeowners
- FAQ
Which insulation types work best in Texas attics?
The material you choose depends on your attic layout, whether your ducts are up there, and your budget. Here’s how each option performs in the Texas climate.
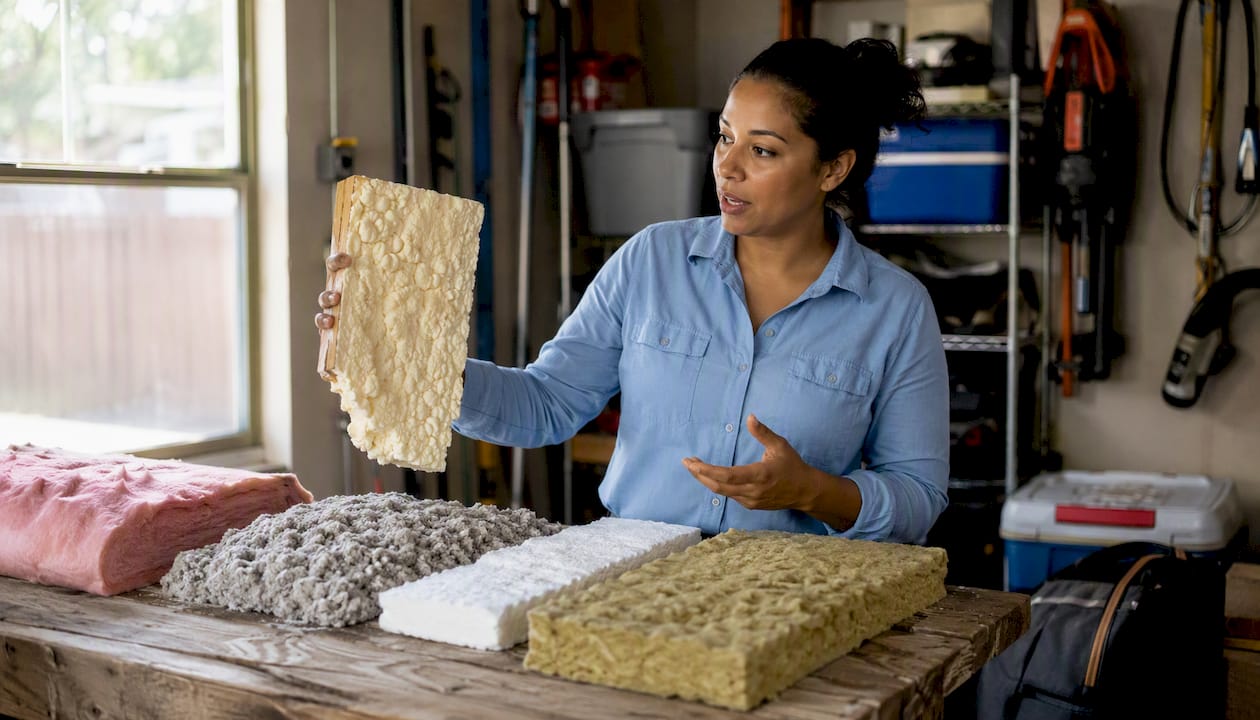
Blown-in fiberglass is the best starting point for most existing vented attics. It fills irregular joist bays and around obstructions without gaps, installs quickly, and delivers solid value for vented attic floors. R-value per inch runs roughly R-2.2 to R-2.7, so reaching R-49 requires a substantial depth of material. It doesn’t settle as much as cellulose and resists moisture absorption.
Cellulose (blown-in) is made from recycled paper treated with borate for fire and pest resistance. It performs similarly to blown-in fiberglass in cost and ease of installation, and generally provides an R-value per inch of about R-3.2 to R-3.8. Cellulose does settle over time, so installers typically overshoot the target depth slightly to account for that.
Fiberglass batts are the DIY-friendly option. They’re easy to handle and widely available, but they leave gaps around wires, pipes, and irregular framing unless cut precisely. In a Texas attic with lots of penetrations, those gaps matter more than the R-value on the label.
Mineral wool (rock wool) batts offer better fire resistance and slightly higher R-value per inch than standard fiberglass batts (roughly R-3.0 to R-3.3 per inch). They’re dimensionally stable and don’t compress easily. The tradeoff is cost — mineral wool runs higher than fiberglass batts, which makes it harder to justify for large attic floors when blown-in achieves the same result faster.
Open-cell spray foam expands aggressively and seals air leaks while insulating, with an R-value per inch generally around R-3.5 to R-3.7. It’s vapor-permeable, which matters in humid climates. On an attic floor, it’s rarely the right call. At the roof deck, it creates a semi-conditioned space that keeps duct temperatures manageable.
Closed-cell spray foam delivers a higher R-value per inch of about R-6 to R-7 and acts as both an air and vapor barrier. Applied at the roof deck, it’s the go-to when HVAC equipment or ducts are in the attic because it prevents the extreme temperature swings that degrade duct performance. It’s the most expensive option per square foot, and switching to a semi-conditioned attic may require rebalancing your HVAC system.
The most cost-effective path for the majority of Texas homeowners: air seal the floor thoroughly, then blow in fiberglass or cellulose to the target R-value. Spray foam belongs at the roof deck when your ducts are up there, not as a floor-level substitute for blown-in.
What R-value does your Texas attic actually need?
Most Texas homes should target R-38 to R-49, with the higher end of that range making sense for homes in the hottest metro areas or anywhere HVAC runtime is a persistent problem. Here’s how that maps to your situation:
- Hot-humid metros (Houston, San Antonio, Austin): a higher R-value is worth the extra material cost in hotter metro areas given summer heat loads and high AC runtime
- North Texas / DFW: R-38 to R-49 depending on existing insulation condition and duct placement
- Homes with ducts in the attic: Prioritize roof-deck spray foam over floor insulation — the goal shifts to keeping the whole attic space cooler
- Older homes with little or no existing insulation: Get to R-38 minimum as the first upgrade; add more if budget allows
The table below gives you a quick depth estimate so you can measure what you have and calculate the gap.
| Material | R-value per inch | Inches needed for R-38 | Inches needed for R-49 |
|---|---|---|---|
| Blown-in fiberglass | R-2.2 to R-2.7 | 14–17 | 18–22 |
| Blown-in cellulose | R-3.2 to R-3.8 | 10–12 | 13–15 |
| Closed-cell spray foam | R-6 to R-7 | 6–7 | 7–8 |
A word on the “7 and 7 rule” — the idea that 7 inches of insulation on each side of the roof deck is sufficient. It’s an outdated heuristic that ignores the fact that different materials have very different R-values per inch. R-value is the only reliable metric. Seven inches of blown-in fiberglass gets you to roughly R-15 to R-19, well short of the R-38 minimum. Measure R-value, not inches.
Ventilation and air sealing: do these before anything else
Sealing air leaks before adding insulation is not optional. Air leakage is the primary driver of attic-related energy loss, and a thin layer of foam or caulk at the right spots often delivers bigger gains than several inches of additional insulation on top of an unsealed attic floor.
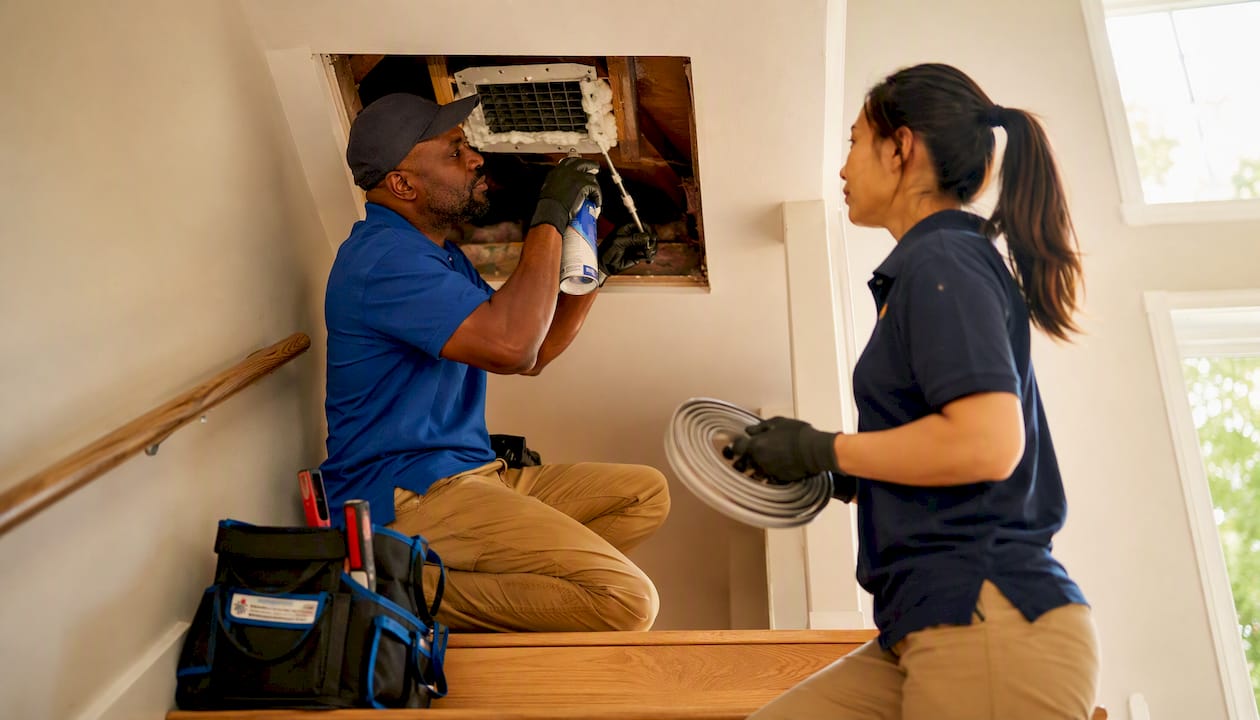
The order of operations is: seal, verify ventilation, then insulate. Adding insulation over unsealed penetrations traps conditioned air loss and can create moisture problems in humid Texas summers.
Work through this checklist before insulation goes in:
- Top plates: Seal the gap between interior wall framing and the attic floor with foam or caulk
- Attic hatch or pull-down stairs: Add weatherstripping and an insulated cover; this is one of the biggest single leak points in most homes
- Recessed light fixtures (can lights): Use IC-rated airtight covers or replace with sealed LED fixtures — open can lights dump conditioned air directly into the attic
- Duct boots and chases: Seal where supply and return ducts penetrate the attic floor with mastic or foam
- Plumbing stacks and wiring penetrations: Fill gaps around pipes and wires with fire-rated foam
Ventilation must stay functional after insulation is added. Blocking soffit vents with insulation is one of the most common installation mistakes — it traps heat and moisture and defeats the purpose of the work.
Pro Tip: Install baffles (rafter vents) at every soffit bay before blowing in insulation. They keep the channel between the soffit vent and the ridge vent open, no matter how deep the insulation gets. Skipping this step is the fastest way to create a moisture problem in a Texas attic.
Do you need a radiant barrier in Texas?
A radiant barrier is not insulation in the traditional sense. It doesn’t slow conductive heat transfer — it reflects radiant heat from the roof deck before it can warm the attic air. In Texas, where attic temperatures regularly exceed 130°F on sunny summer days, that distinction matters.
Radiant barriers are a high-ROI add-on in hot climates, particularly when paired with proper bulk insulation and when ducts are in the attic. If your ducts run through a 140°F attic, even well-insulated ducts lose significant cooling capacity. A radiant barrier stapled to the underside of the roof rafters can drop attic air temperature by 20–30°F on a peak summer day, which directly reduces duct losses and AC runtime.
When a radiant barrier makes sense:
- Ducts are in the attic (high-priority case)
- Your home faces west or has a dark roof
- You’re already planning to add insulation and air sealing — the barrier amplifies those gains
When to skip it: if your attic is already well-sealed, fully insulated to R-49, and your ducts are in conditioned space, the marginal gain from a radiant barrier shrinks considerably. It’s an add-on, not a substitute for bulk insulation.
The best combination for a Texas attic in a hot metro: radiant barrier at the roof deck, air sealing at the floor, and R-38 to R-49 of blown-in insulation. That stack addresses all three heat transfer mechanisms — radiation, convection, and conduction.
How to tell if your attic insulation is inadequate
The clearest sign is a second floor that stays noticeably warmer than the rest of the house even when the AC is running hard. But you can confirm it with a few simple checks before calling anyone.
Run through this DIY inspection:
- Watch your energy bills — a sudden spike in summer cooling costs without a change in usage often points to insulation failure or duct issues
Call a professional when you find moisture damage, mold, or evidence of rodents. Insulation contaminated by rodents or moisture must be removed before new insulation goes in — adding new material on top traps contaminants and creates ongoing health and odor problems. Complex rooflines, ducts in the attic, and any situation involving structural damage also warrant a pro assessment rather than a DIY fix.
Before starting any project, reviewing common attic insulation mistakes DIY homeowners make can save you from the most expensive errors.
What does Texas attic insulation cost, and when does it pay back?
Costs vary with material, attic size, and existing conditions. The table below reflects typical installed ranges for a standard vented attic floor; spray foam at the roof deck runs higher because it requires specialized equipment and more material.
| Material | Typical installed cost (attic) | Estimated simple payback |
|---|---|---|
| Blown-in fiberglass | $800–$2,000 | 3–6 years |
| Blown-in cellulose | $900–$2,200 | 3–6 years |
| Open-cell spray foam (roof deck) | $2,500–$5,000+ | 5–10 years |
| Closed-cell spray foam (roof deck) | $4,000–$8,000+ | 6–12 years |
These are ballpark figures. Installed costs vary widely by material and home size, and payback depends heavily on your current insulation level, local energy rates, and how much air sealing is included. Homes starting from near-zero insulation see faster payback than those adding a few inches on top of an existing layer.
A few factors that move the number significantly:
- Contaminated or wet insulation that needs removal adds cost before new material goes in
- Attic access difficulty (low pitch, limited entry points) increases labor
- Air sealing scope — a thorough seal job adds upfront cost but shortens payback noticeably
Check with your local utility for rebates. Oncor, CenterPoint Energy, and AEP Texas have offered insulation rebate programs in the past, and federal tax credits for energy-efficiency improvements may apply. Verify current availability directly with your utility or at energy.gov, since program terms change.
Why Xtreme Air Services approaches attic insulation differently
A professional assessment does something a ruler and a flashlight can’t: it connects attic conditions to HVAC performance. Xtreme Air Services starts every attic project with a measured diagnosis — actual insulation depth, air leakage points, ventilation status, and duct condition — before recommending any material or scope of work.
The workflow follows the seal-first principle. Air sealing happens before insulation is added, targeting the highest-impact penetrations: top plates, can lights, attic hatches, and duct boots. Ventilation paths are verified and baffled where needed. Only then does insulation go in, to a confirmed R-value target based on the home’s climate zone and attic configuration.
Xtreme Air Services serves the Dallas area including Plano, Irving, Sunnyvale, and surrounding communities, and the team regularly encounters the specific challenges of North Texas attics: extreme summer heat, aging ductwork running through unconditioned spaces, and homes where the original insulation was installed well below current standards. For homes where HVAC diagnostics and duct performance are part of the picture, the attic assessment and the HVAC evaluation happen together rather than as separate projects.
Post-installation, the team verifies depth and coverage before closing out the job. If you want a professional to measure what you have and tell you exactly what it will take to reach R-38 or R-49, that’s the starting point.
Key Takeaways
For Texas attics, the sequence that delivers the best return is always the same: seal air leaks, confirm ventilation, then add blown-in insulation to R-38 or R-49.
| Point | Details |
|---|---|
| Seal before you insulate | Air sealing top plates, hatches, and can lights delivers bigger gains than insulation alone. |
| Target R-38 to R-49 | Most Texas homes need a substantial thickness of blown-in fiberglass or cellulose insulation to reach the target range. |
| Use spray foam at the roof deck | Reserve closed-cell spray foam for attics with ducts or HVAC equipment — not as a floor-level substitute. |
| Add a radiant barrier in hot metros | Pairing a radiant barrier with R-38+ insulation cuts summer attic temps and reduces AC runtime. |
| Call Xtreme Air Services for a full diagnosis | Xtreme Air Services provides measured attic assessments across the Dallas area, covering insulation, ventilation, and duct performance together. |
The mistake most Texas homeowners make with attic insulation
The single most common error is adding insulation without sealing first. Homeowners see low depth, buy bags of blown-in fiberglass, and fill the attic floor — but the air leaks at the top plates and can lights keep running, and the new insulation barely moves the needle on energy bills. The second most common mistake is leaving contaminated or wet insulation in place and blowing new material on top of it. That approach traps moisture and odors and creates a remediation problem that costs more to fix later than it would have upfront.
Realistic expectations matter too. A full attic air seal and insulation project on a 2,000 square foot home is a one-to-two day job with some disruption — attic access, dust, and temporary displacement of stored items. The payback is real, but it’s measured in years, not months, unless you’re starting from near-zero insulation. Clear communication with your contractor about existing conditions, scope, and what’s included in the quote prevents most of the frustration homeowners describe after a project goes sideways.
Ready for a professional attic assessment in the Dallas area?
Xtreme Air Services delivers complete attic evaluations for homeowners across Dallas, Plano, Irving, Sunnyvale, and surrounding communities — measuring actual insulation depth, identifying air leakage points, and checking ventilation before recommending any scope of work. The diagnostic approach means you get a specific recommendation tied to your home’s conditions, not a generic quote based on square footage alone.

Beyond insulation, the team handles HVAC diagnostics, ductwork inspection and repair, and roofing and ventilation repairs, so attic performance issues get addressed as a system rather than in pieces. If your energy bills are climbing or your upstairs stays hot no matter how hard the AC runs, that’s the right starting point.
Schedule your assessment through the Xtreme Air Services HVAC maintenance plans page or call directly to book. Bundling an attic inspection with an HVAC maintenance visit is one of the most efficient ways to get a complete picture of what’s driving your cooling costs.
Useful sources for Texas homeowners
These are the primary references used throughout this article. For local rebate and code updates, check directly with your utility provider and the Texas Energy Code authority.
- ENERGY STAR — Well-Insulated and Sealed Attic: R-value guidance, DIY inspection tips, and contractor selection advice
- U.S. Department of Energy — Insulation: Material comparisons, installation guidance, and rebate program links
For local rebate programs, contact your utility directly: Oncor, CenterPoint Energy, and AEP Texas each maintain their own efficiency incentive programs, and availability changes year to year. The Texas Energy Code site covers current residential insulation requirements by climate zone.
FAQ
What type of insulation is best for a Texas attic?
Blown-in fiberglass or cellulose is the best value for most vented Texas attics because both fill irregular spaces completely and install quickly to the R-38 to R-49 target. Closed-cell spray foam at the roof deck is the right choice when HVAC ducts or equipment are located in the attic.
How much does it cost to insulate a 2,000 sq ft attic in Texas?
Blown-in fiberglass or cellulose typically cost less than spray foam insulation, with prices varying depending on attic size, material, and existing conditions. Removal of contaminated insulation increases overall cost.
What are the attic insulation requirements in Texas?
Texas follows the International Energy Conservation Code, which requires attic insulation levels that vary by climate zone. Most of Texas falls in zones where R-38 to R-49 is the practical target; check the Texas Energy Code site or your local building department for the requirement specific to your county.
What is the 7 and 7 rule for attics?
The “7 and 7 rule” is an older heuristic suggesting 7 inches of insulation on each side of the roof deck. It’s unreliable because it ignores the fact that R-value per inch varies by material — 7 inches of blown-in fiberglass delivers roughly R-15 to R-19, well below the R-38 minimum most Texas homes need. R-value is the only metric that matters.
Should I hire a pro or DIY my attic insulation?
Fiberglass batts are manageable for a careful DIYer in a simple attic, but blown-in insulation and spray foam require specialized equipment and carry moisture risks that make professional installation the safer choice. Any attic with moisture damage, rodent contamination, or ducts in the space should always be handled by a professional.