

Pipe slope in plumbing is defined as the downward angle at which a horizontal drain pipe is installed so gravity moves wastewater from your home to the sewer. The industry term is “drain pipe pitch” or “grade,” and it is the single most important factor in whether your drainage system works or fails. Drainage relies on gravity flow, unlike pressurized supply pipes, which means every horizontal drain line must be angled correctly. Get the slope wrong and you get slow drains, chronic clogs, and a failed plumbing inspection. The IRC 2024 sets minimum slope requirements by pipe diameter, and understanding those numbers gives you the foundation to install or inspect any drain line with confidence.
What does pipe slope mean in plumbing, and why does it matter?
Pipe slope is the ratio of vertical drop to horizontal run along a drain pipe. A slope of 1/4 inch per foot means the pipe drops 1/4 inch for every 12 inches it travels horizontally. That specific angle is not arbitrary. It produces a self-scouring velocity of at least 2 ft/s, which is the minimum speed needed to keep solids suspended in the liquid and moving toward the sewer.

Without enough slope, liquid moves too slowly. Solids settle to the bottom of the pipe and begin to accumulate. Over time, that buildup hardens and creates a blockage that no amount of drain cleaner will fully clear. The correct slope gives pipes self-cleaning capability by keeping solids and liquids moving together at the right speed.
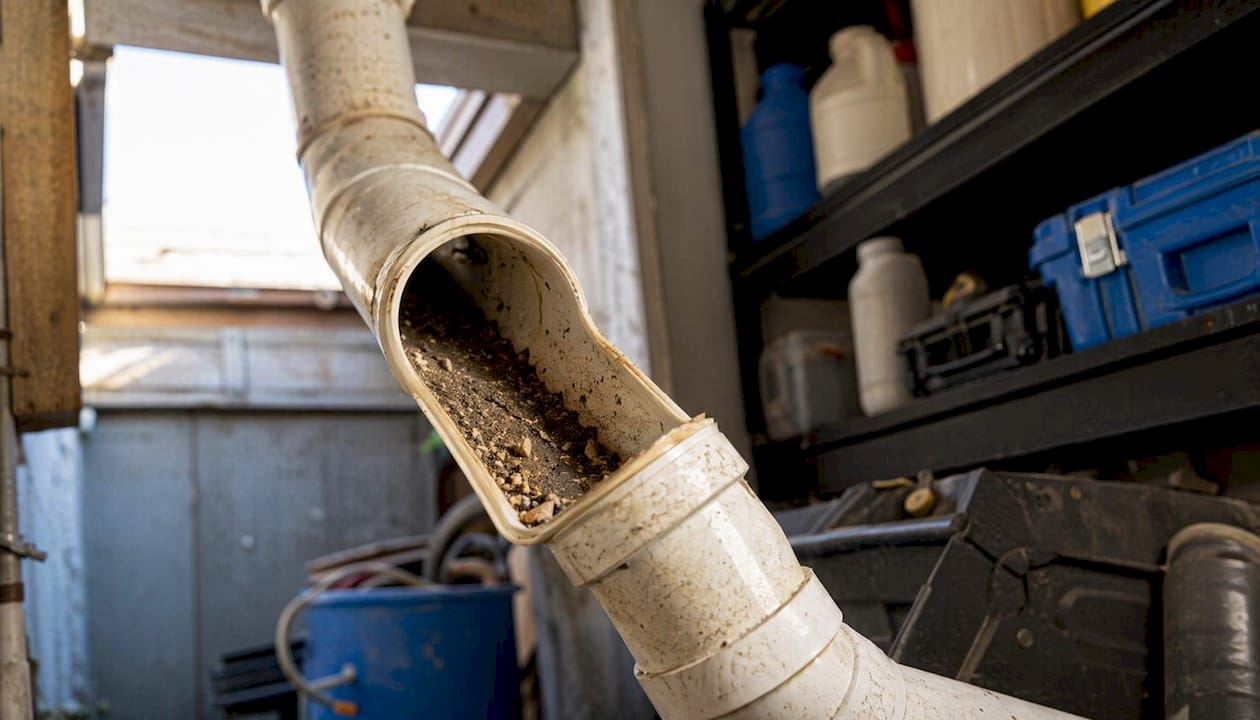
Slope also protects your home from sewer gas. When a drain pipe is installed with a back pitch (sloping the wrong direction) or has a sag in the middle, water pools in that low spot. That pooled water can break the water seal in your P-trap, allowing methane and hydrogen sulfide gas to enter your living space. Proper slope keeps water moving forward and traps functioning as designed.
Understanding pipe slope in your home plumbing system is not just a code requirement. It is the difference between a drain that works for decades and one that fails within months of installation.
What are the standard pipe slope requirements for residential plumbing?
The IRC 2024 sets minimum slope requirements based on pipe diameter. Larger pipes need less slope to achieve the same self-scouring velocity because they carry more volume. Smaller pipes need more slope to generate enough flow speed.
| Pipe diameter | Minimum slope required | Grade as a percentage |
|---|---|---|
| 2-1/2 inches and smaller | 1/4 inch per foot | 2% |
| 3 to 6 inches | 1/8 inch per foot | 1% |
| 8 inches and larger | 1/16 inch per foot | 0.6% |
The IRC 2024 minimum slope for pipes 2-1/2 inches and smaller is 1/4 inch per foot. That covers most of the drain lines in a typical home, including sink drains, shower drains, and toilet branch lines. The 3-inch and 4-inch pipes that connect toilets to the main stack fall into the second category, requiring at least 1/8 inch per foot.
These are minimums, not targets. Xtremeairservices recommends aiming for 1/4 inch per foot on all residential drain lines whenever the site allows it. That extra slope provides a buffer against minor pipe sag over time and keeps drains flowing freely even as the system ages.
The upper limit matters just as much as the lower limit. Slope exceeding 1/2 inch per foot can cause the liquid to outrun the solids, a phenomenon known as the “Slope Paradox.” When that happens, solids are left behind in the pipe. They dry out, harden, and form blockages that are far more stubborn than typical grease or hair clogs.
Pro Tip: If you are roughing in a new bathroom and have a choice, slope every drain line at 1/4 inch per foot regardless of pipe size. You will never regret having a little extra grade, but you will regret having too little.
Local codes sometimes add requirements on top of the IRC. Always check with your local building department before starting any drain work. Some jurisdictions require permits for drain line modifications, and an inspector will verify slope as part of the rough-in inspection.
How to measure and calculate pipe slope accurately
Measuring pipe slope is straightforward once you understand the math. The formula is vertical drop divided by horizontal run. A pipe that drops 2 inches over 8 feet of horizontal run has a slope of 2 divided by 96, which equals 0.021, or just over 2%. That is right at the 1/4 inch per foot target.
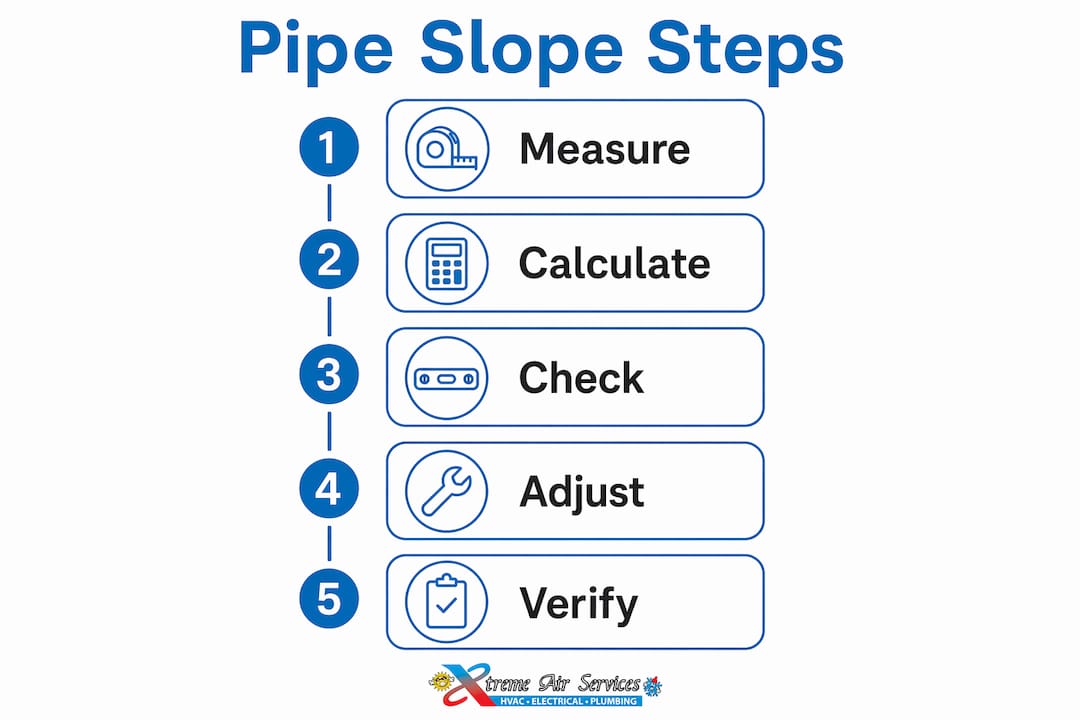
Measuring slope accurately on-site requires only a few basic tools. Here is the step-by-step process:
- Measure the total horizontal run. Use a tape measure to find the distance from the start of the pipe (at the fixture) to the end (at the stack or cleanout). Record this in inches.
- Calculate the required drop. Multiply the horizontal run in feet by your target slope. For 1/4 inch per foot over 10 feet, the required drop is 2.5 inches.
- Set your starting point. Mark the pipe’s entry height at the fixture end. This is your reference point for all measurements.
- Mark the end point. Subtract the required drop from the starting height. Mark this elevation at the stack end.
- Stretch a chalk line or use a long level. Connect the two marks and confirm the pipe follows that line continuously with no sags or high spots.
- Install pipe hangers at the correct height. Space hangers per code (typically every 4 feet for PVC) and set each one to maintain the calculated slope.
- Verify with a water test. Pour water into the fixture and watch it drain. Water should clear the pipe quickly and completely with no standing water left behind.
A digital level or a standard 4-foot level with a slope vial makes step 5 much easier. Many digital levels display slope as a percentage, so you can read 2% directly without doing the math. A slope calculator app on your phone works just as well for quick field checks.
Pro Tip: Never rely on eyeballing slope. What looks right to the eye is almost always off. Use a level on every section of pipe before you secure the hangers permanently.
The most common measurement mistake is checking slope at only one point. Slope must be uniform and continuous along the entire pipe run. A pipe that is correctly sloped at the start and end but sags in the middle will still fail inspection and still clog.
Why correct pipe slope is critical: consequences of improper slope
Improper slope causes two distinct categories of problems, and both are expensive to fix after the fact.
Problems caused by too little slope
- Solids settle to the pipe floor and accumulate over weeks and months.
- Slow drainage becomes the first visible symptom, often mistaken for a partial clog.
- Odors develop as organic waste sits in standing water inside the pipe.
- Biofilm builds up on pipe walls, narrowing the effective diameter over time.
- Repeated chemical drain treatments fail to clear the root cause.
Problems caused by too much slope
- Liquid rushes ahead of solids, leaving waste stranded in the pipe.
- Excessive slope causes trap siphoning, which pulls water out of P-traps and allows sewer gas into the home.
- Solids dry out and harden into dense blockages that require mechanical clearing.
- High-velocity flow can erode pipe joints over time, especially in older cast iron systems.
The “Slope Paradox” is the counterintuitive failure mode that catches most DIYers off guard. A pipe sloped too steeply looks like it should drain better, but it actually drains worse. Liquid races to the sewer while solids are abandoned mid-pipe. Those solids harden, and the next flush pushes more solids into the same spot. Within weeks, you have a blockage that a plunger will not touch. The fix requires opening the wall or floor to clear the pipe mechanically. Getting the slope right the first time costs nothing extra. Getting it wrong costs hundreds of dollars in repairs.
The most common installation mistake that causes slope problems is improper pipe support. Pipe hangers must maintain consistent slope and prevent sagging between support points. A hanger set even slightly too low creates a “belly” in the pipe. That belly traps waste every time the drain is used.
Signs that your existing drain lines may have slope problems include drains that gurgle after use, slow clearing after flushing, recurring clogs in the same location, and sewer odors that appear and disappear. Any of these symptoms warrants a closer look at the pipe’s grade.
DIY fixes are appropriate for accessible pipes in crawl spaces or unfinished basements. If the pipe runs through a finished wall or concrete slab, call a licensed plumber. Cutting into finished surfaces without a clear plan leads to more damage than the original slope problem.
How pipe slope integrates with overall plumbing design and inspection standards
Pipe slope does not work in isolation. It is one component of a drainage, waste, and vent (DWV) system that also includes pipe sizing, venting, trap placement, and fitting selection. All of these elements must work together for the system to function and pass inspection.
The IRC 2024 regulates slope and inspection requirements as part of a broader set of DWV rules. Inspectors verify slope during the rough-in phase, before walls are closed. They use water tests, air pressure tests, and physical level measurements to confirm compliance. A pipe that fails slope inspection must be re-run before the project can proceed.
Key factors that affect how slope integrates with the rest of the system:
- Pipe size and slope work together. A 3-inch pipe at 1/8 inch per foot carries more volume than a 2-inch pipe at 1/4 inch per foot. Upsizing a pipe without adjusting slope can actually reduce flow velocity below the self-scouring threshold.
- Venting maintains slope effectiveness. Without proper venting, negative pressure in the drain line slows flow and can pull water from traps, mimicking the symptoms of incorrect slope.
- Fitting selection affects flow. Long-sweep elbows and wye fittings maintain flow direction better than short-radius elbows, which create turbulence and slow solids.
- Continuous uniform grade is non-negotiable. Irregularities cause waste accumulation and failed inspections. A single low spot in a 20-foot run will cause problems regardless of how well the rest of the pipe is sloped.
- Local codes may add requirements. Some municipalities require specific pipe materials, cleanout spacing, or slope verification methods beyond the IRC baseline.
Understanding plumbing code compliance before you start a project saves you from costly re-work. A backflow inspection is another code-related check that often accompanies drain work on larger projects. Staying current with both slope requirements and the broader code framework keeps your system legal and functional for the long term.
Homeowners who want to stay ahead of slope-related problems should add drain line inspection to their regular home plumbing maintenance checklist. Catching a developing belly or a shifted pipe hanger early costs far less than clearing a hardened blockage or re-running a drain line through a finished wall.
Key Takeaways
Correct pipe slope is the single most controllable factor in preventing drain clogs, passing inspections, and keeping a residential plumbing system working for decades.
| Point | Details |
|---|---|
| Standard slope by pipe size | Pipes 2-1/2 inches and smaller need 1/4 inch per foot; 3–6 inch pipes need 1/8 inch per foot. |
| The Slope Paradox | Slopes above 1/2 inch per foot cause liquids to outrun solids, leaving hardened blockages. |
| Measure before you secure | Calculate vertical drop over horizontal run and verify slope continuously, not just at endpoints. |
| Pipe hangers are critical | Improperly set hangers create bellies that trap waste and cause recurring clogs. |
| Code compliance protects you | IRC 2024 slope requirements are minimums; inspectors verify slope before walls are closed. |
The “Goldilocks” rule is the one thing most DIYers miss
After years of inspecting and repairing residential plumbing, the pattern I see most often is not homeowners who skipped the slope entirely. It is homeowners who thought more slope meant better drainage and went too steep. They read that drain pipes need to slope downward, grabbed a level, eyeballed a steep angle, and called it done. Six months later, they are calling for a drain cleaning because solids have been drying out and hardening in the pipe since day one.
The “Goldilocks” principle is real in plumbing. Too flat and waste stagnates. Too steep and solids get left behind. The 1/4 inch per foot standard exists because engineers calculated the exact slope that keeps solids suspended in liquid at the right velocity. That number is not a suggestion.
The second thing I see constantly is pipe hangers installed at the wrong height. A plumber will set the slope perfectly at the fixture and at the stack, then hang the middle of the pipe from whatever blocking happens to be convenient. The result is a belly right in the center of the run. The slope looks correct at both ends, but the pipe fails the water test because water pools in the middle.
My advice to any homeowner doing drain work: measure the required drop before you touch a single hanger. Mark the endpoint elevation on the wall or framing. Then set every hanger to that line. Do not trust your eye. Do not assume the framing is level. Measure, mark, and verify. That 10 minutes of prep work prevents the most common and most expensive slope mistakes I see on the job.
— Xtreme
Xtremeairservices can verify your plumbing is code-compliant
Pipe slope problems are often invisible until a drain backs up or an inspector flags the work. Xtremeairservices provides professional plumbing inspections and drain line assessments for homeowners who want to confirm their system meets IRC 2024 standards before problems develop.

Whether you are finishing a basement bathroom, renovating a kitchen, or dealing with a recurring slow drain, the Xtremeairservices plumbing team can assess your drain line grades, identify bellies or back-pitch, and correct slope issues before they become costly repairs. Start with a review of your home plumbing pipe types to understand what materials are in your system, then schedule a professional slope verification with Xtremeairservices. Proper slope is a one-time installation decision that affects your plumbing for the life of the home.
FAQ
What is the standard pipe slope for a residential drain?
The IRC 2024 requires a minimum slope of 1/4 inch per foot for drain pipes 2-1/2 inches and smaller. Pipes 3 to 6 inches in diameter require at least 1/8 inch per foot.
Can a drain pipe have too much slope?
Yes. Slopes above 1/2 inch per foot cause liquid to outrun solids, leaving waste stranded in the pipe where it dries and hardens into blockages. This is called the Slope Paradox.
How do I calculate the drop for a drain pipe?
Multiply the horizontal run in feet by your target slope. For 1/4 inch per foot over 12 feet of run, the required drop is 3 inches total from start to finish.
What causes a pipe belly and why is it a problem?
A pipe belly is a low sag in the middle of a drain run, usually caused by improperly set pipe hangers. Waste pools in the belly, accumulates, and eventually causes a blockage or a failed plumbing inspection.
Does pipe slope affect sewer gas in the home?
Yes. Excessive slope can cause trap siphoning, which pulls water out of P-traps and allows sewer gas to enter the home. Correct slope keeps traps sealed and gas outside where it belongs.