
Most common AC problems homeowners deal with are fixable without a service call. A dirty air filter, a misconfigured thermostat, or a blocked condenser can shut down your cooling just as effectively as a failed compressor.
The difference is that the first three cost you nothing to fix. Understanding the diagnostic pathway from thermostat to compressor gives you a clear, logical sequence to follow before you spend a dollar.
This article covers every major residential AC malfunction: what causes it, how to troubleshoot it safely, and when to call a licensed HVAC technician.
1. What are the most common AC problems homeowners face?
The most common AC problems fall into a predictable set of categories. Knowing them by name helps you diagnose faster and communicate clearly with a technician when you do need one.
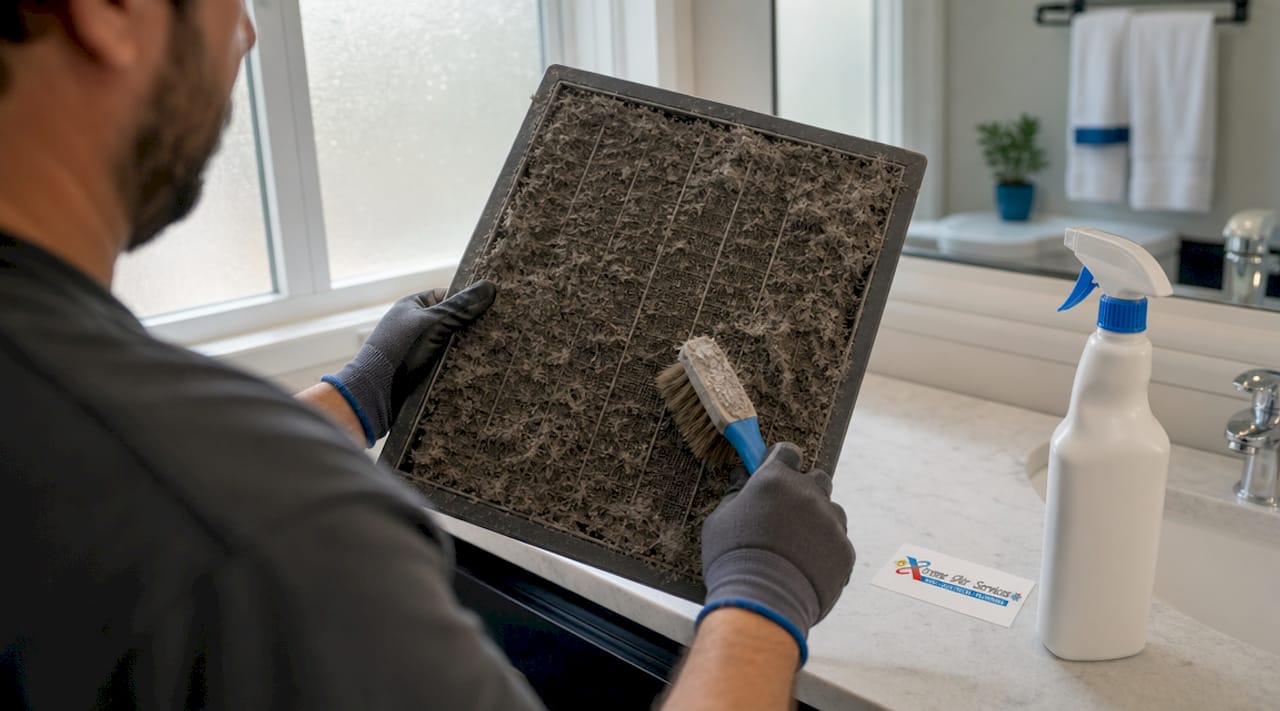
- Dirty or clogged air filters are the single most frequent cause of poor cooling. A filter loaded with dust restricts airflow across the evaporator coil, which makes the coil freeze and the system lose capacity. Replacing filters every 30 to 45 days during peak season prevents most airflow and freezing problems.
- Thermostat misconfiguration or dead batteries account for a surprising number of service calls. If your system is set to “fan only” instead of “cool,” or set above room temperature, the unit runs without cooling. A Honeywell or Ecobee smart thermostat with dead batteries behaves exactly like a broken system.
- Frozen evaporator coils result from restricted airflow or low refrigerant. When the coil freezes, ice blocks airflow entirely and the system stops cooling. The first visible sign is often ice on the refrigerant lines near the indoor air handler.
- Dirty outdoor condenser coils reduce the system’s ability to release heat. Grass clippings, cottonwood, and debris pack into the coil fins and act as insulation. The compressor then works harder, runs hotter, and eventually trips a high-pressure limit switch.
- Refrigerant leaks cause the system to lose cooling capacity gradually. Symptoms include warm air from the vents, ice on the refrigerant line, and a hissing or bubbling sound near the outdoor unit. This is not a DIY repair.
- Electrical component failures, particularly a failed run capacitor, are the most common reason an outdoor unit stops starting. The capacitor provides the startup torque for the compressor and fan motor. Without it, neither component runs.
- Blocked or closed supply vents are easy to overlook. Furniture pushed against a register, a rug over a floor vent, or a vent closed in a spare room can reduce whole-house cooling. Opening every supply register and removing obstructions is a two-minute fix that restores airflow immediately.
- Short cycling means the system turns on and off rapidly without completing a full cooling cycle. Causes include an oversized unit, a refrigerant overcharge, a dirty filter, or a failing thermostat. Short cycling stresses the compressor and drives up energy bills.
- Water leaks and clogged condensate drain lines show up as puddles near the indoor air handler. The condensate drain collects moisture removed from the air. When algae or debris clogs the drain pan or line, water backs up and overflows. Some systems have a float switch that shuts the unit off when the pan fills.
- Unusual noises each point to a specific failure. A grinding sound indicates a failing blower motor bearing. A loud bang at startup or shutdown suggests a loose component or refrigerant slugging. Persistent clicking that never resolves into normal operation points to a failed capacitor or contactor.
2. How to troubleshoot AC problems safely before calling a pro
The best AC troubleshooting follows one simple rule: start with the cheapest and easiest checks first. Most “AC not cooling” issues resolve in under 60 minutes with basic self-checks. That saves you the $75 to $150 cost of a diagnostic service call.
-
Check the thermostat first. Confirm it is set to “cool,” not “fan only.” Verify the set temperature is at least 3 to 5 degrees below the current room temperature. Replace the batteries even if the display looks normal. A weak battery can cause erratic behavior in Honeywell, Ecobee, and Nest thermostats alike.
-
Inspect the air filter. Pull the filter and hold it up to a light source. If you cannot see light through it, replace it immediately. Even a seemingly clean filter can block enough airflow to freeze the coil or cut efficiency. A new filter costs $5 to $15 and takes two minutes to swap.
-
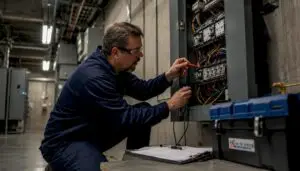
Check the circuit breaker. Go to your electrical panel and look for a tripped breaker labeled “AC,” “air handler,” or “condenser.” A tripped breaker sits in the middle position between on and off. Push it fully to off, then back to on. If it trips again immediately, stop and call a technician. Repeated tripping indicates a wiring or compressor fault.
-
Thaw a frozen evaporator coil correctly. If you see ice on the indoor unit or refrigerant lines, switch the thermostat to “fan only” and let it run. A frozen coil needs 4 to 24 hours to thaw completely before you restart cooling mode. Restarting a frozen system forces liquid refrigerant into the compressor, which causes catastrophic and expensive damage.
-
Open all supply registers. Walk through every room and confirm each floor, wall, and ceiling register is fully open. Check that no furniture, rug, or curtain blocks the airflow path. This takes five minutes and costs nothing.
-
Clear the outdoor condenser unit. Turn the system off at the thermostat. Remove any leaves, grass, or debris from around the unit. Keep at least two feet of clearance on all sides. You can rinse the coil fins gently with a garden hose from the inside out, but avoid pressure washers, which bend the fins and reduce airflow.
-
Check the condensate drain line. Locate the PVC drain line exiting the indoor air handler. Pour a cup of diluted bleach or white vinegar into the access port to clear algae buildup. If the float switch has shut the system off, clearing the drain and resetting the switch restores operation.
-
Listen for electrical warning sounds. A buzzing or humming from the outdoor unit that never leads to the compressor starting points to a failed capacitor or contactor. A clicking sound that repeats without the system starting is the same signal. These symptoms mean the unit is trying to start but cannot. Stop cycling the thermostat on and off, because repeated failed starts damage the compressor.
Pro Tip: Before calling a technician, take a short video of any unusual sounds from the outdoor unit. Technicians can often diagnose a capacitor or contactor failure from audio alone, which speeds up the service call and reduces parts-guessing costs.
3. Which AC problems require a professional repair?
Some home air conditioner repairs fall outside the safe boundary of DIY work. Knowing where that line sits protects your equipment, your wallet, and your safety.
-
Refrigerant leaks and recharging require an EPA 608 certified technician. Handling refrigerants without certification is illegal under federal law. Improper handling also risks severe mechanical damage to the compressor and personal injury from chemical exposure.
-
Compressor replacement is the most expensive residential AC repair, often running $1,200 to $2,500 depending on unit size. A compressor failure usually signals the system is near end of life. A licensed technician can assess whether repair or replacement makes more financial sense. The repair versus replace decision depends on unit age, refrigerant type, and repair cost relative to replacement cost.
-
Capacitor and contactor replacement sits in a gray zone. Capacitors are inexpensive parts, typically $15 to $50, but they store a lethal electrical charge even after power is disconnected. Unless you have electrical training and a multimeter that reads microfarads, leave this to a technician. A capacitor reading more than 10% below its rated microfarad value has failed and needs replacement to restore compressor or fan motor function.
-
Electrical wiring faults, including burned wires, failed contactors, and control board failures, require a licensed technician. These faults carry fire and shock risk that no cooling comfort justifies attempting without proper training.
When in doubt, stop. If a basic check does not resolve the symptom within 30 minutes, the problem is almost certainly mechanical or electrical. Continuing to cycle the system on and off while a fault exists accelerates damage and turns a $150 repair into a $1,500 one.
Some signs demand an immediate professional call:
- Refrigerant odor near the unit.
- A burning smell from any component.
- A breaker that trips repeatedly.
- Water pooling near the electrical panel.
- Any symptom that returns within 24 hours of a DIY fix.
4. What maintenance practices prevent most AC problems?
Preventive AC maintenance eliminates the majority of residential AC malfunctions before they start. Done consistently, the practices below extend system life and keep energy bills predictable.
Choosing ENERGY STAR certified cooling equipment also lowers the risk of many problems homeowners see with older, inefficient units.
- Filter replacement schedule. Replace standard 1-inch filters every 30 to 45 days during summer. MERV-11 filters last longer but still need monthly inspection. MERV ratings above 13 can restrict airflow in systems not designed for them, so check your equipment manual before upgrading.
- Seasonal condenser coil cleaning. Clean the outdoor condenser coils at the start of each cooling season. A garden hose rinse removes most surface debris. For heavy buildup, a coil cleaning spray like Nu-Calgon Evap Foam is safe for aluminum fins and rinses clean without scrubbing.
- Condensate drain maintenance. Pour a quarter cup of white vinegar into the condensate drain access port monthly during the cooling season. This prevents the algae growth that causes clogs and float switch shutdowns.
- Duct inspection. Duct leakage wastes 20 to 30% of cooled air before it reaches living spaces. Inspect accessible duct joints in the attic or crawl space each year and seal gaps with mastic sealant or foil tape. This single fix often produces a noticeable improvement in cooling performance.
- Smart thermostat diagnostics. Smart thermostats provide fault alerts and runtime data that flag developing problems early. An Ecobee or Nest thermostat showing unusually long run times or frequent short cycles is warning you before the system stops working entirely.
Pro Tip: Schedule your professional HVAC tune-up in March or April, before the summer peak. Technicians are fully booked by June, and a pre-season appointment costs less and gets you priority scheduling if something fails mid-summer.
| Maintenance task | Recommended frequency |
|---|---|
| Air filter replacement | Every 30 to 45 days during peak season |
| Condenser coil rinse | Once per year, start of cooling season |
| Condensate drain flush | Monthly during cooling season |
| Professional tune-up | Once per year, pre-season preferred |
| Duct inspection | Once per year or after any renovation |
Key takeaways
Most common AC problems homeowners encounter trace back to three root causes: restricted airflow, electrical component failure, and deferred maintenance. All three are preventable with consistent seasonal checks.
| Point | Details |
|---|---|
| Start with simple checks | Thermostat settings, filter condition, and breaker status resolve most cooling failures for free. |
| Never restart a frozen coil | Thaw the evaporator coil for 4 to 24 hours on fan-only mode before resuming cooling. |
| Refrigerant is a professional job | EPA 608 certification is legally required; DIY refrigerant work risks compressor damage and fines. |
| Filter replacement prevents most failures | Replacing filters every 30 to 45 days during peak season stops airflow and freezing issues before they start. |
| Pre-season maintenance saves money | A spring tune-up costs less than an emergency call and extends system life significantly. |
What I’ve learned after years of AC service calls
After seeing hundreds of residential AC failures across every type of system and climate, one pattern stands out clearly. The homeowners who avoid expensive repairs are not the ones with the newest equipment.
They are the ones who change their filters on schedule and call before the system stops working entirely.
The most common scenario I see at Xtremeairservices is a system that struggled for two or three weeks before the homeowner called. By that point, what started as a dirty filter has become a frozen coil, then a compressor running under stress, then a failed run capacitor.
The original fix was a $10 filter. The final bill is $400 or more.
The other thing I want homeowners to understand is that the diagnostic sequence matters. Starting at the thermostat and working outward to the compressor is not just a logical framework. It is the fastest way to find the real problem without replacing parts that are not broken.
I have seen homeowners spend $200 on a new thermostat when the actual problem was a clogged drain line tripping a float switch.
DIY troubleshooting has real value. It saves money, builds understanding of your system, and helps you communicate clearly with a technician.
But the line between a filter swap and a refrigerant repair is not a gray area. Respect it, and your system will last years longer than average.
— Xtreme
Keep your AC running all summer with Xtremeairservices
The troubleshooting steps in this article handle the most frequent residential AC malfunctions. But consistent, professional maintenance is what keeps them from coming back.
Xtremeairservices offers HVAC maintenance plans built for homeowners who want reliable cooling without emergency repair bills. Each plan includes:
- Seasonal inspections.
- Coil cleaning.
- Refrigerant checks.
- Priority scheduling when something does go wrong.
If your system is already showing signs of trouble, our technicians can diagnose and repair any issue covered in this article. Schedule your pre-season tune-up now and get ahead of summer before the heat does.
FAQ
Why is my AC running but not cooling the house?
The most common causes are a dirty air filter, a frozen evaporator coil, a dirty condenser coil, or a thermostat set incorrectly. Check these four items in order before calling a technician.
How often should I replace my AC air filter?
Replace standard filters every 30 to 45 days during peak cooling season. MERV-11 filters last longer but still need monthly inspection to confirm they are not restricting airflow.
Can I fix a refrigerant leak myself?
No. Refrigerant handling requires EPA 608 certification by federal law. Attempting this repair without certification is illegal and risks serious damage to the compressor and personal injury.
What does it mean when my AC short cycles?
Short cycling means the system turns on and off rapidly without completing a full cooling cycle. Common causes include a dirty filter, an oversized unit, low refrigerant, or a failing thermostat. It stresses the compressor and should be diagnosed promptly.
How do I know if my AC capacitor has failed?
A failed capacitor typically causes the outdoor unit to hum or buzz without the compressor or fan starting. Capacitors that test more than 10% below their rated microfarad value have failed and need replacement by a qualified technician.