

Your air conditioner doesn’t fail overnight. It fails gradually, filter by filter, season by season. All the while, you pay more on energy bills and get less comfort in return.
Following the right home ac unit maintenance steps is the single most effective way to stop that slide. Do it, and you head off a $3,000 repair call before it ever happens.
This guide walks you through everything: the tools you need, how to clean every major component, how to spot warning signs early, and which habits actually extend your system’s life. No fluff. No guesswork. Just what works.
For background on efficiency standards, see ENERGY STAR, whose guidance underpins many of these maintenance recommendations.
Table of Contents
- Key takeaways
- Home AC unit maintenance steps: tools and system basics
- Step-by-step AC cleaning and care procedures
- Troubleshooting common AC issues
- Best practices for long-term AC efficiency
- My take on AC maintenance after years in the field
- Keep your AC running strong with expert support
- FAQ
Key takeaways
| Point | Details |
|---|---|
| Start with power off | Always shut off power to both units before touching any AC component. |
| Filters are your first priority | Replace or clean air filters every 1 to 2 months during heavy use seasons. |
| Coils and fins need regular attention | Dirty coils force motors to work harder and eventually cause breakdowns. |
| Clear the drain line every season | A clogged condensate line causes water damage and triggers system shutdowns. |
| Schedule one pro visit per year | Annual professional inspections catch refrigerant leaks and electrical wear before summer hits. |
Home AC unit maintenance steps: tools and system basics
Good AC maintenance starts with two things: the right tools and a basic understanding of what you’re working on. Get both right before you touch a single component.
Skip this step and you risk the same mistakes well-meaning homeowners make. They:
- damage fins
- void warranties
- miss obvious problems because they didn’t know what to look for
What tools you’ll need
You need only a handful of common tools for most AC maintenance. Gather these before you start:
- Replacement air filters (check your unit’s size rating before buying)
- Vacuum with brush attachment for dust removal inside and around the unit
- Fin comb to straighten bent aluminum fins on the condenser
- Soft-bristle brush for coil and grille cleaning
- Garden hose with spray nozzle for rinsing the outdoor condenser
- Screwdrivers (flathead and Phillips) for removing access panels
- Gloves and safety glasses to protect your hands and eyes
- Wet/dry vacuum or stiff wire for clearing condensate drain lines
- Mild detergent or coil cleaner spray for deeper cleaning
This toolkit covers about 90% of what you’ll do on a regular basis. You don’t need specialty equipment for most of these tasks.
Understanding your AC system’s key parts
Your home cooling system has two main sections that work together. Here is what each key part does:
- The outdoor condenser unit sits outside your home and releases heat from the refrigerant.
- The indoor air handler contains the evaporator coil, which absorbs heat from your home’s air.
- Your air filters clean the air as it is pulled in. That air passes over the evaporator coil to cool down, then gets pushed back through your vents.
- The condensate drain line removes moisture pulled from indoor air during the cooling process.
- The fins are the thin aluminum strips on both units that allow airflow and heat transfer.
- The thermostat is the brain of the whole operation, telling the system when and how hard to run.
Knowing these parts means you’ll recognize when something looks wrong before it becomes a breakdown.
Safety first: shut everything down
Before any maintenance, cut all power to the system. Work through these steps in order:
- Turn off power at the thermostat first.
- Go to your electrical panel and switch off the circuit breaker for the air conditioner.
- Pull the dedicated disconnect box mounted near the outdoor condenser.
Never skip this step.
Pro Tip: Take a photo of your thermostat settings before switching anything off. It saves you the guesswork when you’re resetting after maintenance.
| Component | Location | What it does |
|---|---|---|
| Outdoor condenser | Outside your home | Releases heat from refrigerant |
| Evaporator coil | Indoor air handler | Absorbs heat from indoor air |
| Air filter | Return air duct or air handler | Traps dust, pollen, and debris |
| Condensate drain | Indoor unit drain pan | Removes moisture from air |
| Thermostat | Interior wall | Controls system settings |
Step-by-step AC cleaning and care procedures
This is the core of your seasonal AC maintenance routine. Done twice a year (spring before heavy use, fall before shutdown), these steps keep your system running at full capacity.
Step 1: Start with the air filter
Start with the filter, because it is the fastest win. Pull it out and hold it up to light. If you can barely see light through it, it is past due for replacement. Dirty filters reduce airflow, force the system to work harder, and drag down indoor air quality.
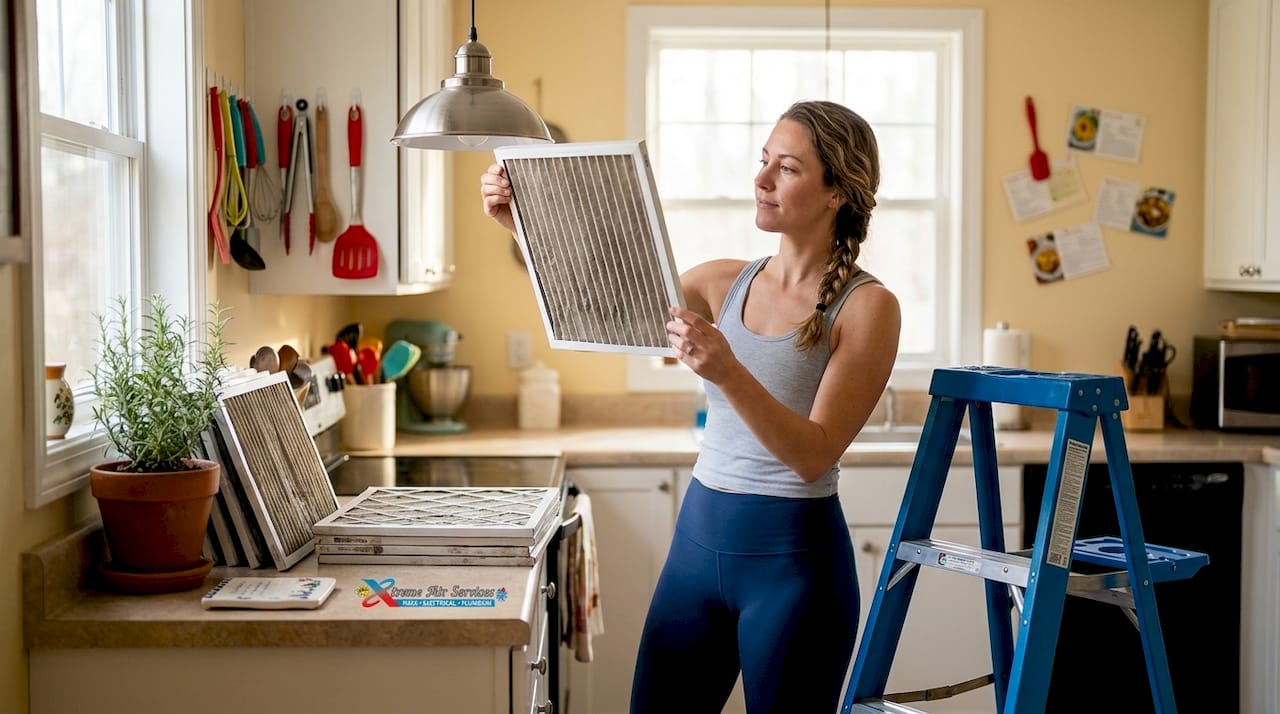
For most homes, change the filter every 1 to 2 months during heavy-use periods. If you have pets or live in a dusty area, lean toward every four to six weeks.
Use the MERV rating recommended in your owner’s manual. Going too high on MERV can actually restrict airflow in systems not designed for it.
Step 2: Clean the outdoor condenser unit
The outdoor condenser is where most of the real dirt accumulates. Start by removing visible debris from around the unit: leaves, grass clippings, sticks, or anything else that settled against the casing over the past season.
Trim back any shrubs or plants that have grown within two feet of the unit.
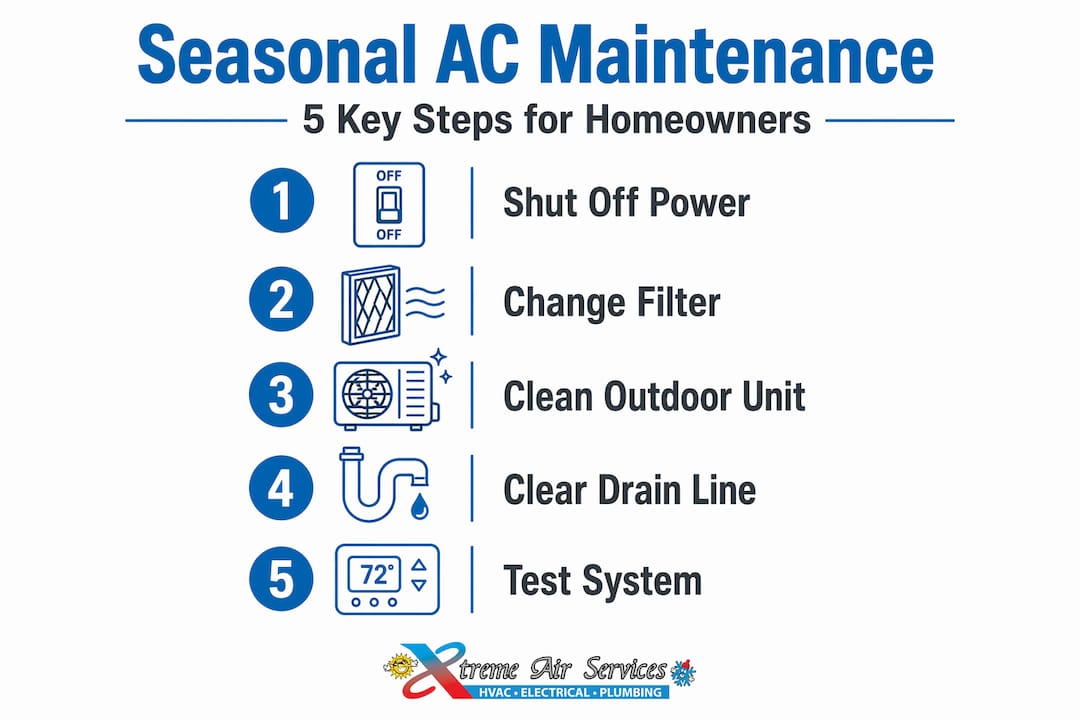
Next, clean the unit itself:
- Remove the top grill and fan assembly by unscrewing the bolts on the top panel.
- Set it aside carefully so you don’t strain the wiring.
- Use your soft-bristle brush or vacuum to clear debris from inside the unit.
- With a garden hose, spray the fins from the inside outward. This pushes dirt out the same way it came in, rather than packing it deeper.
Avoid a pressure washer here. The fins are made of thin aluminum and bend easily under high pressure.
Step 3: Straighten bent fins
Straightening bent fins restores airflow through the coil. Look closely at the fins wrapping around your outdoor unit. If you see crushed or bent sections, those areas are blocking airflow. Bent fins reduce efficiency and strain the compressor over time.
A fin comb (which costs around $10) does the job cleanly. Match the comb’s teeth spacing to your fins and gently work it through the bent sections. You won’t get every fin perfect, but clearing the worst spots makes a measurable difference.
Step 4: Clean the indoor evaporator coil and grilles
Your evaporator coil sits inside the air handler, usually behind an access panel secured with a few screws. It won’t be as dirty as the outdoor coil, but it still collects a layer of dust and grime over the season.
Use a soft brush to gently clear buildup from the coil’s surface. You can also use a no-rinse coil cleaner spray, which foams up and drips away with condensation.
While you have the panel open, wipe down the interior walls of the cabinet and check the drain pan below the coil for standing water or slime buildup. Both are early signs of a drain problem.
Step 5: Clear the condensate drain line
The condensate drain is a PVC pipe that runs from the drain pan in your air handler to a floor drain or outside your home. Over time, algae and mold build up inside it.
A clogged line can trigger the unit’s safety float switch and shut the whole system down. Worse, it can overflow and damage ceilings and flooring.
Clearing it is quick:
- Pour a cup of distilled white vinegar down the drain access port (usually a T-shaped cap near the air handler).
- Let it sit for 30 minutes, then flush with water.
- If you suspect a full clog, use a wet/dry vacuum against the exterior drain outlet to pull the blockage out.
This takes about two minutes and can save you a service call.
Pro Tip: Set a recurring reminder on your phone to pour vinegar down the condensate drain every 90 days during cooling season. It costs almost nothing and prevents the most common mid-summer shutdowns.
Step 6: Check and reset the thermostat
Replace the thermostat’s batteries if it is battery-powered, then confirm the settings match your comfort needs. Proper thermostat settings around 75 to 78°F suit most American homes.
That range balances comfort with energy use. Pushing it much lower increases energy consumption for minimal comfort gain.
If you don’t have a programmable thermostat, this is worth considering. Setting it higher while you’re away and letting it cool down before you return is one of the best energy efficient AC tips available.
Step 7: Restore power and test the system
With everything reassembled and the panels back in place, restore power at the breaker and disconnect box first, then set the thermostat.
Let the system run for 10 to 15 minutes and confirm cool air flows steadily from all vents. Walk the house and check for any unusual smells, sounds, or warm spots.
Troubleshooting common AC issues
Knowing the home ac unit maintenance steps is one thing. Recognizing when something is wrong before it escalates is where most homeowners fall short.
Common warning signs to watch for
Five warning signs tell you your AC needs attention before it fails:
- Weak airflow: Usually a clogged filter or dirty evaporator coil. Start there before calling anyone.
- Warm air from vents: Could be low refrigerant, a tripped circuit, or a dirty condenser coil. Check the breaker first.
- Strange noises: Rattling often means loose panels or debris in the unit. Squealing can indicate a failing belt or motor bearing.
- Water pooling near the indoor unit: Almost always a clogged condensate drain or a frozen evaporator coil.
- Higher-than-normal energy bills: Often tied to a dirty filter, blocked condenser, or a system running longer to reach setpoint.
“Many homeowners mistake a ‘working’ system for an ‘efficient’ one. Early spring inspections can reveal costly future issues hiding behind seemingly normal operation.”
The danger of skipping the off-season startup check
Skipping the off-season startup check can send contaminants straight into your home’s air. When you flip on a neglected system after months of dormancy, accumulated dust, mold spores, and bacteria get pushed into the air you breathe.
If anyone in your household has allergies or asthma, this can trigger immediate reactions. A clean startup matters for more than just equipment health. It also protects the AC and air quality in your home.
When to call a professional
Some tasks fall outside safe DIY territory. Call a licensed HVAC technician if you notice:
- Ice forming on the refrigerant lines or evaporator coil
- A burning smell or visible scorch marks near electrical components
- The system cycling on and off every few minutes
- No cooling at all after you’ve checked filters, thermostat, and breakers
- Any sign of refrigerant leaks (oily residue around fittings, hissing sounds)
Annual professional HVAC maintenance catches refrigerant levels, electrical connections, and component wear that you simply can’t assess without professional tools. Once a year is the minimum. Twice a year is better if you run your system hard.
Pro Tip: Book your professional tune-up in late February or March. By April, most HVAC companies in warmer climates are fully booked for weeks. Early scheduling also means any issues get fixed before you actually need the AC.
Best practices for long-term AC efficiency
Getting through one round of maintenance is good. Building habits around it is what actually extends your unit’s life and keeps your utility bills reasonable year after year.
These are the home cooling system upkeep habits that separate a 10-year AC from a 15 to 20-year one.
Maintain clearance around the outdoor unit
Experts recommend at least 2 feet of clearance on all sides of the outdoor condenser unit. Restrict that airflow and the compressor has to work harder to reject heat.
Over time, that extra strain adds up. Keep mulch, landscaping, and stored items away from the unit year-round.
Build a seasonal maintenance schedule
Spread maintenance across the year so nothing piles up. Use this seasonal schedule:
| Season | Task |
|---|---|
| Early spring | Full cleaning, filter replacement, drain flush, professional tune-up |
| Monthly (summer) | Visual inspection, filter check |
| Late fall | Clean unit, cover or prep for winter, document any issues |
| Winter | Check heating components, inspect for pest or debris intrusion |
Keeping a simple log of what you did and when also pays off. If a technician asks when the coils were last cleaned or the filter last changed, you’ll have the answer.
That kind of record helps technicians diagnose problems faster. It also helps you track when the unit might be approaching the end of its useful life.
Set realistic thermostat habits
Stop setting your thermostat at 65°F when you get home. Your house won’t cool faster. The system runs at the same rate regardless of the setpoint. All you’re doing is making it run longer. Set it at your target comfort temperature (75 to 78°F for most people) and let it work.
If you have a smart thermostat, program schedules that raise the temperature a few degrees while the house is empty. The Department of Energy estimates this can reduce cooling costs noticeably over a full season.
Pro Tip: Use the “fan only” mode on your thermostat occasionally to circulate air without running the compressor. This helps on mild days and reduces compressor wear.
Change filters based on your home’s reality
How often you change filters depends on your household, not a fixed calendar. A single-person home with no pets and hardwood floors might get away with a change every two months. A household with two dogs, carpet, and allergies? Every three to four weeks.
Check your filter monthly during cooling season and let what you see drive the schedule, not a generic calendar reminder.
Skipping coil cleaning also creates a domino effect of AC component failures as the motors strain against restricted heat transfer. That one skipped step in spring can mean a blown capacitor in July.
My take on AC maintenance after years in the field
I’ve watched more homeowners lose perfectly good AC systems to simple neglect than to any mechanical defect. The honest truth? Most of those expensive repairs were preventable with a $15 filter and 45 minutes of work twice a year.
What I’ve learned running HVAC maintenance calls is that the gap isn’t knowledge. Most people have heard they should change their filter. The gap is follow-through. Life gets busy, summer arrives, and suddenly the system that “worked fine last year” is struggling to hit 78°F on a 100-degree day.
Here’s what I think most advice gets wrong: it treats maintenance like a checklist you complete and forget. It’s not. It’s a relationship with a machine.
The homeowners who get the most out of their systems are the ones who walk by the outdoor unit occasionally. They notice when something looks or sounds different, and they act on it before it becomes a problem.
There’s also a real safety angle that doesn’t get enough attention. Electrical components degrade silently. Refrigerant leaks slowly. A once-a-year professional inspection isn’t just about efficiency. It’s about having a trained set of eyes on wiring and refrigerant lines that you genuinely cannot assess yourself without specialized tools.
Build the routine. Set the reminders. Don’t wait until the hottest week of summer to find out your condenser coil hasn’t been cleaned in three years.
— Xtreme
Keep your AC running strong with expert support
Doing your own seasonal cleaning is smart. But some tasks genuinely need professional hands, and there’s no shame in knowing where the line is.

At Xtreme Air Services, we handle the full scope of residential HVAC maintenance for homeowners in Dallas, Plano, Irving, and Sunnyvale, TX. Our tune-up visits cover:
- Refrigerant level checks
- Electrical connection inspections
- Coil cleaning
- Thermostat calibration
- A complete system performance review
We also offer preventive maintenance plans that keep you on a consistent schedule, so nothing falls through the cracks.
Did your DIY inspection turn up a refrigerant issue, a strange noise, or an electrical concern you would rather not handle yourself? Our team can diagnose and repair it the same day in most cases.
Book your spring tune-up early. Appointment slots fill up fast once the heat arrives, and you don’t want to be waiting two weeks in July.
FAQ
How often should I perform home AC unit maintenance?
You should complete a full cleaning and inspection twice a year: once in early spring before cooling season and once in fall before you shut the system down. Filter checks should happen every one to two months during heavy use.
What are the most important AC unit cleaning tips for beginners?
Start with the filter, then move to the outdoor condenser coils and fins, then the condensate drain. These three areas cause the majority of preventable AC problems and can all be addressed without professional tools.
When should I call a professional instead of doing it myself?
Call a licensed technician if you see ice on the refrigerant lines, smell burning near the unit, notice the system short-cycling, or suspect a refrigerant leak. These issues require specialized equipment and should not be attempted as DIY repairs.
Does a dirty AC really affect indoor air quality?
Yes, significantly. Running an uncleaned system after months of inactivity pushes trapped dust, mold spores, and bacteria into your home’s air. Regular filter changes and coil cleaning directly reduce the pollutants circulating through your home. Pairing clean AC maintenance with good air purifier usage gives you the best indoor air results.
What is the best thermostat setting for energy efficiency?
For most American homes, setting the thermostat between 75 and 78°F during occupied hours balances comfort with energy use. Setting it lower does not cool your home faster. It only runs the system longer and raises your energy bill.