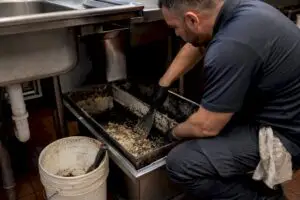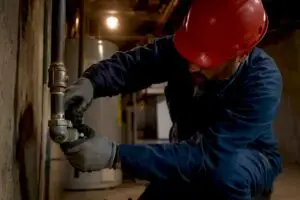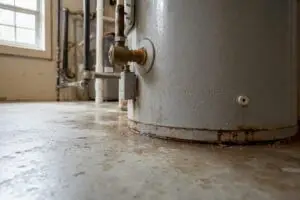


The fastest way to avoid a frozen pipe is to combine three things: steady indoor heat that never drops below 55°F, insulation on any pipe that sits in an unheated space, and a short pre-freeze checklist finished before the first hard cold snap. Most freeze-related plumbing disasters trace back to one of those three getting skipped, not to some freak weather event nobody could have predicted.
Here’s what to knock out in the next ten minutes:
- Set your thermostat to hold at least 55°F, even if you’re leaving town.
- Disconnect every garden hose and shut the indoor valve feeding outdoor spigots.
- Find your main water shutoff valve now, before you need it in a panic.
- Open cabinet doors under sinks that sit against exterior walls.
- Wrap any exposed pipe in the attic, garage, crawl space, or basement with foam insulation sleeves.
The 55°F rule: the American Red Cross recommends keeping your thermostat at a minimum of 55°F day and night through winter, even in rooms you don’t use. That single number does more to prevent frozen pipes than almost any other single action.
Key Takeaways
Preventing frozen pipes comes down to three habits done consistently: steady indoor heat at 55°F or above, insulation on every exposed pipe, and knowing your main shutoff before an emergency forces you to find it.
| Point | Details |
|---|---|
| Hold the thermostat floor | Keep indoor heat at a minimum of 55°F day and night, especially when traveling. |
| Insulate exposed pipe runs | Wrap pipes in attics, crawl spaces, basements, and garages with foam sleeves before the first freeze. |
| Disconnect outdoor lines | Drain hoses, shut the indoor valve to outdoor spigots, and add foam hose-bib covers. |
| Know your emergency steps | Locate the main shutoff now, and shut it off first if a pipe ever bursts. |
| Call a pro for repeated freezes | Xtreme Air Services handles winterization inspections, pipe insulation, and emergency burst-pipe repair when DIY prevention isn’t enough. |
Table of Contents
- How to Prevent Pipe Freezing Before Winter Hits
- What to Do the Day a Cold Snap Hits
- How Do You Know If a Pipe Is Frozen, and How Do You Thaw It Safely?
- My Pipe Burst. What Do I Do First?
- DIY vs. Hiring a Plumber: Costs and Time to Expect
- Don’t Forget Sump Pumps and Sewer Lines
- What Kind of Pipe Insulation Actually Holds Up in Extreme Cold?
- Check These Pipes Before Winter Sets In
- Keeping Rarely Used Rooms Warm Enough to Protect Plumbing
- Can Smart Sensors Catch a Freeze Before It Happens?
- Why I Push Homeowners Toward the Short List, Not the Long One
- Get a Professional Winterization Check Before the First Freeze
- Sources
- FAQ
How to Prevent Pipe Freezing Before Winter Hits
Winterizing your plumbing isn’t a weekend project. It’s a short list of targeted tasks, most of which take less than an hour, and doing them in the right order matters more than doing all of them perfectly.
Start with the tasks that protect the most pipe for the least effort:
- Set your thermostat floor (5 minutes). Lock it at 55°F minimum, especially if you travel during winter months.
- Locate and label your main shutoff valve (10 minutes). Know whether it’s a ball valve or gate valve, and confirm it actually turns.
- Disconnect and drain outdoor hoses (10 minutes). Shut the interior valve that feeds outdoor spigots and leave the spigot open so residual water drains out, a step the Red Cross specifically calls out.
- Install foam hose-bib covers over every outdoor faucet (5 minutes each).
- Insulate exposed pipes in the attic, crawl space, basement, and garage using foam pipe sleeves or wrap insulation (30 to 60 minutes depending on how much pipe you’re covering).
- Caulk around pipe penetrations where lines pass through exterior walls, and close foundation vents in crawl spaces during the coldest months. Portland Water’s winter guidance covers all of these steps in more detail.
Timeline: finish items 1 through 4 by early November, well before your region’s typical first freeze. Save the pipe insulation and caulking for a dry weekend in late fall, and treat foundation vent closures as a task you revisit each time a hard freeze warning shows up.
Tools and materials to have on hand: foam pipe insulation sleeves (sized to your pipe diameter), foam hose-bib covers, exterior-grade caulk, a caulk gun, and a flashlight for crawl space work.
Pro Tip: If a sink sits on an exterior wall, leave the cabinet doors open on the coldest nights and tuck a small clip-on fan inside pointed at the pipes. Moving warm air reaches the plumbing faster than air that just sits in the room.
What to Do the Day a Cold Snap Hits
Once a hard freeze warning shows up, your winterization checklist becomes a same-day action list. These steps take minutes, not hours.
- Confirm your thermostat is still holding at 55°F or higher, don’t let it dip overnight to save on heating costs.
- Open cabinet doors under every sink on an exterior wall.
- Let faucets served by exposed or vulnerable pipes drip at a slow, steady trickle.
- Keep garage doors closed if any plumbing runs through the garage.
- If you’re using a portable space heater near exposed pipes, keep it away from anything flammable and never leave it unattended.
The dripping-faucet trick works because moving water resists freezing better than water sitting still in a pipe, and it also gives built-up pressure somewhere to go if ice does start forming upstream. Mississippi State Extension and local guidance from Franklin County, Kentucky both point to the same mechanism: a slow trickle acts as a pressure-relief valve for a pipe that’s starting to freeze from the outside in.
A few utilities discourage constant dripping during severe drought restrictions, so check local guidance if your area has watering limits in place.
Pro Tip: A pencil-lead-width trickle is enough. You’re not trying to run water, just keep it moving.
How Do You Know If a Pipe Is Frozen, and How Do You Thaw It Safely?
The telltale signs are simple: a faucet that produces no water or just a weak trickle, frost or condensation visible on an exposed section of pipe, and the problem showing up on only some fixtures while others work fine.
Once you’ve located the frozen section, follow these steps in order:
- Open the faucet connected to the frozen pipe first, both hot and cold sides, and leave it open through the entire thawing process.
- Apply heat starting near the faucet and work backward toward the coldest, most frozen section. Use a hair dryer on low, an electric heating pad wrapped around the pipe, or towels soaked in hot water.
- Never use an open flame like a propane torch or charcoal grill near a pipe. This is a leading cause of house fires during winter thaw attempts and can also damage the pipe itself.
- Watch for steady flow returning to the open faucet, that’s your sign the ice has cleared and water is moving freely again.
Call a licensed plumber immediately if the frozen section is buried in a wall or slab you can’t reach, if you smell gas anywhere near the area, if you spot a split or bulge in the pipe, or if you can’t get any thaw progress after a reasonable effort. Water that keeps rising after a thaw attempt usually means the pipe has already cracked.
Pro Tip: If more than one fixture stops working at once, the frozen section is probably farther back in the system, closer to where the line enters your home, not right at the faucet.
My Pipe Burst. What Do I Do First?
A burst pipe turns into serious water damage fast, so speed and order matter here more than anywhere else in this article.
- Shut off the main water valve immediately. This is why locating it ahead of time matters so much.
- Turn off your water heater, gas or electric, so it doesn’t keep heating a tank with no incoming water.
- Open faucets throughout the house to drain remaining water out of the lines and relieve pressure.
- Shut off electricity to the affected area at the breaker panel, but only if water has reached outlets, switches, or the panel itself, and only if you can do it safely without standing in water.
- Contain what you can, towels, buckets, a wet vac, and move furniture, electronics, and valuables out of the path of the water.
Once the immediate threat is under control:
- Photograph and video every affected area before you start cleanup, insurance adjusters need this.
- Call your insurance company and a licensed plumber the same day, emergency burst-pipe repair should happen before drywall and flooring dry in place and trap moisture.
- Skip anything structural, don’t cut into walls or attempt permanent repairs yourself.
Pro Tip: Never use an open flame or a makeshift heat source to try to “fix” a burst pipe while water is still flowing. Shut off the source first, deal with heat second.
DIY vs. Hiring a Plumber: Costs and Time to Expect
Most of the pre-freeze checklist is genuinely DIY-friendly. Foam pipe insulation sleeves and hose-bib covers cost relatively little and take under an hour to install for most homes. Basic caulking around pipe penetrations is another low-cost, low-skill job most homeowners can handle in an afternoon.
Where it makes sense to bring in a professional:
- You’ve had the same pipe freeze more than once, that’s a sign of a structural or insulation gap that DIY fixes haven’t solved.
- The vulnerable pipe is inside a wall, under a slab, or otherwise inaccessible without demolition.
- You notice a slow leak, corrosion, or visible pipe damage during your inspection.
- You manage a rental property, duplex, or multi-unit building and can’t be onsite during a cold snap.
- You’re not confident you’ve correctly identified your main shutoff valve, this alone is worth a service call.
Heat tape installation, whole-attic insulation upgrades, and running new insulated piping through a crawl space are jobs where professional installation reduces the risk of a fire hazard or code violation. A seasonal HVAC maintenance plan also pays off here indirectly. Keeping your heating system running reliably through the coldest stretch of winter is half the battle against frozen pipes.
Pro Tip: If you’re already comparing quotes for attic insulation, ask about pipe wrap in the same visit. It’s a small add-on when a crew is already up there.
Don’t Forget Sump Pumps and Sewer Lines
Most frozen-pipe advice focuses on supply lines, but a frozen sump pump discharge line or sewer vent stack causes its own headaches, often worse ones, because the symptoms show up as flooding or backups instead of a dry faucet.
A sump pump’s discharge line runs from your basement or crawl space out to daylight, usually just a few inches below grade. That shallow depth makes it one of the more freeze-prone lines in the entire house. If it freezes solid while your sump pump is actively trying to push water through it, the pump can burn out or water can back up into your basement instead of draining away. Insulate the exposed portion of the discharge line with the same foam pipe sleeves you’re using elsewhere, and consider a freeze-relief valve, a small fitting that lets water escape into a gravel bed if the main line is blocked by ice.
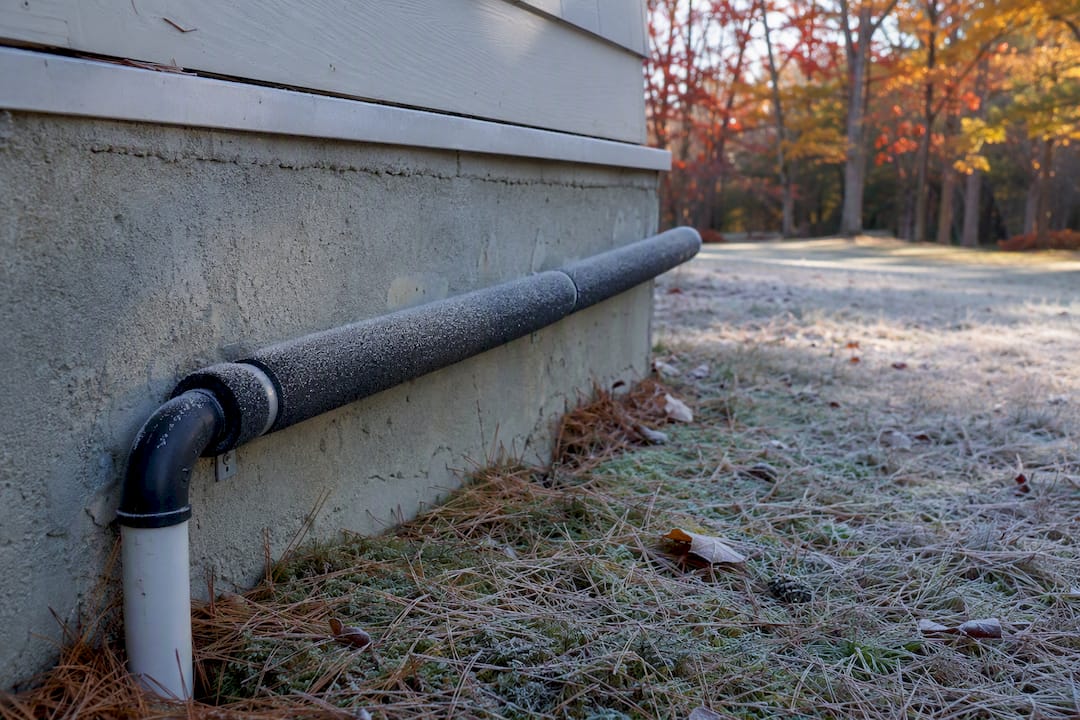
Sewer vent stacks that run through unheated attic space can develop frost buildup where they exit the roof, which occasionally restricts airflow and causes slow drains or gurgling sounds throughout the house. This is less common than a frozen supply line, but it’s worth a look if multiple drains start acting sluggish at the same time during a cold stretch.
If you winterize a vacant property, drain P-traps under sinks and in floor drains, then replace that water with non-toxic, plumbing-rated propylene glycol antifreeze rather than leaving the trap dry. A dry trap lets sewer gas into the house, and plain water left in the trap can freeze and crack the fitting.
What Kind of Pipe Insulation Actually Holds Up in Extreme Cold?
Not all pipe insulation performs the same way once temperatures drop into the teens or lower, and the foam sleeve that works fine in a mild climate can fall short in a true deep freeze.
Standard polyethylene foam pipe insulation, the split-tube kind sold in most hardware stores, works well for moderate cold and is the right choice for most exposed indoor pipe runs in a basement or garage. For pipes in genuinely harsh, sustained cold, such as an uninsulated crawl space in a region that regularly sees single-digit temperatures, thicker fiberglass pipe wrap or self-regulating electric heat tape under the insulation gives meaningfully better protection. Heat tape draws a small amount of electricity to keep the pipe surface just above freezing and is worth the investment on any pipe that has frozen before.
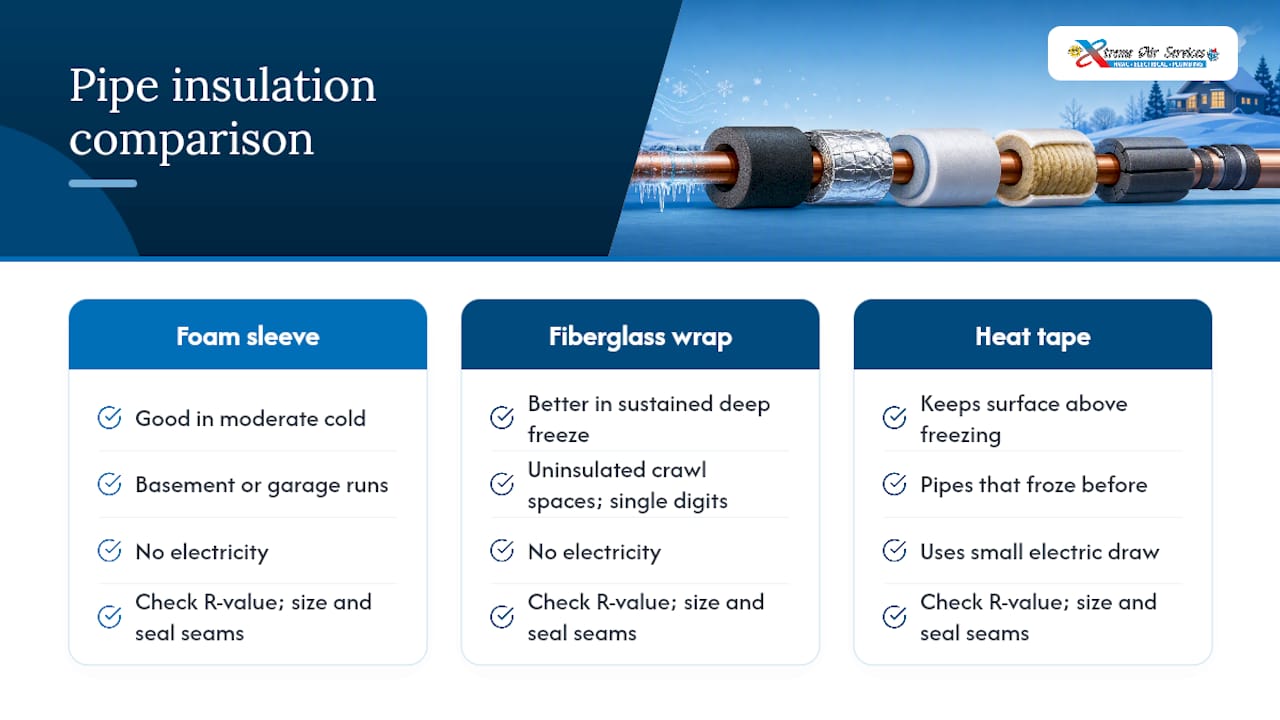
Whatever material you choose, check the R-value rating on the packaging rather than just the thickness. A quarter-inch cheap foam sleeve and a half-inch higher-density sleeve can look similar on a shelf but perform very differently once the temperature drops. Make sure sleeves are sized correctly to the pipe diameter, a loose fit leaves gaps where cold air gets in, and seal every seam with the manufacturer’s tape rather than leaving slits open. For pipes running through masonry or exterior walls, understanding what your pipes are made of helps you judge which sections are most vulnerable, since older galvanized steel and copper conduct cold differently than PEX.
Check These Pipes Before Winter Sets In
A short seasonal inspection catches small problems before they become frozen-pipe emergencies. Walk through your home in early fall and check the same handful of spots every year.
In the basement and crawl space, look for any pipe insulation that’s torn, compressed, or missing altogether, foam sleeves degrade over a few winters and need periodic replacement. Check that crawl space vents close properly if your area recommends sealing them for winter. In the attic, confirm insulation hasn’t shifted away from pipes near the roofline, since attic insulation settles and can leave a pipe more exposed than it was the year before.
Outside, inspect hose bibs for cracks from last winter’s freeze, a small crack that didn’t fully fail can still leak once water refreezes and expands again. Test your main shutoff valve by turning it fully closed and back open. A valve that’s seized or hard to turn needs attention now, not during an emergency.
Inside, run water briefly at every fixture, including ones you rarely use like a guest bathroom or utility sink, to confirm normal flow and catch any slow drain issues before cold weather makes diagnosis harder. This is also a good time to schedule a broader home plumbing maintenance check if it’s been more than a year since a professional looked at your system.
Keeping Rarely Used Rooms Warm Enough to Protect Plumbing
Guest bedrooms, finished basements, and detached garages with plumbing are the rooms homeowners forget to heat, and they’re exactly where frozen pipes show up first.
The instinct to close vents and shut doors in unused rooms to save on heating costs works against you here. A closed-off room with a bathroom or laundry hookup can drop well below the temperature needed to keep pipes safe, even while the rest of the house stays comfortable. Keep at least a partial vent open to any room with plumbing, and crack the interior door slightly so heat can circulate even when the room isn’t in regular use.
For a garage with a laundry hookup or utility sink, insulating both the walls and the garage door itself makes a measurable difference, since garage doors are typically the least insulated surface in the structure. Sealing gaps around the garage door and weatherstripping doors leading into the house helps keep that space above freezing without running a dedicated heater. The same air-sealing principle applies to exterior entry doors throughout the house. Weatherstripping and sealing exterior doors cuts down on drafts that pull warm air away from nearby plumbing runs.
If a room genuinely can’t hold heat, a small oil-filled space heater set on a low, safe thermostat setting can bridge the gap, positioned well away from anything flammable and never left running unattended overnight.
Can Smart Sensors Catch a Freeze Before It Happens?
Smart water sensors and pipe temperature monitors give you an early warning that traditional prevention methods can’t. A temperature sensor clipped near a vulnerable pipe alerts your phone when the surrounding air drops close to freezing, well before ice actually forms inside the pipe.
Water leak detectors that pair with your home’s main shutoff valve go a step further. Some models can automatically close the valve the moment they detect an unexpected flow pattern or a sudden temperature drop, which limits damage even if you’re not home when a pipe fails. These systems work especially well in vacation homes, rental properties, or any house that sits vacant for stretches during winter, exactly the scenarios where a frozen pipe can run undetected for days.
None of this replaces the fundamentals. A sensor tells you a pipe is at risk, it doesn’t insulate the pipe or keep your furnace running. Smart monitoring works best layered on top of the same basics covered above: steady heat, insulation, and a pre-freeze checklist finished on schedule.
Why I Push Homeowners Toward the Short List, Not the Long One
Homeowners who call about a burst pipe almost always skipped one of three things: the thermostat floor, hose disconnection, or basic insulation. The math is lopsided. A few foam sleeves and an hour of prep cost far less than the repair, drying, and repiping that follow a real burst. Xtreme Air Services sees that gap every winter, and it’s why our winterization checklist leads with the cheapest, fastest tasks first.
Get a Professional Winterization Check Before the First Freeze
Reading a checklist is one thing, knowing your specific attic, crawl space, and shutoff valve are actually ready for winter is another. Xtreme Air Services handles the parts of winterization that are easy to get wrong on your own, inspecting exposed pipe runs, checking your main shutoff, insulating vulnerable sections properly, and keeping your heating system running steady enough to hold that 55°F floor even during a hard freeze.

We also respond to burst-pipe emergencies and frozen-line thaws when prevention isn’t enough, and a seasonal HVAC maintenance plan covers the furnace-side half of the equation so your heat doesn’t fail on the coldest night of the year. If it’s been more than a year since anyone looked at your plumbing or heating system, schedule an inspection now, before the first freeze warning shows up, not after.
Sources
- Preventing & Thawing Frozen Pipes | American Red Cross
- Prepare your water system for winter | Portland Water
- How properly drip water faucet | Mississippi State Extension
- Tips to Avoid Frozen Pipes | Franklin County, KY
FAQ
What Temperature Should I Set My Thermostat to Prevent Pipe Freezing Winter Risk?
Keep your thermostat at a minimum of 55°F both day and night, even if you’re away from home, according to Red Cross guidance.
Should I Let My Faucet Drip Every Night During Winter?
Only during extreme cold snaps, and only on faucets served by exposed or vulnerable pipes. A slow trickle relieves pressure and helps prevent a freeze from turning into a burst.
How Long Does It Take a Pipe to Freeze Solid?
It varies by insulation, pipe location, and how cold it gets, but pipes in unheated spaces can freeze within just a few hours during a hard freeze if they’re uninsulated and exposed to moving cold air.
Can I Use a Hair Dryer to Thaw a Frozen Pipe?
Yes, a hair dryer on low heat works well for accessible pipe sections. Start near the faucet and work toward the frozen area, and never use an open flame.
When Should I Call a Plumber Instead of Handling It Myself?
Call immediately if you smell gas, see a crack or bulge in the pipe, can’t reach the frozen section, or a pipe has already frozen more than once. Xtreme Air Services offers emergency burst-pipe repair for these situations.