
A home winterization checklist is the structured set of tasks that protects your property from cold-weather damage, cuts heating costs, and keeps your family safe through winter. The best window to do this work runs from september through november, before the first hard freeze locks in.
Skip the wrong tasks and the bills add up fast. You face pipe burst claims averaging $11,650, plus furnace replacements that run $3,000–$7,600.
The good news: most high-impact steps cost under $50 in materials and take a few hours. This guide covers every critical action, in priority order, so you know exactly what to do and why it matters.
1. What is a home winterization checklist and why does it matter?
A home winterization checklist is a prioritized list of maintenance tasks that prepares your house for freezing temperatures, ice, and increased heating demand. The term “winterization” is the industry-standard word for this process, covering everything from sealing air leaks to draining outdoor plumbing.
The financial case is straightforward. The four most critical tasks each prevent a specific, expensive failure:
- Draining outdoor faucets
- Scheduling a furnace tune-up
- Testing smoke and carbon monoxide detectors
- Clearing gutters
Skipping even one can cost you thousands.
Timing matters as much as the tasks themselves. The fall window of september through november gives you enough time to schedule contractors, buy materials, and finish the work before temperatures drop.
Waiting until december means competing with every other homeowner who also waited.
2. Drain and insulate outdoor faucets
Frozen outdoor faucets are the single most preventable source of water damage in winter. Water left in an exterior pipe expands when it freezes, splits the pipe, and floods your home when it thaws.
The fix is simple:
- Disconnect all garden hoses and store them indoors.
- Turn off the interior shut-off valve that feeds each outdoor spigot.
- Open the outdoor faucet to drain any remaining water.
- Wrap the faucet with a foam faucet cover, available at any hardware store for under $5.
If your home has an irrigation or sprinkler system, blow out the lines with compressed air or hire a landscaper to do it.
Water left in underground irrigation lines will crack the pipes and fittings. This repair costs far more than a single service call.
Pro Tip: Label each interior shut-off valve with a permanent marker so you can find it fast in an emergency. This also helps if you ever need to document winterization steps for an insurance claim.
3. Schedule a professional furnace inspection
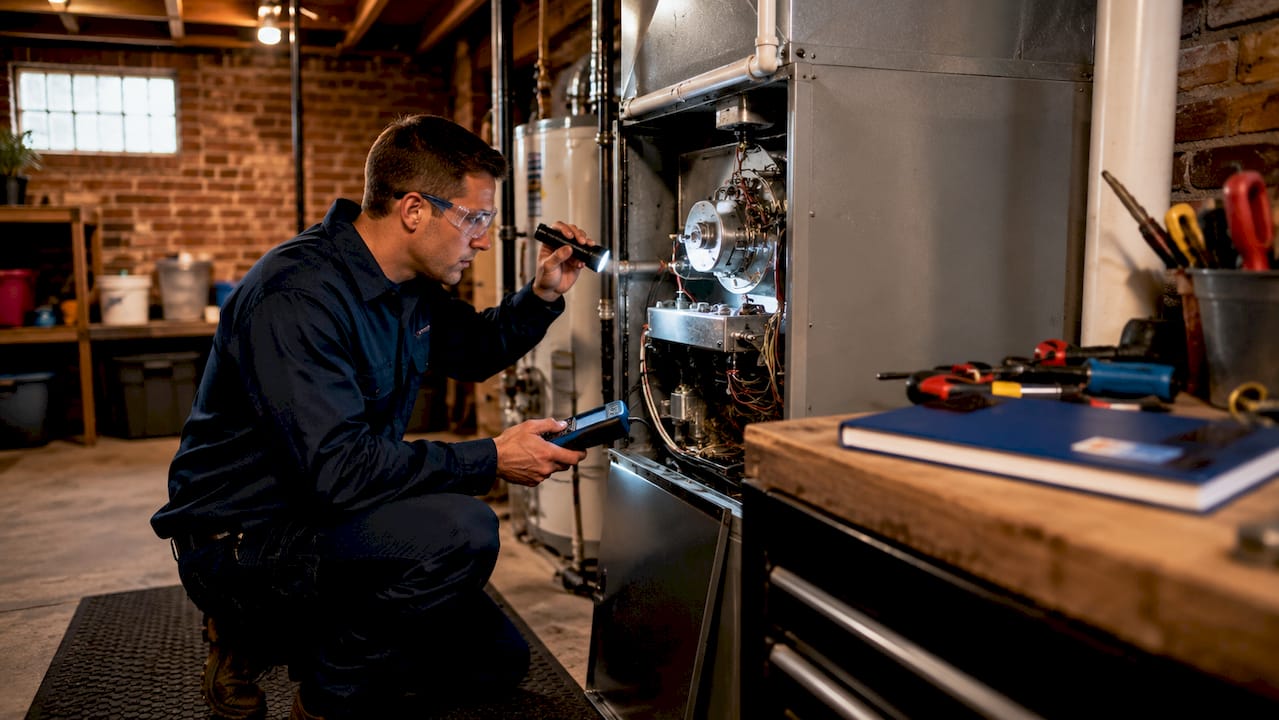
A furnace inspection is not optional maintenance. It is the step that confirms your heating system will actually work on the coldest night of the year. Furnace replacement costs $3,000–$7,600, while a professional tune-up costs a fraction of that.
A certified technician runs several checks:
- Inspects the heat exchanger for cracks
- Tests ignition
- Measures combustion efficiency
- Cleans the burners
Cracks in the heat exchanger are a carbon monoxide risk, not just a performance issue. You cannot see or smell this problem without the right equipment.
Book your appointment in september or october. HVAC companies fill up fast once cold weather arrives.
Xtremeairservices offers furnace inspection and tune-up services built for cold-season readiness. Scheduling early means you get the appointment slot you want.
4. Test smoke and carbon monoxide detectors
Carbon monoxide poisoning is a serious winter hazard. Homes are sealed tighter and heating equipment runs longer, so gas can build up fast.
Generators must operate at least 20 feet from windows, doors, or air intakes to prevent deadly gas buildup inside. The same logic applies to gas stoves and portable heaters.
Test every smoke detector and CO detector in your home by pressing the test button. Replace batteries in all units, even if they still work.
The standard recommendation is to replace batteries every fall. That makes this a natural part of your cold weather home prep routine.
Replace any detector that is more than 10 years old. The sensors degrade over time and may not trigger at dangerous CO levels. A new combination smoke and CO detector costs $20–$40 and takes five minutes to install.
Pro Tip: Never use a gas oven or stove to heat your home during a power outage. This is a leading cause of carbon monoxide poisoning in winter storms.
5. Seal air leaks with caulk and weatherstripping
Air sealing is the most cost-effective step in any home insulation checklist. Properly sealing windows and doors reduces heating energy use by 10%–25%. That is a significant reduction for materials that cost less than $30 at a hardware store.
Many homeowners focus on insulation and overlook air leaks entirely. Sealing is actually more cost-effective than adding insulation alone. Air leaks let conditioned air escape continuously.
Insulation slows heat transfer, but it does not stop a draft.
Finding air leaks yourself
You can find air leaks yourself in minutes. Run your hand along the edges of windows, doors, electrical outlets, and where pipes enter walls. On a cold day, you will feel the draft clearly.
A lit incense stick works even better. Hold it near suspected gaps and watch for the smoke to move sideways.
Common leak locations include:
- Door frames and window frames (caulk the exterior side)
- The gap between the bottom of doors and the floor (add a door sweep)
- Electrical outlets on exterior walls (use foam outlet gaskets)
- Where pipes and wires pass through walls (use expanding foam sealant)
- The attic hatch (add weatherstripping around the frame)
Weatherstripping and caulk: which to use
Use caulk for stationary gaps and weatherstripping for moving parts. Caulk works around window frames, door frames, and where trim meets siding. Weatherstripping suits the edges of doors and operable windows.
Foam weatherstripping compresses when the door closes, creating a tight seal. V-strip weatherstripping lasts longer and works well on the sides of doors.
Pro Tip: Buy a tube of paintable latex caulk for interior gaps and a tube of silicone caulk for exterior gaps. Silicone handles temperature swings without cracking, which latex will do over time outdoors.
6. Check and add attic insulation
Nearly 90% of U.S. homes are under-insulated. That statistic means your attic almost certainly needs attention. Heat rises, and an under-insulated attic lets it escape directly through your roof.
Measure your current attic insulation with a ruler. The recommended depth is 10–14 inches, depending on your region.
If you are below that, adding blown-in insulation is a straightforward project. It pays for itself in reduced heating bills within a few seasons.
Understanding why insulation matters goes beyond keeping warm. It also protects your roof deck from ice dams caused by uneven heat loss.
Also check the rim joists, the framing that sits on top of your foundation walls. These are a major source of heat loss in older homes and are often completely uninsulated.
Cut rigid foam board to fit and seal the edges with spray foam for a fast, affordable fix.
7. Replace your furnace filter and choose the right MERV rating
A clean furnace filter protects your HVAC system and keeps your air clean when windows stay shut all winter. Replace the filter before the heating season starts, then check it monthly.
Filter selection matters more than most homeowners realize. Filters with a MERV rating above 13 can restrict airflow in residential systems, straining the blower motor.
A MERV 8–13 filter is the right range for most homes. It captures dust, pollen, and pet dander without choking the system. Always use the filter size your manufacturer specifies.
When it is time to replace HVAC equipment entirely, look for ENERGY STAR certified products to maximize efficiency.
Using compatible filters with appropriate MERV ratings prevents premature blower motor failure, which is an expensive repair. Write the replacement date on the filter frame with a marker so you always know when it was last changed.
8. Prepare your plumbing for freezing temperatures
Frozen pipes are not just an outdoor problem. Pipes in unheated crawl spaces, garages, and exterior walls are all at risk. A home plumbing maintenance checklist should include insulating every pipe that runs through an unheated space.
Foam pipe insulation sleeves cost about $1 per foot and slip on without tools. Focus on pipes in the garage, basement, and any cabinet that sits against an exterior wall.
On nights below 20°F, open those cabinet doors to let warm air reach the pipes.
Failing to document winterization can lead to denied insurance claims if a pipe freezes. Take photos of your insulated pipes and labeled shut-off valves.
Store those photos in a folder with your homeowner’s insurance policy. This simple step protects you from paying the full cost of a repair that should be covered.
Pro Tip: Know where your main water shut-off valve is before winter starts. If a pipe bursts, shutting off the water in the first 60 seconds limits damage dramatically.
9. Reverse ceiling fans to push warm air down
Ceiling fans have a reverse switch that changes the blade direction from counterclockwise to clockwise. In clockwise mode at low speed, the fan pushes warm air from near the ceiling back down into the room.
This reduces how hard your furnace works to maintain temperature.
The switch is usually a small toggle on the motor housing. Flip it after the first cold snap and set the fan to its lowest speed. You should feel no direct breeze, just a general improvement in room warmth.
This step costs nothing and takes 30 seconds per fan. Homeowners with high ceilings see the biggest benefit because warm air stratifies more dramatically in tall rooms.
10. Inspect your roof and clean the gutters
Roof and gutter problems become expensive fast once winter arrives. Ice dams form when heat escapes through the roof, melts snow, and the meltwater refreezes at the cold eaves.
The resulting ice backs up under shingles and causes water damage inside the home.
Walk around your home and look for missing, curled, or cracked shingles. Check the flashing around chimneys and vents. Any gap in the flashing is a water entry point.
If you see damage, schedule a repair before the first freeze. Xtremeairservices provides roofing services and can assess your roof’s condition before winter sets in.
Clean gutters completely in late october or early november, after most leaves have fallen. Clogged gutters hold water that freezes, adds weight, and can pull the gutter away from the fascia.
Extend downspouts at least 6 feet from the foundation to direct meltwater away from your home.
Also check for pest entry points while you work on the exterior. Mice and other rodents move indoors as temperatures drop, and gaps around pipes, vents, and the roofline are their way in.
Seal any opening larger than a quarter inch with steel wool and caulk.
11. Winterize outdoor spaces and landscaping
Outdoor furniture, grills, and equipment left exposed to ice and snow deteriorate quickly. Protect them before the freeze:
- Move furniture to a garage or shed, or cover it with waterproof covers secured with bungee cords.
- Drain and store garden hoses.
- Drain and stabilize your gas grill by running the burners until the fuel line is empty.
Trim tree branches that hang over the roof or power lines. Ice-loaded branches break under the weight and can damage your roof, car, or utility connection.
This is a job for a certified arborist if the branches are large or close to power lines.
Shut off and drain any outdoor water features, including fountains and ponds with pumps. Store the pumps indoors. Water left in a pump housing will freeze and crack the casing.
12. Prepare your HVAC system as a whole
Preparing your full HVAC system for winter goes beyond the furnace filter. The entire system needs attention before cold weather arrives, including ductwork, vents, and the thermostat.
A complete HVAC winter preparation covers three areas:
- Duct sealing
- Thermostat calibration
- Verifying that all supply and return vents are open and unobstructed
Check every room to confirm that furniture has not been pushed against vents. Blocked vents create pressure imbalances that force the system to work harder. Vacuum the vent covers to remove dust buildup that restricts airflow.
Set your thermostat to a minimum of 55°F even when you travel. Dropping below that threshold risks frozen pipes in the walls. A programmable or smart thermostat makes this easy to manage remotely.
Key Takeaways
A complete home winterization checklist prevents the most expensive cold-weather failures by addressing plumbing, heating, insulation, and safety systems before the first freeze.
| Point | Details |
|---|---|
| Act in fall, not winter | Complete all winterization tasks between september and november before hard freezes arrive. |
| Seal air leaks first | Caulking and weatherstripping deliver 10%–25% energy savings at the lowest cost of any task. |
| Protect pipes proactively | Insulate pipes in unheated spaces and document the work to protect your insurance coverage. |
| Use the right furnace filter | Stay within MERV 8–13 to protect airflow and prevent blower motor damage. |
| Document everything | Photos of insulated pipes and labeled shut-offs protect you from denied insurance claims. |
What I have learned after years of winter service calls
The homeowners who call us in january with burst pipes and failed furnaces almost always share one thing in common: they planned to get to it. They knew the tasks. They just kept pushing the date back.
By the time the first hard freeze hit, the window had closed.
The most overlooked step on any cold weather home prep list is air sealing. Homeowners spend hundreds on new insulation and then wonder why their heating bill barely moves.
The reason is simple. Insulation slows heat transfer, but a drafty door frame lets conditioned air pour out continuously. Seal the leaks first, then add insulation if the measurements call for it.
The other mistake I see constantly is skipping the documentation step. Labeling your shut-off valves and photographing your insulated pipes takes 20 minutes.
But when a pipe freezes and you file a claim, that documentation is the difference between a covered repair and a $10,000 out-of-pocket bill. Insurance companies look for evidence that you maintained reasonable heat and took preventive steps.
My honest recommendation: combine DIY tasks with at least one professional inspection. You can handle weatherstripping, filter changes, and gutter cleaning yourself.
But a furnace heat exchanger crack is invisible without the right tools, and a carbon monoxide leak from a cracked exchanger is life-threatening. The professional inspection is not an upsell. It is the one task where the stakes are too high to skip.
Start your checklist in early october. Give yourself four weeks to work through it. The homeowners who finish before november 1 sleep better all winter.
— Xtreme
Xtremeairservices is ready to help you prepare for winter
Xtremeairservices handles the technical side of winter preparation so you do not have to guess whether your heating system is ready. From furnace inspections to filter replacements and full system tune-ups, the team covers every step that requires professional equipment and certified expertise.
HVAC maintenance plans from Xtremeairservices are built around seasonal readiness, with fall inspections scheduled before demand peaks. The team also handles heating repairs, duct checks, and indoor air quality improvements, which matter more when your home is sealed tight for months.
Book your fall appointment early. Slots fill up fast once temperatures start dropping, and waiting means risking a cold-night breakdown when technicians are hardest to reach.
Xtremeairservices serves Dallas, Plano, Irving, Sunnyvale, and surrounding areas.
FAQ
When should I start my home winterization checklist?
The best time to start is between september and november, before the first hard freeze. Starting in early october gives you enough time to schedule professional services and complete DIY tasks without rushing.
How much can I save by sealing windows and doors?
Properly sealing windows and doors reduces heating energy use by 10%–25%. This makes weatherstripping and caulking the highest-return tasks on any home insulation checklist.
What MERV rating should I use for my furnace filter?
Use a filter rated MERV 8–13 for most residential systems. Filters above MERV 13 restrict airflow and can damage the blower motor over time.
How do I prevent frozen pipes in winter?
Insulate pipes in unheated spaces like garages and crawl spaces, keep your thermostat at 55°F or above, and open cabinet doors under sinks on exterior walls during extreme cold. Label your main shut-off valve so you can act fast if a pipe does freeze.
Is a professional furnace inspection really necessary?
A professional inspection is the only way to detect heat exchanger cracks, which are a carbon monoxide risk that cannot be seen or smelled without specialized equipment. Given that furnace replacement costs $3,000–$7,600, an annual inspection is a straightforward investment in both safety and cost avoidance.