
Rooftop HVAC unit servicing is a defined sequence of inspections, measurements, and maintenance tasks designed to keep commercial packaged units running at peak efficiency and prevent costly breakdowns. Property managers and building owners who follow structured rooftop HVAC unit servicing steps spend less on emergency repairs, extend equipment life, and maintain tenant comfort year-round. The process covers six core systems: air filters, evaporator and condenser coils, refrigerant circuits, condensate drainage, mechanical drive components, and electrical systems. Skipping or rushing any one of these areas creates compounding failures that show up at the worst possible time, typically the first hot day of summer or the first cold snap of fall.
What are the essential tools and prerequisites for servicing rooftop HVAC units?
Arriving on a rooftop without the right tools is the fastest way to turn a two-hour service call into a three-visit problem. Before any technician or contracted crew touches a unit, the following equipment must be on hand.
Core tools and instruments:
- Filter pullers and replacement filters matched to unit specifications
- Coil cleaner (foaming, non-acid formula for aluminum fins) and a low-pressure rinse sprayer
- Fin combs sized to the coil fin density (typically 12 to 20 fins per inch on commercial RTUs)
- Refrigerant manifold gauges and a calibrated electronic leak detector
- Digital thermometer and anemometer for temperature differential and airflow measurement
- Clamp meter for amperage readings and a megohmmeter for motor insulation resistance testing
- Torque screwdriver and electrical connection kit for terminal tightening
- Camera or smartphone for photographic documentation
Safety requirements before any work begins:
- Lock out and tag out the unit at the disconnect and the main panel. No exceptions.
- Wear cut-resistant gloves, safety glasses, and slip-resistant footwear rated for rooftop surfaces
- Use a fall arrest harness if the unit sits within six feet of a roof edge
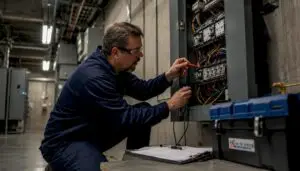
- Confirm the unit is de-energized with a non-contact voltage tester before opening any panel
Technical manuals for the specific unit model must be available on-site or accessible digitally. Manufacturers like Carrier, Trane, and Lennox publish model-specific pressure ranges, motor amp draws, and torque specs that generic guides cannot replace. For teams managing multiple buildings, a CMMS (Computerized Maintenance Management System) such as UpKeep or Limble CMMS tracks work orders, logs measurements, and schedules recurring tasks automatically.
Pro Tip: Before climbing to the roof, pull the last three service records for the unit. Knowing the previous filter pressure drop, refrigerant charge, and belt condition turns a routine visit into a trend-based diagnostic session.
What are the step-by-step servicing tasks for rooftop HVAC units during pre-cooling season?
Spring pre-season service is the most consequential visit of the year. Failures spike during the first cooling call when inspections are deferred or incomplete, which means every step below must be completed before the unit sees its first cooling demand.
Step 1: Power shutdown and visual safety check
Shut down the unit at the rooftop disconnect and lock out the panel. Walk the full cabinet perimeter and note any physical damage, missing screws, bent panels, or evidence of pest intrusion. Photograph anything abnormal before opening access panels.
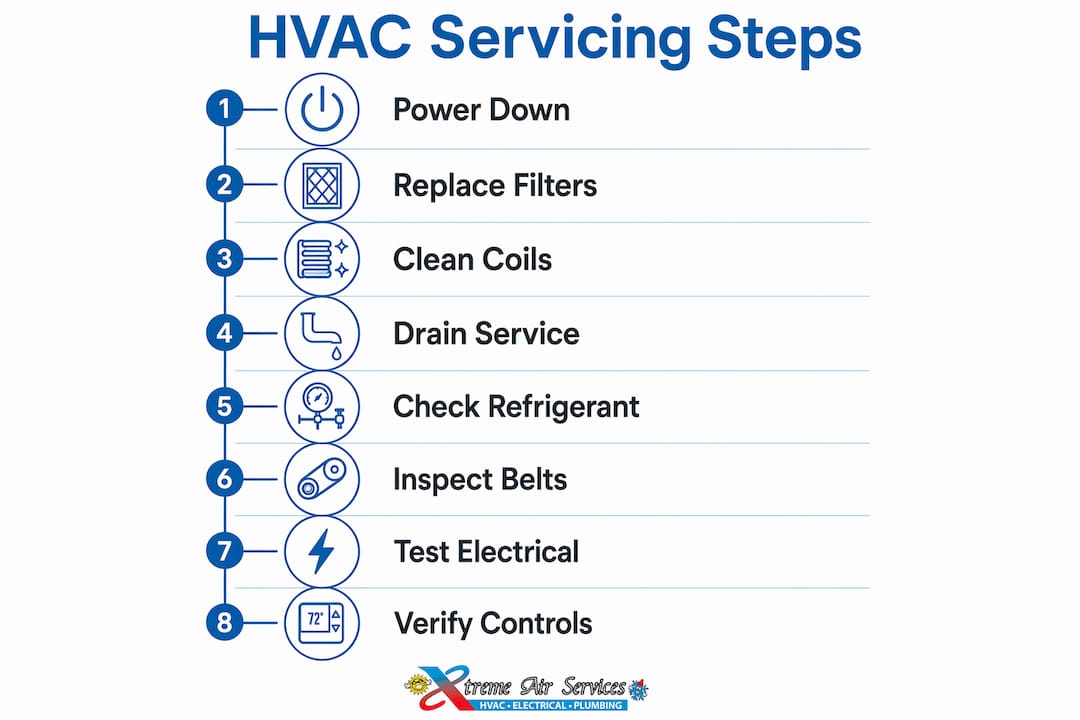
Step 2: Air filter replacement and pressure drop logging
Pull the existing filters and record the model number, MERV rating, and the pressure drop reading from the magnehelic gauge if one is installed. Filter replacement and pressure monitoring are foundational tasks that directly affect airflow across the evaporator coil. Install new filters and log the clean baseline pressure drop. This number becomes your reference for the next service visit.

Step 3: Evaporator and condenser coil inspection and cleaning
Inspect both coil faces for dirt bridging, fin damage, and biological growth. Apply a foaming coil cleaner to the evaporator coil, allow the dwell time specified on the product label, then rinse from the inside out with low pressure. Repeat on the condenser coil. Use a fin comb to straighten any bent fins, working in the direction of the fin channels. Coil face pressure drop should stay within ±20% of the manufacturer’s baseline. A delta-T (temperature differential across the coil) of 10 to 15°F on the cooling coil confirms adequate heat transfer. Record both values.
Step 4: Condensate drain pan and line service
Inspect the drain pan for standing water, cracks, and biological slime. Neglecting condensate drain maintenance leads to overflow, microbial growth, and potential equipment shutdown. Flush the drain line with a wet/dry vacuum and pressurized water. Add a biocide tablet or pan treatment strip rated for commercial HVAC use. Confirm free drainage by pouring one quart of water into the pan and watching it clear within 30 seconds.
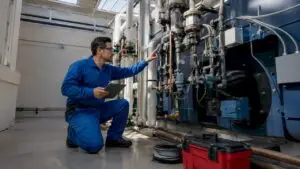
Step 5: Refrigerant charge and leak verification
Restore power temporarily to run the compressor and attach manifold gauges to the service ports. Measure suction and discharge pressures, then calculate superheat and subcooling against the manufacturer’s target values. Refrigerant leak detection is a mandatory safety and efficiency check performed by EPA Section 608 certified technicians. If charge is low, locate the leak with an electronic detector before adding refrigerant. Document the refrigerant type, amount added, and gauge readings.
Step 6: Belts, pulleys, fan motors, and blades
Inspect all drive belts for cracking, glazing, and proper tension. A belt that deflects more than half an inch under moderate thumb pressure needs replacement. Check pulley alignment with a straightedge and inspect fan blades for cracks, corrosion, or debris buildup. Spin each fan by hand to feel for bearing roughness. Record motor nameplate amperage and compare it to your clamp meter reading under load.
Step 7: Electrical connections and motor insulation testing
Tighten all terminal connections to manufacturer torque specs. Loose connections are a leading cause of premature motor failure and nuisance tripping. Use a megohmmeter to test motor insulation resistance. Readings below one megohm on a 480V motor indicate deteriorating insulation that warrants replacement planning.
Step 8: Controls and thermostat verification
Test the thermostat calibration by comparing its reading to a calibrated reference thermometer. Cycle the unit through cooling, fan-only, and off modes to confirm each control stage responds correctly. Document any control anomalies with photographs.
| Servicing Task | Measurement Target | Action if Out of Range |
|---|---|---|
| Filter pressure drop | Within ±20% of baseline | Replace filter, inspect ductwork |
| Coil delta-T (cooling) | 10–15°F across evaporator | Clean coils, check airflow |
| Refrigerant superheat | Per manufacturer spec | Check charge, test for leaks |
| Motor amperage | Within 10% of nameplate | Inspect bearings, check voltage |
| Condensate drain clearance | Clears within 30 seconds | Flush line, add biocide |
Pro Tip: Photograph the gauges, filter condition, and drain pan at every visit. Measurement-backed documentation and photographic evidence accelerate troubleshooting and support warranty verification when a manufacturer dispute arises.
How to conduct pre-heating season and annual servicing tasks for rooftop HVAC units
Fall service on a gas rooftop unit carries higher safety stakes than spring service. Heat exchanger failures can introduce carbon monoxide into the building’s air supply, making this inspection non-negotiable.
-
Heat exchanger inspection with burner firing. Fire the burners and observe the flame pattern. A distorted or rolling flame indicates a cracked heat exchanger. Shut the unit down immediately and tag it out of service if any crack is visible. This is not a repair to defer.
-
Combustion analysis. Use a calibrated combustion analyzer to measure CO (carbon monoxide), O2 (oxygen), and flue gas temperature. CO readings above 100 ppm in the flue stream or any CO in the supply air stream require immediate corrective action. Target O2 levels typically fall between 3% and 6% for natural gas burners.
-
Heating coil and freeze protection controls. Inspect electric or hot water heating coils for element damage or scale buildup. Test freeze stat controls and low-limit thermostats by simulating a low-temperature condition. A freeze stat that fails to trip at its setpoint will allow a water coil to freeze and rupture.
-
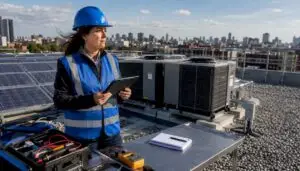
Economizer sensors and damper actuators. Inspect the outdoor air damper for free movement through its full range. Test the economizer controller by simulating outdoor air conditions above and below the changeover setpoint. A stuck damper in the open position can add significant heating load in winter. Calibrate or replace faulty sensors.
-
Comprehensive refrigerant leak test. Even if the unit passed spring leak checks, perform a full circuit leak test in fall using a calibrated electronic detector. Temperature swings between seasons stress fittings and Schrader valve cores.
-
Motor insulation resistance and crankcase heater test. Retest motor insulation resistance with the megohmmeter. Confirm the compressor crankcase heater is energized and warm to the touch. A failed crankcase heater allows refrigerant to migrate into the compressor oil during cold standby, causing liquid slugging on startup.
-
Cabinet weatherproofing and electrical panel inspection. Inspect all cabinet gaskets, access panel latches, and roof curb flashing for gaps. Water intrusion into the electrical compartment is a leading cause of control board failures. Seal any gaps with appropriate HVAC-grade sealant.
Critical safety note: Any heat exchanger crack, CO reading above threshold, or gas valve anomaly must be documented, reported to the building owner in writing, and the heating function locked out until a licensed gas technician completes the repair. Operating a unit with a compromised heat exchanger is a life-safety violation.
| Fall Servicing Task | Acceptance Threshold | Consequence if Skipped |
|---|---|---|
| Heat exchanger inspection | No visible cracks or flame distortion | CO infiltration into supply air |
| Combustion CO reading | Below 100 ppm in flue | Tenant health risk, liability |
| Freeze stat trip test | Trips at setpoint ±2°F | Coil freeze and rupture |
| Crankcase heater check | Warm to touch, circuit confirmed | Compressor liquid slugging |
| Cabinet seal inspection | No visible gaps or water staining | Control board corrosion failure |
What scheduling framework best optimizes rooftop HVAC unit maintenance?
ANSI/ASHRAE/ACCA Standard 180 defines a layered maintenance schedule that commercial facilities should treat as a minimum baseline, not a ceiling. The framework organizes tasks by frequency so nothing falls through the cracks between service visits. For additional guidance on maintenance standards, see the Air Conditioning Contractors of America (ACCA).
Monthly tasks:
- Replace or inspect air filters and log pressure drop
- Flush condensate drain lines and inspect pan condition
- Perform a visual walk-around of the unit cabinet and controls
Quarterly tasks:
- Clean evaporator and condenser coils
- Inspect and tension drive belts and pulleys
- Calibrate economizer sensors and test damper actuator travel
- Check refrigerant pressures and compare to baseline
Semi-annual tasks:
- Full electrical system inspection with terminal tightening
- Controls and thermostat calibration testing
- Compressor and refrigerant circuit review including leak detection
- Motor amperage testing under load
Annual tasks:
- Heat exchanger inspection with combustion analysis (gas units)
- Motor insulation resistance testing with megohmmeter
- Cabinet integrity and weatherproofing inspection
- Full documentation review and trend analysis across all service records
Commercial rooftop units require at minimum two pre-season inspections annually plus quarterly servicing during operation. High-use facilities such as hospitals, data centers, and 24-hour retail locations should increase quarterly visits to monthly full inspections. Annual maintenance costs for a standard office building run roughly $500 to $1,200 per unit. High-criticality environments push that figure to $1,500 to $2,500 per unit. Consistent scheduled maintenance reduces emergency callout costs, which routinely run three to five times the cost of a planned visit for the same repair.
Pro Tip: Build your maintenance calendar backward from your peak demand dates. If your building’s cooling season starts in late April, schedule the pre-cooling inspection no later than the first week of April. Scheduling with appropriate lead time before demand peaks prevents most seasonal startup failures.
For property managers overseeing multiple buildings, a commercial HVAC preventive maintenance program that standardizes task lists and measurement logging across all units creates consistency and makes trend analysis far more useful.
Key takeaways
Effective rooftop HVAC unit servicing requires seasonal pre-inspections, measurement-based verification across filters, coils, refrigerant, and electrical systems, and a documented scheduling framework aligned with ANSI/ASHRAE/ACCA Standard 180. Following these rooftop HVAC unit servicing steps consistently is the single best way to avoid unplanned downtime.
| Point | Details |
|---|---|
| Pre-season timing is critical | Schedule spring and fall inspections before the first cooling or heating call to prevent startup failures. |
| Measurement targets matter | Track coil delta-T, filter pressure drop, and motor amperage against baselines to catch degradation early. |
| Condensate drains are high-risk | Flush drain lines monthly and add biocide treatment to prevent overflow and microbial contamination. |
| Annual heat exchanger inspection is non-negotiable | CO infiltration from a cracked exchanger is a life-safety issue requiring immediate lockout. |
| Scheduled maintenance reduces total cost | Planned visits cost three to five times less than emergency callouts for equivalent repairs. |
What I’ve learned from years of rooftop HVAC service calls
The single most common mistake I see property managers make is treating the pre-season inspection as a formality rather than a diagnostic event. Teams rush through the checklist, skip the combustion analysis because “the unit ran fine last year,” and then wonder why the compressor locks out on the first 95-degree day in June.
The measurement trend is where the real intelligence lives. A single refrigerant pressure reading tells you almost nothing. Three readings taken six months apart, logged against outdoor ambient temperature, tell you whether the charge is stable or whether you have a slow leak that will strand your tenants in August. Trend baselines across service visits reveal gradual equipment degradation far more reliably than any single inspection snapshot. This is the difference between reactive and proactive facility management.
Condensate drain neglect is the failure mode I see most often in buildings that otherwise have decent maintenance programs. The drain pan gets cleaned in spring and then ignored until something overflows. Condensate management requires systematic flushing, biocide application, and pan condition verification at every monthly visit, not just at pre-season. One clogged drain line can shut down a unit, damage ceiling tiles, and trigger a mold remediation claim that costs ten times what a biocide tablet would have.
Digital work order systems change the game for multi-building portfolios. When every technician logs actual measured values rather than checkmarks, you build an asset history that supports capital planning, warranty claims, and vendor accountability. Investing in technician training specific to rooftop unit nuances, not just general HVAC certification, pays back in fewer missed findings and faster diagnostics on every visit.
— Xtreme
Let Xtremeairservices handle your rooftop HVAC maintenance
Managing rooftop HVAC servicing across multiple buildings is a significant operational responsibility. Xtremeairservices offers structured HVAC maintenance plans built around the seasonal and quarterly task framework described in this guide. Each plan includes pre-season inspections, documented measurement logging, priority scheduling, and digital service records that give property managers full visibility into equipment condition across their portfolio.
Whether you manage a single commercial building or a portfolio of properties, a professional maintenance plan removes the scheduling burden, keeps your units compliant with ANSI/ASHRAE/ACCA Standard 180 requirements, and gives you documented proof of due diligence. Contact Xtremeairservices to review a plan matched to your building type, unit count, and service frequency requirements.
FAQ
What are the basic rooftop HVAC unit servicing steps?
The core steps are power shutdown, filter replacement, coil cleaning, condensate drain service, refrigerant charge verification, belt and motor inspection, electrical connection tightening, and controls testing. Each step requires logging measured values, not just visual confirmation.
How often should a commercial rooftop HVAC unit be serviced?
Commercial rooftop units require at minimum two pre-season inspections annually plus quarterly servicing during operation. High-use facilities benefit from monthly full inspections to catch issues before they become failures.
What happens if you skip the condensate drain during servicing?
Skipping condensate drain maintenance leads to overflow, microbial growth in the drain pan, and potential equipment shutdown. Monthly flushing and biocide treatment prevent clogs and biological contamination that can damage the unit and surrounding building materials.
Why is heat exchanger inspection critical in fall servicing?
A cracked heat exchanger on a gas rooftop unit can introduce carbon monoxide directly into the building’s supply air. This is a life-safety issue that requires immediate unit lockout and repair by a licensed gas technician before heating operation resumes.
What does annual rooftop HVAC maintenance typically cost?
Annual maintenance for a standard office building runs roughly $500 to $1,200 per unit. High-criticality environments such as hospitals or data centers typically see costs of $1,500 to $2,500 per unit depending on service frequency and equipment complexity.
Recommended
- Complete HVAC System Maintenance | Step by Step Guide for Homeowners & Technicians – YouTube
- Types Of Commercial HVAC Systems: 2026 Facility Guide
Need professional help? Explore our commercial air conditioning and heating.