

A roof leak in a commercial building is defined as any uncontrolled water intrusion through the roof assembly that threatens the structure, interior assets, or business operations. A roof leak commercial building fix requires three things done in the right order: accurate leak detection, immediate damage control, and the correct repair method. Skip any one of those steps and you pay for the same problem twice. Bi-annual professional inspections are the industry standard for commercial flat roofs, ideally in spring and fall plus after any significant storm. Property managers who treat roof maintenance as a scheduled line item rather than a reactive expense consistently spend less over the life of the building.
How do you find a roof leak in a commercial building?
Locating a leak accurately is the most underestimated part of commercial roof repair. Water travels. A drip hitting your ceiling tiles may have entered the roof membrane 20 feet away. Chasing the drip without tracing the path wastes time and money.
Start with interior signs
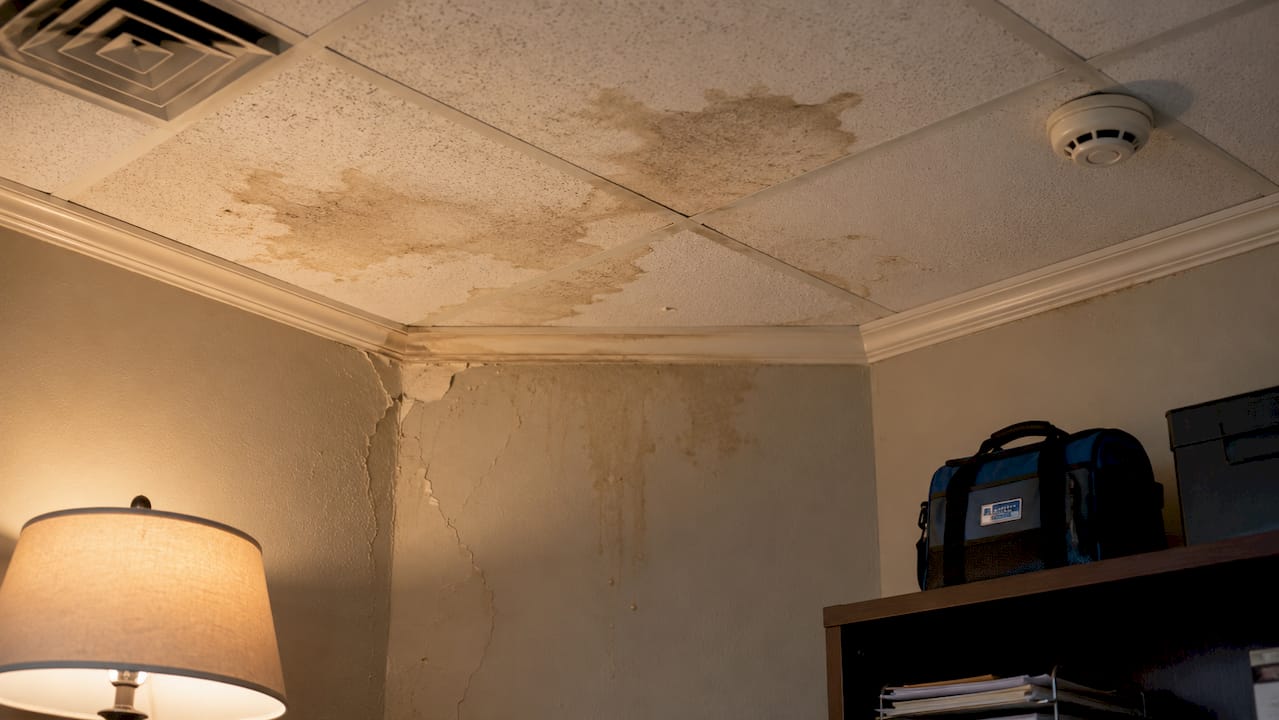
Damp spots, discoloration on ceiling tiles, and peeling paint are the clearest interior signals that water has breached the roof. These signs tell you water is already inside the building assembly. They do not tell you where it entered. Mark every interior sign with tape or chalk before you go to the roof. That map guides your exterior search.
Move to the exterior surface
Walk the roof and inspect in a systematic grid pattern rather than heading straight to the area above the interior damage. Pay close attention to:
- Flashings around HVAC curbs, skylights, and parapet walls
- Open penetrations where pipes, conduits, or vents pass through the membrane
- Membrane seams that have lifted, cracked, or separated
- Ponding water zones where drainage is blocked or slow
- Blistering or bubbling in the membrane surface, which signals trapped moisture
Open penetrations, damaged flashings, and aging membranes are the three most common sources of commercial roof leaks. Identifying which one applies determines the repair method you use.
Use water testing when the source is unclear
When a visual inspection does not isolate the leak, a controlled water test works well. One person stays inside near the marked interior damage while another runs a hose slowly across the roof in sections, starting low and moving upward. The moment the interior person sees water, you have your zone. For large or complex roofs, professional leak detection technology such as infrared thermography or electronic field vector mapping gives you precise results without flooding the building.

Pro Tip: Always inspect the roof after a rain event rather than during dry weather. Active moisture makes membrane defects, seam failures, and flashing gaps far easier to spot.
What should you do immediately after spotting a leak?
Speed matters the moment you confirm a leak. The goal in the first hour is not to fix the roof. The goal is to stop the interior damage from getting worse while you arrange the actual repair.
- Move valuables and inventory away from the leak zone immediately. Electronics, documents, and stock are your most expensive losses in a roof leak event.
- Place buckets or waterproof containers under active drips. Buckets under drips and moving inventory are the two fastest ways to limit damage before a contractor arrives.
- Deploy tarps carefully. A tarp can channel water toward a drain or collection point, but improper tarp setup can cause heavy pooling that stresses the roof structure. Angle the tarp so water flows off rather than collects.
- Notify your tenants or staff. If the leak is above a work area, clear the space. Wet floors and falling ceiling tiles create liability.
- Call for emergency professional help when you see sagging roof sections, widespread water intrusion, or any sign of structural compromise.
Serious structural damage such as sagging roof sections or leaks disrupting operations requires an emergency call. Delaying repairs in those situations leads to costly interior damage and real safety hazards.
Pro Tip: Take photos and video of every affected area before you move anything. That documentation is your insurance claim. Adjusters need to see the damage as it was, not after cleanup.
If the leak is active during business hours and the building is occupied, your first call is to a licensed commercial roofing contractor, not a handyman. The distinction matters for both safety and insurance purposes.
When should you hire a professional roofing contractor?
Hiring the right contractor is not just about fixing the current leak. It is about protecting your asset and your insurance position. The wrong contractor can void your warranty, create new penetrations, or use materials incompatible with your existing membrane system.
When selecting a commercial roofing contractor, look for:
- Verifiable commercial roofing experience. Residential roofers work with different systems and different materials. Commercial flat roofs use TPO, EPDM, modified bitumen, and built-up roofing systems. Your contractor needs hands-on experience with whichever system your building uses.
- Proof of licensing and insurance. A contractor without general liability and workers’ compensation coverage transfers that financial risk to you.
- Written scope of work before any repair begins. Verbal agreements create disputes. A written scope protects both parties.
- References from comparable commercial projects. A strip mall repair is not the same as a warehouse or a multi-story office building.
- Manufacturer certifications for the membrane system on your roof. Certified installers can often restore or extend your existing manufacturer warranty.
Insurance considerations you cannot ignore
Many commercial roof insurance policies exclude coverage for gradual or long-term damage. That clause means a small leak you ignored for six months may not be covered when it finally causes serious damage. Insurers call this “failure to maintain,” and it is one of the most common reasons commercial roof claims get denied.
Document every inspection, every repair, and every contractor visit in writing. When you file a claim, your adjuster needs a timeline that shows you acted promptly. Coordinate your repair schedule with the adjuster before work begins. Starting repairs before the adjuster inspects can complicate your claim.
How do you repair common commercial roof leaks step by step?
The repair method depends on the leak source. These steps apply to the most common scenarios on flat commercial roofs.
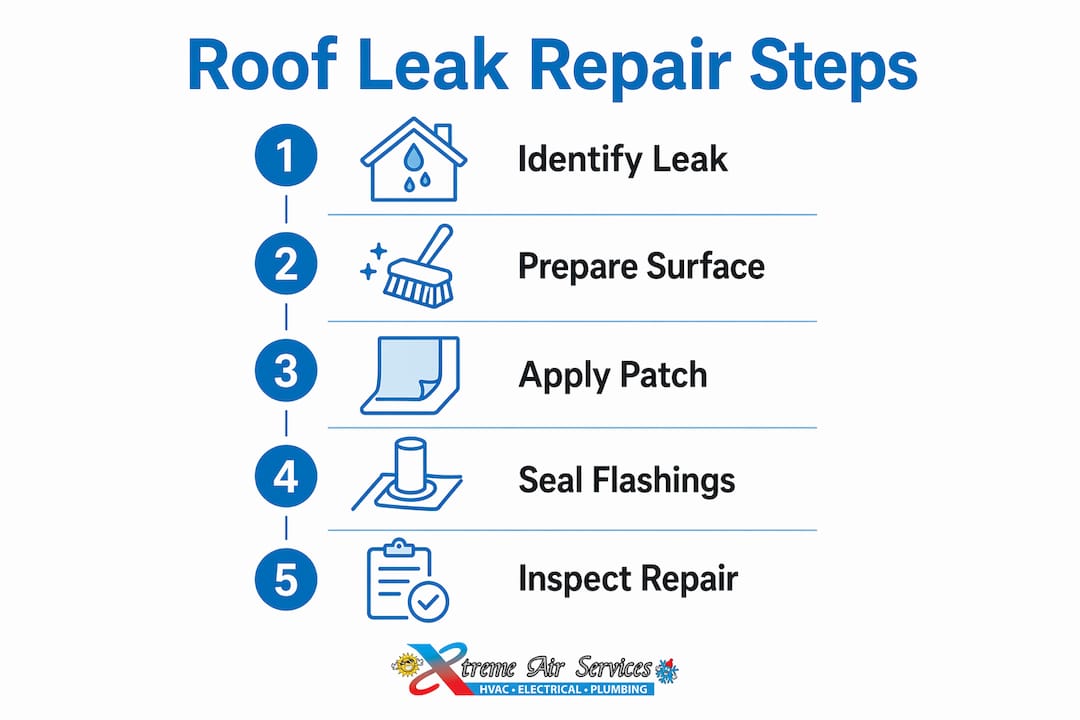
- Clear and clean the repair area. Remove debris, standing water, and any loose membrane material. Clean, dry surfaces are the single most important factor in repair adhesion and durability. Applying sealant or a patch to a dirty or wet surface guarantees early failure.
- Inspect the full damage zone. Do not patch only the visible hole. Check a 12-inch radius around the defect for soft spots, delamination, or additional cracks.
- Cut out damaged membrane sections. For membrane repairs, cut a clean square or rectangle around the damaged area. Ragged edges create weak points in the patch.
- Apply the appropriate patch material. Match the patch to your existing membrane. TPO membranes use heat-welded TPO patches. EPDM membranes use EPDM tape or bonding adhesive. Modified bitumen uses torch-applied or self-adhering cap sheets.
- Seal all penetrations and flashings. Use a compatible roof sealant around pipe boots, HVAC curbs, and flashing edges. Apply in smooth, continuous beads without gaps.
- Inspect the repair under simulated rain. Run water over the repaired area and check the interior. Confirm the fix before closing up.
The table below shows the most common leak sources and the corresponding repair approach.
| Leak source | Repair method | Key material |
|---|---|---|
| Damaged membrane | Cut and patch | TPO, EPDM, or modified bitumen patch |
| Open pipe penetration | Reseal boot and flange | Compatible roof sealant |
| Flashing separation | Re-adhere and seal | Flashing cement or sealant tape |
| Membrane seam failure | Re-weld or re-bond seam | Heat weld or seam tape |
| Ponding water zone | Improve drainage, patch membrane | Drain insert, membrane patch |
Common mistakes to avoid: Never apply a new layer of sealant over an old, cracked layer without removing the old material first. Never repair a roof during rain or when temperatures are below the sealant manufacturer’s minimum application temperature. Both errors produce repairs that fail within weeks.
For property managers who also manage rooftop mechanical equipment, rooftop HVAC unit servicing often reveals early membrane damage around equipment curbs before it becomes a leak.
How do you prevent roof leaks from coming back?
Prevention costs a fraction of what emergency repairs cost. The math is straightforward: a scheduled inspection finds a failing flashing seal for a few hundred dollars. The same failure, left alone, becomes a water-damaged ceiling, ruined inventory, and a potential mold problem. Water damage and mold remediation after a neglected commercial roof leak can run into thousands of dollars and weeks of disruption.
The core preventive maintenance practices for commercial roofs are:
- Schedule bi-annual professional inspections. Spring and fall are the standard timing. Spring catches winter damage before summer heat stresses the membrane further. Fall prepares the roof for rain and freeze cycles.
- Inspect after every significant storm. High winds, hail, and heavy rain create damage that does not always show up immediately inside the building.
- Clear drains and gutters every quarter. Blocked drainage causes ponding water, which is the leading accelerant of membrane deterioration on flat roofs.
- Walk the roof yourself monthly. You do not need to be a roofing expert to spot obvious debris accumulation, standing water, or visible membrane damage.
- Repair minor damage immediately. A small blister or a hairline crack in a seam costs almost nothing to fix. Left alone, it becomes a full membrane replacement.
Pro Tip: Build your roof inspection schedule into the same calendar as your commercial HVAC preventive maintenance. Both systems live on the roof, and a single site visit can cover both. That coordination saves time and catches problems that affect both systems.
Seasonal alignment matters more than most property managers realize. Scheduling a membrane inspection in october before the first freeze means you catch open seams before water gets in, freezes, and expands the gap by spring. That single timing decision can add years to a roof’s service life.
Key Takeaways
A roof leak commercial building fix succeeds only when leak detection, immediate damage control, correct repair technique, and scheduled preventive maintenance all work together as a system.
| Point | Details |
|---|---|
| Detect before you repair | Trace water to its entry point on the roof, not just the interior drip location. |
| Act fast on damage control | Move inventory, place buckets, and tarp carefully within the first hour of a confirmed leak. |
| Match repair to membrane type | TPO, EPDM, and modified bitumen each require different patch materials and methods. |
| Protect your insurance position | Document every inspection and repair in writing to avoid gradual-damage claim denials. |
| Inspect twice a year, minimum | Bi-annual professional inspections plus post-storm checks are the industry standard for flat commercial roofs. |
What I’ve learned from watching property managers handle roof leaks
The biggest mistake I see property managers make is treating a roof leak as a one-time event rather than a symptom. They fix the visible damage, file the claim, and move on. Six months later, the same section of roof fails again because nobody asked why the flashing failed in the first place.
The second most common mistake is waiting too long to call a professional. I understand the instinct to handle it internally. But a roof leak that looks minor from the inside can represent significant membrane failure on the exterior. By the time water is dripping onto your ceiling tiles, it has already traveled through insulation, decking, and possibly structural components. The interior damage is the last thing that happens, not the first.
The property managers who handle this well share one habit: they treat the roof like any other piece of critical building equipment. They schedule it, document it, and budget for it. They also know the difference between a repair a qualified maintenance technician can handle and one that requires a licensed commercial roofing contractor. Minor sealant touch-ups around a pipe boot? A competent maintenance tech can manage that with the right materials. A membrane seam failure spanning 15 feet? That is a contractor call, every time.
One more thing worth saying directly: the water damage restoration side of a roof leak is often more expensive than the roof repair itself. Mold grows fast in commercial spaces with poor air circulation. If water has been sitting in your ceiling assembly for more than 48 hours, get a remediation assessment before you close up the ceiling. That step protects your tenants, your liability exposure, and your building’s long-term value.
— Xtreme
Xtremeairservices supports commercial property managers year-round
Commercial property managers need a service partner who understands that a building’s systems do not operate in isolation. A roof leak affects your HVAC performance, your air quality, and your electrical systems. Xtremeairservices provides roofing inspection and repair alongside HVAC, electrical, and plumbing services for commercial properties.

When a leak hits, you need one call that covers the full scope of damage. Xtremeairservices handles emergency roof repairs, coordinates with your insurance adjuster, and integrates roof care into your building maintenance plan so the next storm does not catch you off guard. Contact Xtremeairservices to schedule a commercial roof inspection or request emergency service today.
FAQ
How do I find where a commercial roof is leaking?
Start by marking all interior signs of water intrusion, then inspect the roof surface directly above those areas, focusing on flashings, penetrations, and membrane seams. When the source is unclear, a controlled water test or infrared thermography pinpoints the entry point.
How long does a commercial roof repair take?
Most localized repairs, such as patching a membrane section or resealing a flashing, take one to two days. Larger repairs involving multiple leak sources or significant membrane replacement can take several days depending on weather and material availability.
Does commercial property insurance cover roof leaks?
Coverage depends on the cause and how quickly you reported the damage. Many policies exclude gradual damage, so leaks that developed slowly over time may not be covered. Prompt reporting and documented maintenance records strengthen your claim.
Can I repair a commercial roof leak myself?
Minor sealant touch-ups around pipe boots or small cracks are manageable with the right materials and a dry surface. Any repair involving membrane seams, flashings, or structural components requires a licensed commercial roofing contractor to protect your warranty and insurance coverage.
How often should a commercial flat roof be inspected?
Professional inspections twice yearly, in spring and fall, are the industry standard for commercial flat roofs. Additional inspections after significant storms catch storm-related damage before it develops into a full leak.