

If your thermostat isn’t working, start here: replace the batteries, check the HVAC breaker and the power switch on your furnace or air handler, confirm the thermostat is set to the right mode and temperature, then wait up to 10 minutes for any compressor protection delay to clear. These four steps resolve the majority of thermostat failures without touching a single wire.
Before you go further, one safety rule: do not open your furnace or air handler panels, and do not touch any wiring, unless the power is completely off and you are comfortable working around electrical components. When in doubt, stop and call a licensed HVAC technician.
Quick checks you can do right now:
- Replace batteries. Even if the display looks fine, weak batteries cause erratic behavior and blank screens.
- Check the breaker. Find your electrical panel and look for a tripped breaker labeled “furnace,” “air handler,” or “HVAC.”
- Confirm the HVAC power switch. There is usually a light-switch-style toggle on or near the furnace or air handler — make sure it is on.
- Check thermostat mode and setpoint. The mode must be set to Heat or Cool (not “Off” or “Fan Only”), and the setpoint must be at least 3°F above (for heat) or below (for cool) the current room temperature.
- Wait out the compressor delay. Most systems have a 5–10 minute lockout after a power interruption to protect the compressor. If the display shows “Cool On” but nothing runs, wait and listen.
- Look at the furnace door. A safety switch on the furnace access panel cuts power if the door is ajar. Push it firmly closed.
Energy notes that incorrect mode and setpoint settings are among the most common reasons a thermostat appears to malfunction when the equipment itself is fine.
Key Takeaways
Most thermostat failures trace back to a handful of fixable causes: dead batteries, a tripped breaker, a triggered safety switch, or a wiring issue after a thermostat swap — and a 10-minute checklist rules out all of them before you need a pro.
| Point | Details |
|---|---|
| Start with power checks | Replace batteries, reset the breaker, and confirm the furnace power switch before any other step. |
| Blank screen is usually power-related | Dead batteries, a blown low-voltage fuse, or a tripped breaker cause most blank thermostat displays. |
| Display on but no HVAC response | Wait 5–10 minutes for the compressor delay, then check the outdoor disconnect and condensate float switch. |
| C-wire matters for smart thermostats | Missing or loose C-wire causes intermittent reboots and blank screens on Nest, Amazon, and similar units. |
| Xtremeairservices for Dallas-area repairs | Licensed HVAC technicians available for same-day diagnostics, thermostat replacement, and electrical repairs in the Dallas, TX area. |
Table of Contents
- Is your thermostat not working? Follow this 10-minute checklist first
- What a blank or black thermostat screen is telling you
- Display is on but your HVAC won’t start — what to check next
- Wiring, C-wire needs, and compatibility after a thermostat swap
- When to power-cycle, reboot, or factory reset your thermostat
- When should you call a licensed HVAC professional?
- Brand-specific troubleshooting for Honeywell, Nest, Amazon, and Trane
- What HVAC technicians actually see most often
- Xtremeairservices handles thermostat and HVAC problems in the Dallas area
- Sources
- FAQ
Is your thermostat not working? Follow this 10-minute checklist first
Work through these steps in order. Each one rules out a cause before you move to the next.
- Check the display. Is it blank, dim, or showing an error? Note exactly what you see — it matters for diagnosis.
- Replace batteries. If your thermostat takes batteries (AA, AAA, or 3V lithium), swap them for fresh ones even if the display is on. Low batteries cause missed calls to the HVAC system.
- Check the HVAC breaker. Go to your electrical panel. If the breaker is tripped (sitting between On and Off), switch it fully Off, then back On. A breaker that trips again immediately means a wiring or equipment problem — call a pro.
- Locate and check the furnace/air-handler power switch. It looks like a standard light switch, usually mounted on the wall near the unit or on the unit itself. Flip it off and back on.
- Confirm the furnace access door is fully closed. The door safety switch cuts all power to the thermostat circuit when the panel is open or loose. Press it firmly shut.
- Set the correct mode and setpoint. Switch to Heat or Cool, set the temperature at least 3°F beyond the current room reading, and wait 2 minutes.
- Wait for the compressor delay. After any power interruption, most systems lock out the compressor for 5–10 minutes. If the display shows a call for cooling but the outdoor unit is silent, this is normal. Wait, then listen for the condenser fan to start.
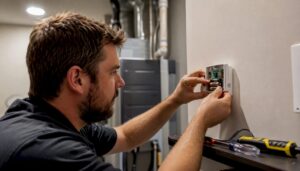
- Do a quick visual wire check. With the thermostat face plate removed (power off first), look for any wire that has slipped out of its terminal. Do not pull or reconnect wires unless you are confident — just note what you see.
Pro Tip: To tell whether your thermostat runs on batteries or a C-wire (common wire), look at the back of the thermostat. If you see a wire seated in a terminal labeled “C,” it draws power from the HVAC system. No C terminal or an empty C terminal usually means it runs on batteries. Smart thermostats like the Google Nest and Amazon Smart Thermostat often need a C-wire for reliable operation.
Before calling a technician, write down: the thermostat model number, what the display shows, which steps you tried, and any recent events (power outage, new thermostat install, recent HVAC service). That information cuts diagnostic time significantly.
What a blank or black thermostat screen is telling you
A blank thermostat screen is almost always a power problem. Honeywell’s troubleshooting guide lists dead batteries, a tripped breaker, a furnace/air-handler switch that is off, and a blown low-voltage fuse as the most frequent causes — and recommends checking them in that order before anything else.
| Display symptom | Most likely cause | DIY check | Call a pro when |
|---|---|---|---|
| Completely blank | Dead batteries or no 24V power | Replace batteries; check breaker and furnace switch | Breaker trips again after reset |
| Dim or flickering | Weak batteries or intermittent C-wire connection | Replace batteries; reseat thermostat on wall plate | Display stays dim after fresh batteries |
| Intermittent on/off | Loose wire at thermostat or control board | Visual check of terminals (power off) | Wires look damaged or corroded |
| Blank after new install | Missing or disconnected C-wire | Confirm C-wire is seated; check compatibility | System still dead after C-wire confirmed |
How to check the furnace control board fuse
The furnace control board carries a small automotive-style fuse, typically rated 3A or 5A. A blown fuse will cut 24V power to the thermostat entirely, leaving the display blank even with fresh batteries. To find it: turn off power to the furnace at the breaker and the power switch, open the furnace access panel, and look for a small colored fuse clipped to the control board. A blown fuse has a visibly broken filament inside.
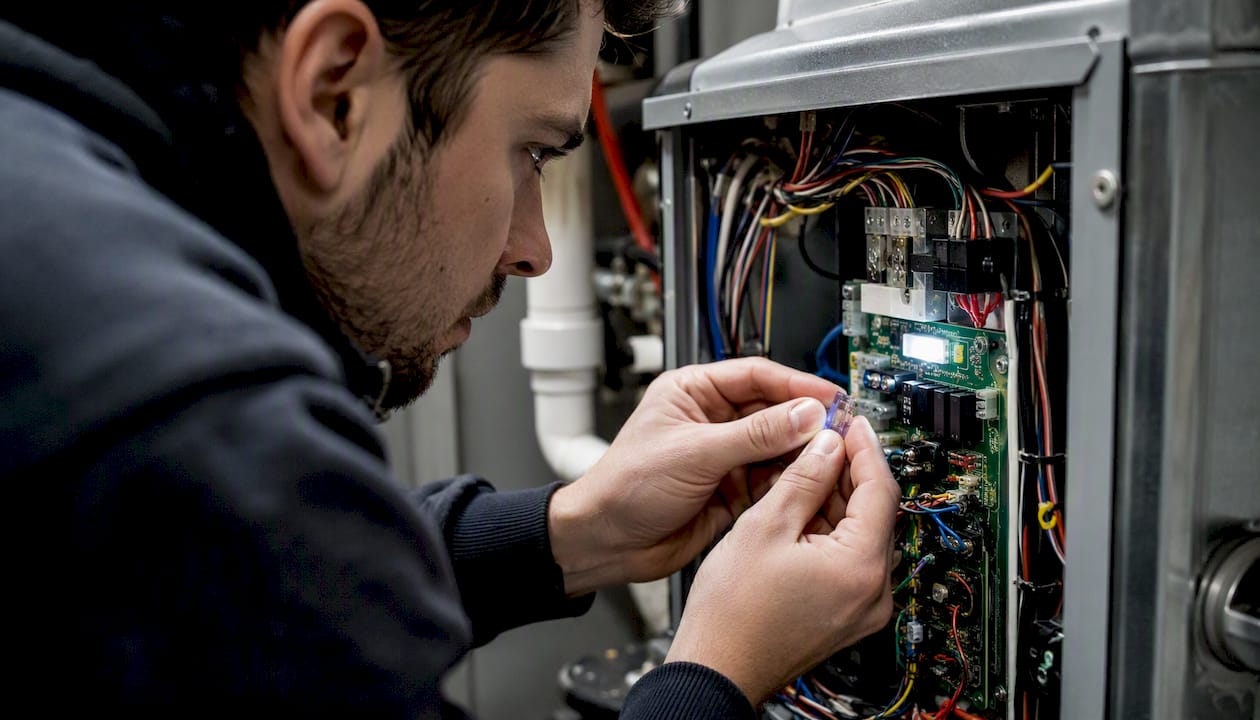
Do not replace the fuse unless you are comfortable working inside the furnace cabinet. A fuse that blows repeatedly signals a short circuit somewhere in the low-voltage wiring — that requires a technician, not another fuse.
Pro Tip: Before removing the thermostat face plate, take a photo of the wiring. It takes 10 seconds and saves you from a frustrating reconnection puzzle later.
Honeywell, Trane, Amazon Smart Thermostat, and Nest all publish model-specific blank-screen guidance. Trane’s support page specifically recommends confirming the display is fully seated on its wall plate before assuming a power fault — a thermostat that has been bumped slightly off its base will lose contact and go blank.
Display is on but your HVAC won’t start — what to check next
When the thermostat shows “Heat On” or “Cool On” but the furnace or air conditioner does not respond, the thermostat is doing its job. The problem is downstream. Carrier’s troubleshooting guidance identifies tripped breakers, clogged filters, and triggered safety switches as the most common equipment-side causes when the thermostat display is active but the system won’t run.
Work through these checks before calling for service:
- Wait 5–10 minutes. Compressor protection delays are built into every modern air conditioner and heat pump. After a power blip, the system will not run the compressor immediately — this is normal and not a fault.
- Check the outdoor disconnect. There is a weatherproof box mounted on the exterior wall near the condenser. Open it and confirm the disconnect block or fuse is seated. A pulled disconnect cuts power to the outdoor unit entirely.
- Inspect the condensate float switch. On cooling systems, a float switch in the drain pan shuts the system down if the condensate line is clogged and water backs up. Check the pan under the air handler for standing water. A clogged drain line is a common cause of a thermostat showing “Cool On” with no equipment response — and it is a home AC maintenance item you can address yourself with a wet/dry vacuum on the drain line.
- Check the air filter. A severely clogged filter can trigger the furnace high-limit switch, which shuts the burner off as a safety measure. Replace the filter, then press the high-limit reset button (a small red button on the furnace, usually accessible without tools).
- Listen and smell. A burning smell or visible smoke means shut the system off immediately and call a professional. No exceptions.
Red flags that require immediate professional service: burning smell, repeated breaker trips, the outdoor unit hums but the fan does not spin, or the furnace ignites briefly then shuts off repeatedly. Short cycling like that often points to a high-limit or pressure switch problem, not the thermostat.
When you call a technician, report: what the display shows, whether you heard any sounds from the equipment, how long the problem has been happening, and whether anything changed recently (new filter, power outage, recent service).
Wiring, C-wire needs, and compatibility after a thermostat swap
Wiring problems are the number-one cause of a thermostat that seems dead after a DIY replacement. A wire that looks connected but is not fully seated in its terminal, a missing C-wire on a smart thermostat, or an incompatible system type will all produce blank screens, erratic behavior, or a unit that simply will not run.
The five wires you are most likely to encounter:
- R (red): 24V power from the transformer — always required.
- C (blue or black): Common wire, completes the 24V circuit. Required for most smart thermostats.
- W (white): Calls for heat.
- Y (yellow): Calls for cooling.
- G (green): Controls the fan.
ENERGY STAR notes that some smart thermostat models require a C-wire for reliable power. Without it, the thermostat may charge intermittently, display random reboots, or fail to maintain a Wi-Fi connection.
| Thermostat type | Typical power source | Common failure mode |
|---|---|---|
| Battery-powered digital | AA/AAA batteries | Blank screen from dead batteries; no C-wire needed |
| Hardwired digital (no battery) | 24V via R and C wires | Blank screen if C-wire is loose or transformer fails |
| Smart thermostat | 24V via C-wire (preferred) | Intermittent reboots or blank screen without C-wire |
C-wire adapter vs. professional C-wire install
If your system has no C-wire and you want to run a smart thermostat, you have two options. A C-wire adapter (sometimes called a “power stealing” adapter or a dedicated add-a-wire kit like the Venstar Add-A-Wire) can be installed at the furnace control board without running new wire. It works well on most conventional systems. A full C-wire pull from the furnace to the thermostat is the cleaner, more reliable solution and usually requires professional installation.
Pro Tip: If your new smart thermostat keeps rebooting or shows a low-battery warning even when wired, a missing or poorly connected C-wire is the most likely cause — not a defective unit.
When to power-cycle, reboot, or factory reset your thermostat
Try steps in this order: power-cycle first, soft reboot second, factory reset only when you have ruled out hardware causes and are prepared to re-enter all your settings.
- Power-cycle the thermostat. Remove it from the wall plate (or pull the batteries), wait 30 seconds, then reinstall. This clears temporary software errors without erasing settings.
- Power-cycle the HVAC system. Turn off the furnace/air-handler power switch, wait 60 seconds, then turn it back on. This resets safety switches and clears compressor delay timers.
- Soft reboot (model-specific). Many digital thermostats have a recessed reset button accessible with a paperclip. Check your model’s manual or the manufacturer’s support page for the exact location and hold time.
- Factory reset. This erases all schedules, Wi-Fi credentials, and settings. Use it only when you suspect corrupted programming is causing the malfunction — not as a first step. On most smart thermostats, the factory reset option is buried in the Settings menu. Have your Wi-Fi password and app login ready before you start.
When replacement makes more sense than resetting:
- The thermostat is 10 or more years old and has had repeated failures.
- Physical damage is visible (cracked screen, burn marks, melted plastic).
- The unit is incompatible with your current HVAC system after an equipment upgrade.
- You have completed all power and wiring checks and the display remains blank.
Pro Tip: Before a factory reset on a Honeywell or Nest thermostat, screenshot your current schedule in the app. Rebuilding a week’s worth of programming from memory is more frustrating than the original problem.
Honeywell, Nest, Amazon, and Trane all publish model-specific reset sequences on their support pages — the steps vary enough between models that following the generic sequence can occasionally cause more confusion than it solves.
When should you call a licensed HVAC professional?
Stop DIY and call a pro when you see any of these: exposed or frayed wiring, a breaker that trips again after reset, a burning smell or visible smoke, a blown low-voltage fuse that keeps blowing, or a furnace that short-cycles repeatedly. These are not thermostat problems — they are electrical or equipment faults that require a licensed technician.
What a technician will check on arrival:
- Multimeter reading at the thermostat terminals (should read 24–28V between R and C)
- Fuse condition on the furnace control board
- Transformer output voltage (a failed transformer reads 0V)
- Control board for error codes or visible burn marks
- Float switch and condensate drain condition
- Refrigerant pressure and outdoor unit operation (for cooling calls)
Rough cost ranges for common repairs (these are ballpark figures; actual costs vary by market and contractor):
- Diagnostic fee: $75–$150, often applied toward the repair if you proceed.
- Low-voltage fuse replacement: $50–$100 parts and labor.
- Transformer replacement: $100–$250 parts and labor.
- Control board replacement: $200–$600 depending on the system.
- Thermostat replacement (pro-installed): $150–$500 depending on model and wiring complexity.
These ranges reflect typical Dallas-area pricing; costs in other markets will differ. Always get a written quote before authorizing work.
Pro Tip: Tell the dispatcher exactly what you tried before calling — batteries replaced, breaker reset, steps taken. A technician who arrives knowing what has already been ruled out can skip straight to the electrical checks and cut your diagnostic time in half.
If you smell burning or see smoke, turn the system off at the breaker immediately and call. Do not attempt to reset or restart the equipment.
Brand-specific troubleshooting for Honeywell, Nest, Amazon, and Trane
Each of these brands has distinct failure modes worth knowing before you start pressing buttons.
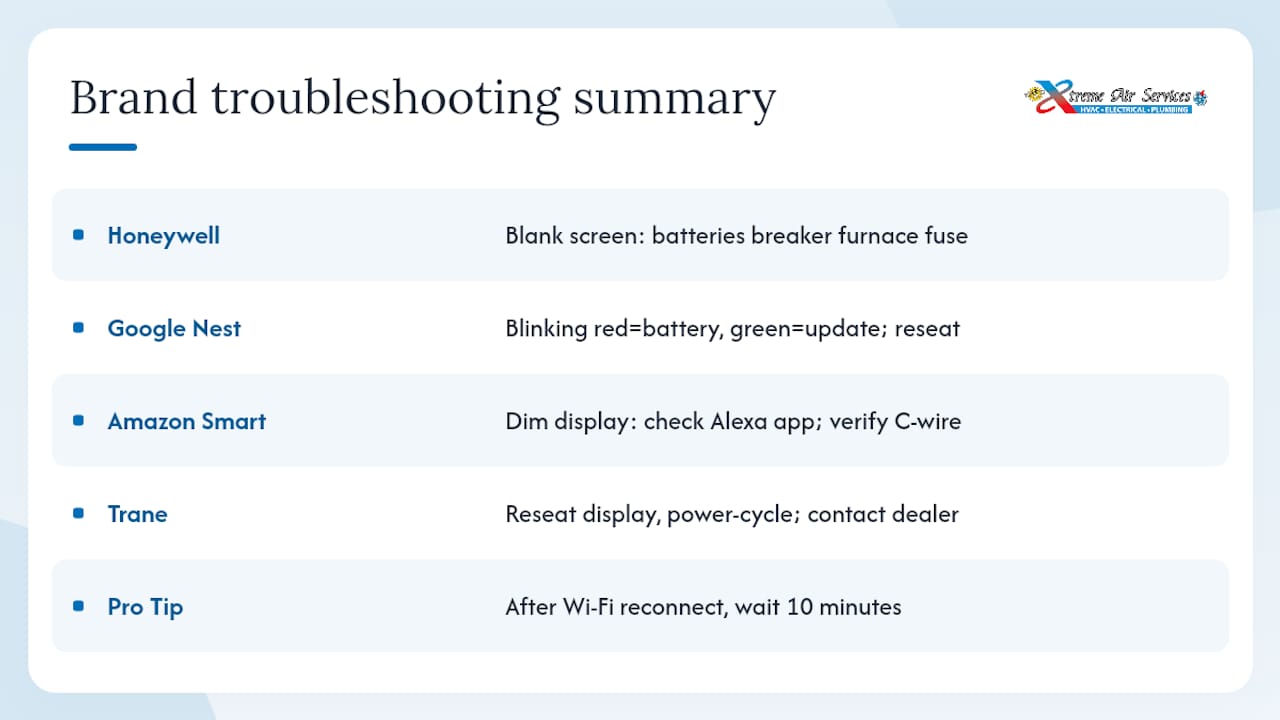
Honeywell thermostats are the most common in U.S. homes and have a well-documented blank-screen sequence: dead batteries, then breaker, then furnace door safety switch, then blown low-voltage fuse. The “Cool On” flashing message on Honeywell units is not a fault — it is the compressor protection delay, and it clears on its own within 5 minutes. Honeywell’s troubleshooting guide covers these steps in detail.
Google Nest thermostats communicate their status through blinking lights. Google’s Nest troubleshooting documentation explains that a blinking red light typically signals a low battery or charging problem, while blinking green usually means a firmware update is in progress. If the display is completely unresponsive, try pressing the display firmly onto the base to reseat the connection. Some older Nest models support a USB charging trick: remove the display, connect it to a USB charger for 30 minutes, then reinstall.
Amazon Smart Thermostat displays can dim significantly in low-power states, which homeowners sometimes mistake for a blank screen. Check the brightness setting in the Alexa app first. The Amazon unit is designed to work with a C-wire adapter (included in the box), and Amazon’s support page walks through wiring verification and app-based diagnostics if the display stays dim or the unit won’t connect.
Trane thermostats, including the Trane XL and ComfortLink II series, respond well to a full power-cycle. Trane’s support page recommends confirming the display is fully seated on its wall plate as the first step for any blank or white screen, followed by cycling power at the breaker. If the screen stays blank after a power-cycle, Trane recommends contacting an authorized dealer rather than attempting internal repairs.
Pro Tip: Smart thermostat firmware updates can temporarily freeze the display for several minutes. If your Nest or Amazon thermostat went unresponsive after a Wi-Fi reconnection, wait 10 minutes before assuming a hardware fault.
What HVAC technicians actually see most often
The most common causes pros encounter are power issues (tripped breaker or blown fuse), safety switch triggers (float switch or high-limit), and wiring or compatibility problems after a homeowner thermostat swap. Sensor drift and control board failures exist but are far less frequent than those three.
What a technician checks on arrival:
- 24V reading between R and C at the thermostat terminals
- Fuse condition on the control board (visual and multimeter)
- Transformer output
- Float switch and condensate pan water level
- Air filter condition and high-limit reset status
Checklist to complete before the tech arrives:
- Write down the thermostat model number (on the back of the unit or in the app).
- Note every step you already tried and what happened.
- Clear a path to the furnace or air handler — move boxes, open closet doors.
- Replace the air filter if it has not been changed recently. A dirty filter is a billable finding that you can eliminate for $10–$20.
- Take a photo of the thermostat wiring before the tech arrives, especially if you recently replaced the unit.
Seasonal transitions are when most thermostat calls come in — the first hot day of summer or the first cold snap of fall. Preparing your furnace before the cold season and running a quick seasonal HVAC prep checklist catches most of these issues before they become emergency calls. Proactive property maintenance checks apply the same logic: catching small faults before they cascade.
Xtremeairservices handles thermostat and HVAC problems in the Dallas area
When the checklist is done and the system still won’t run, or when you hit a red flag like a burning smell, a repeatedly tripped breaker, or a blown control board fuse, the right move is a professional diagnostic — not another reset attempt.
Xtremeairservices dispatches licensed HVAC technicians across the Dallas, TX area for same-day diagnostics, thermostat replacement, low-voltage electrical repairs, and full HVAC system checks. A technician arrives with a multimeter, replacement fuses, and the tools to test transformer output and control board function on the spot. No guessing, no parts-ordered-and-rescheduled delays for common repairs.
For homeowners who want to stay ahead of thermostat and equipment failures, Xtremeairservices HVAC maintenance plans include seasonal inspections that cover wiring condition, safety switch tests, filter replacement, and control board checks — the exact items that prevent most emergency calls. If your thermostat issue points to an electrical fault, the team also handles residential electrical services in Dallas under the same roof.
Schedule online or call to book a diagnostic visit. Have your thermostat model number and a quick summary of what you tried ready — it speeds up the call and gets a tech to your door faster.
Sources
Manufacturer support pages and government guidance for model-specific steps and energy best practices:
- Honeywell Thermostat Not Working
- Trane support: My Thermostat is Blank/Has a White or Black Screen
- Google Nest thermostat troubleshooting
- Common thermostat issues and how to troubleshoot | Carrier
FAQ
Is there a reset button on a thermostat?
Many thermostats have a small recessed reset button, accessible with a paperclip, though the location varies by model. Check your thermostat’s manual or the manufacturer’s support page for the exact location and hold time.
How do I know if my thermostat is broken?
If the display stays blank after fresh batteries and a breaker reset, or if the thermostat calls for heat or cool but the HVAC never responds after 10 minutes, the thermostat itself may be faulty. Ruling out power, wiring, and safety-switch causes first is the only way to confirm the thermostat is the problem and not the equipment.
Why is my thermostat running but not heating?
The most common reasons are a triggered furnace high-limit switch (often caused by a clogged filter), a tripped breaker to the furnace, or a condensate float switch that has cut power to the system. Check the filter, reset the high-limit button on the furnace, and confirm the furnace breaker is on.
How do I reset an unresponsive thermostat?
Remove the thermostat from its wall plate (or pull the batteries), wait 30 seconds, then reinstall it. If it remains unresponsive, cycle power to the HVAC system at the breaker for 60 seconds. For a full factory reset, use the Settings menu on smart thermostats — but have your Wi-Fi password and app credentials ready before you start, since all schedules and settings will be erased.