
Preparing your HVAC system for winter means the proactive maintenance tasks that keep your heating equipment safe, efficient, and reliable before cold weather arrives. Done right, this process lowers your energy bills, prevents emergency breakdowns, and keeps every room consistently warm.
The core areas to address are air filters, ductwork, thermostat settings, the furnace, and your outdoor AC unit. A professional tune-up ties all of it together.
This guide walks you through every step, from what you can do yourself to when you need a technician.
What are the essential DIY steps to prepare your HVAC system for winter?
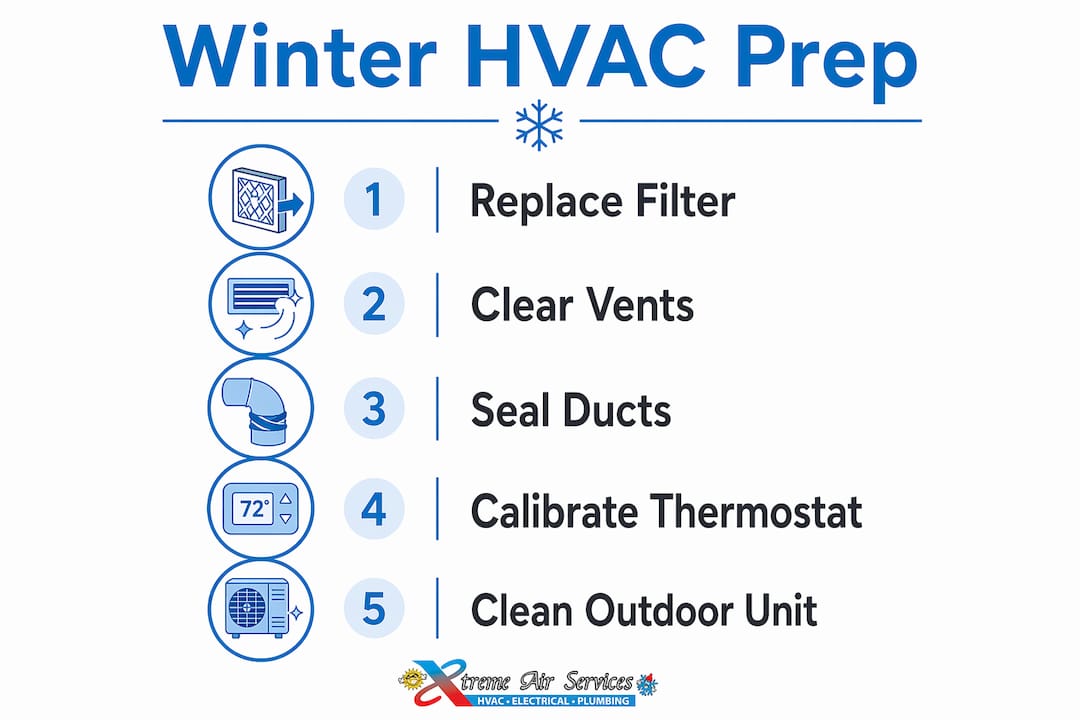
The essential DIY steps are replacing your filter, clearing vents, sealing ducts, testing your thermostat, and prepping the outdoor unit. Winter HVAC preparation starts with the tasks you can handle yourself.
These steps take a few hours and cost very little, yet they prevent the most common causes of heating failures.
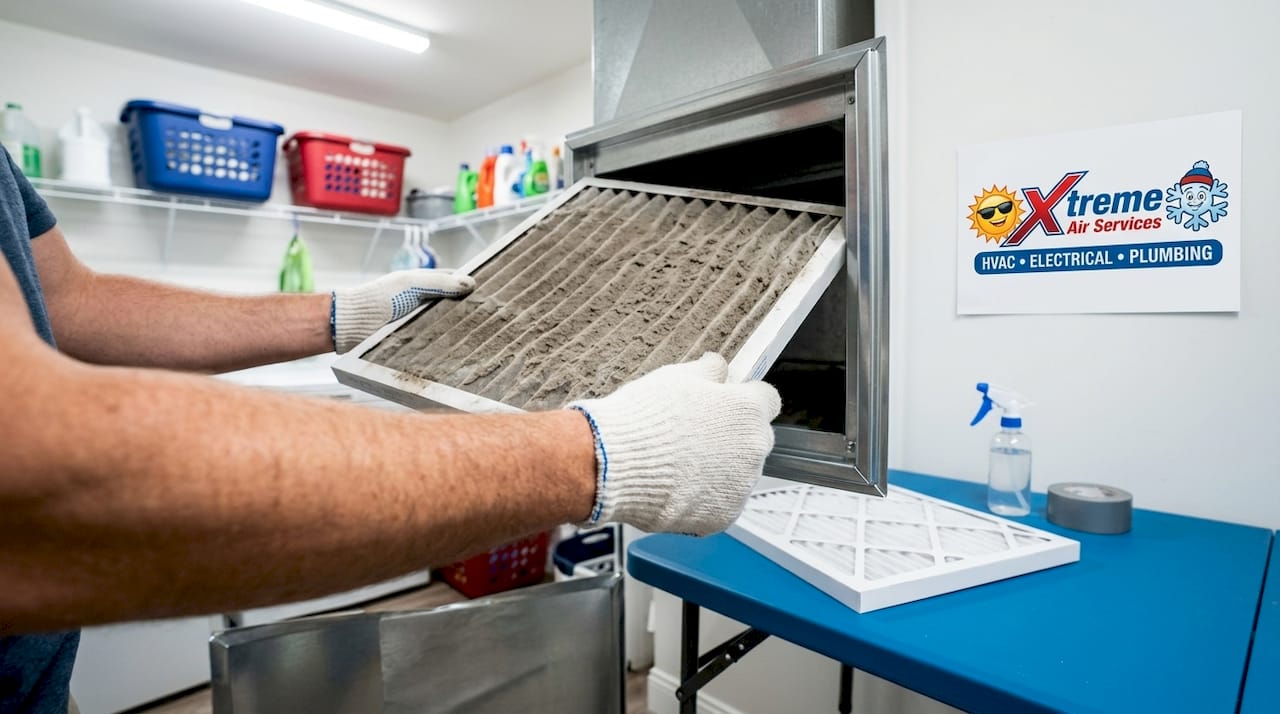
Step 1: Replace or upgrade your air filter
Replace or upgrade your air filter first, because a clogged filter is the single most common cause of reduced airflow and overheating in furnaces. A dirty filter forces your system to work harder, which drives up your energy bill and shortens equipment life.
Follow a simple replacement schedule during heating season:
- Replace filters every 60 to 90 days during heating season.
- Do a visual check every 30 days.
- Swap filters every 30 to 60 days if you have pets or allergy sufferers.
Choose the right filter rating, too. MERV 8 to MERV 11 filters from brands like Filtrete or Nordic Pure balance air quality and airflow well for most homes.
Step 2: Clear all vents and registers
Clear all vents and registers by walking every room and confirming that furniture, rugs, and curtains are not blocking supply or return vents. Blocked vents create pressure imbalances that cause uneven heating and strain the blower motor. This takes ten minutes and costs nothing.
Step 3: Inspect and seal ductwork
Inspect and seal your ductwork, because duct leaks let warm air escape before it reaches living spaces. That creates uneven heating and wasted energy.
Check accessible ducts in your attic, basement, or crawl space for visible gaps, holes, or disconnected joints. Seal any leaks with metallic foil tape, not standard duct tape, which degrades quickly under heat. This is one of the highest-return DIY fixes a homeowner can make.
Step 4: Test and calibrate your thermostat
Test and calibrate your thermostat by turning on your heating system at least two weeks before the first hard freeze. This gives you time to catch problems before temperatures drop.
Run a quick heat-mode check:
- Set the thermostat to heat mode.
- Raise it five degrees above room temperature.
- Confirm warm air comes out of the vents within a few minutes.
If your thermostat reads inaccurately, a simple recalibration or battery replacement often fixes it.
Step 5: Clear debris from your outdoor AC unit
Clear debris from your outdoor AC unit by removing leaves, twigs, and dirt from around the condenser before you cover it for winter. Leave at least two feet of clearance on all sides.
Cover only the top of the unit with a breathable, manufacturer-approved cover. This blocks ice and debris while still letting moisture escape.
Pro Tip: Never use a plastic tarp to cover your outdoor AC unit. Plastic traps moisture and creates a warm, dark environment that attracts rodents looking for a winter home.
Here is a quick reference checklist for your DIY winter prep:
- Replace air filter (check MERV rating for your household needs)
- Clear and unblock all supply and return vents
- Inspect accessible ductwork and seal leaks with metallic foil tape
- Test thermostat in heat mode before the first freeze
- Clean and cover outdoor AC unit with a breathable cover
- Check carbon monoxide detector batteries near your furnace
For a deeper look at furnace-specific tasks, the furnace winterizing guide from Xtremeairservices covers additional steps specific to gas and electric furnaces.
Why and how should you schedule a professional HVAC inspection before winter?
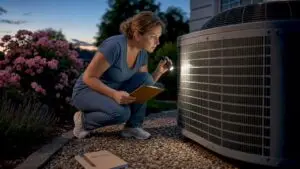
Schedule a professional HVAC inspection in the fall, before heavy heating use begins. DIY steps handle the surface, but a professional inspection handles everything underneath.
Fall tune-ups before heavy heating use are the industry standard for catching hidden issues early. Most HVAC professionals recommend two tune-ups per year, with fall focused on the heating system.
Costs typically run between $75 and $200. That is a fraction of what an emergency repair or replacement costs mid-January.
What a technician checks that you cannot
A technician checks components that require tools and expertise to evaluate safely. Professional inspections cover heat exchangers, refrigerant levels, and safety switches that are invisible to the average homeowner.
A cracked heat exchanger, for example, can leak carbon monoxide into your home without any obvious signs. Technicians also clean evaporator and condenser coils, test electrical connections, and verify that the ignition system fires correctly.
Here is what a standard fall HVAC tune-up covers:
- Heat exchanger inspection for cracks or corrosion
- Electrical component testing, including capacitors and contactors
- Refrigerant level check and leak detection
- Coil cleaning for both evaporator and condenser
- Duct inspection for leaks, blockages, or disconnections
- Safety switch and limit control testing
- Lubrication of moving parts in the blower assembly
Proactive maintenance decreases breakdowns and extends the working life of your system. That is not just a selling point. Systems that receive annual tune-ups consistently outlast neglected ones by several years.
How to prepare for your technician visit
Prepare for your technician visit by writing down every unusual symptom your system showed last season. A written log of past HVAC issues speeds up diagnosis and helps the technician prioritize what to check first.
Note details like:
- Odd noises during operation
- Burning smells
- Rooms that stayed cold
- Thermostat readings that seemed off
Pro Tip: Schedule your fall tune-up in September or early October. By November, most HVAC companies are fully booked, and you risk waiting weeks for an appointment when your heat is already failing.
How to optimize thermostat settings and home insulation for winter efficiency
Optimize winter efficiency by pairing smart thermostat settings with better home insulation. Smart thermostat use is one of the fastest ways to reduce your heating bill without sacrificing comfort.
The Department of Energy recommends 68°F as the baseline winter temperature when you are home and awake. Dropping the setting by 7 to 10 degrees when you are away or asleep produces meaningful savings and still keeps the house comfortable.
The case for programmable and smart thermostats
A programmable thermostat makes the strongest case by removing the temptation to constantly adjust the temperature, which causes real damage. Constantly adjusting your thermostat during extreme cold increases wear on the system and reduces efficiency.
Smart thermostats like the Google Nest or Ecobee learn your schedule and adjust automatically. Models with programmed schedules can save up to 10% annually on heating costs, which adds up over a full winter season.
The benefits of programmable thermostats go beyond convenience. They protect your equipment by maintaining steady operating conditions.
Insulation and air sealing reduce your HVAC’s workload
Insulation and air sealing reduce your HVAC’s workload by keeping warm air from escaping through gaps in your home’s envelope. Your system can only do so much when heated air leaks out.
Check weatherstripping around exterior doors and replace any sections that are cracked or compressed. Apply rope caulk or foam backer rod to gaps around window frames. Pay special attention to the attic hatch, one of the most commonly overlooked air leaks in homes.
Here is a quick insulation checklist:
- Inspect weatherstripping on all exterior doors
- Seal window frame gaps with rope caulk or foam backer rod
- Check attic hatch for gaps and add insulation if needed
- Confirm that attic insulation meets the R-value recommended for your climate zone
- Seal penetrations around pipes and wires entering from outside
Proper insulation does not just save money. It eliminates the cold spots and drafts that make rooms feel uncomfortable even when the thermostat reads 70°F.
What are common HVAC winter problems and how do you troubleshoot them?
Common winter HVAC problems fall into four predictable categories: weak airflow, uneven heating, strange noises, and thermostat malfunctions. Knowing what to look for prevents small issues from turning into expensive repairs.
Weak or no airflow is almost always caused by a clogged filter, a blocked vent, or a failing blower motor. Check the filter first. If the filter is clean and airflow is still weak, check every vent in the house for obstructions. If both check out, call a technician.
Uneven heating across rooms usually points to duct leaks, blocked vents, or a zoning issue. Seal any visible duct leaks and confirm all vents are open. If one area of the house is consistently colder, a duct inspection by a professional will identify the source.
Strange noises during operation are a warning sign that should not be ignored. Banging or clanking suggests a loose or broken component inside the unit. Squealing often points to a worn belt or bearing. Rattling can mean loose panels or debris in the system. Any of these sounds warrant a service call.
Thermostat malfunctions show up as the system not turning on, short cycling, or running continuously. Replace the batteries first. If the problem continues, check that the thermostat is set to heat mode and that the fan setting is on “auto” rather than “on.” If neither fixes it, the thermostat may need recalibration or replacement.
Pro Tip: Never use a gas stove or oven to heat your home if your HVAC fails. This creates a serious carbon monoxide risk. Use electric space heaters rated for indoor use, like those from Vornado or De’Longhi, as a short-term backup while you wait for a repair.
For a full breakdown of warning signs, the top signs you need HVAC repair guide from Xtremeairservices covers 10 specific indicators and what each one means.
How does winterizing your outdoor AC unit protect your whole system?
Winterizing your outdoor AC unit protects your whole system by shielding the component that takes the most weather abuse. The outdoor condenser bears the brunt of ice, debris, and freeze-thaw cycles.
Left unprotected through winter, that abuse can damage the coil fins, refrigerant lines, and electrical connections.
Follow these steps to winterize your outdoor unit correctly:
- Turn off power to the unit at the disconnect box before doing anything else.
- Remove leaves, dirt, and debris from around the unit using a garden hose on a low-pressure setting.
- Straighten any bent coil fins with a fin comb if you have one.
- Allow the unit to dry completely before covering it.
- Place a breathable, hard-top cover designed for AC units over the top only. Do not wrap the entire unit in a cover, as this traps moisture and invites pests.
- Check the cover periodically through winter and remove it before running the system in spring.
Properly winterizing your outdoor unit extends system life and improves spring startup reliability. A unit that has been protected through winter starts up cleaner and runs more efficiently when cooling season begins.
Pro Tip: Place a piece of plywood on top of the unit under the cover to protect against ice falling from roof eaves. Ice impact is one of the most common causes of coil fin damage in northern climates.
For additional homeowner maintenance steps that apply year-round, the AC unit maintenance guide from Xtremeairservices is worth bookmarking.
Key takeaways
Preparing your HVAC system for winter requires replacing filters, sealing ducts, calibrating your thermostat, scheduling a professional fall tune-up, and winterizing your outdoor unit before the first hard freeze.
| Point | Details |
|---|---|
| Replace filters on schedule | Swap filters every 30 to 90 days depending on pets, allergies, and household size. |
| Seal ductwork before heating season | Use metallic foil tape on visible gaps to stop warm air from escaping into unconditioned spaces. |
| Schedule a fall tune-up | Book a professional inspection in September or October, before HVAC companies fill their schedules. |
| Set thermostat to 68°F and hold it | Avoid constant adjustments during cold snaps. Use a smart thermostat to automate steady settings. |
| Winterize the outdoor AC unit | Cover only the top of the unit with a breathable cover and check it periodically through winter. |
What most homeowners get wrong about winter HVAC prep
The biggest thing homeowners get wrong is timing, not neglect. After years of working on residential HVAC systems at Xtremeairservices, the pattern I see most often is people doing the right things too late.
They call for a tune-up in December when the heat is already struggling. By then, every HVAC company in the area is booked out two weeks. The fix is simple: treat fall HVAC prep like a calendar event, not a reaction to a cold snap.
The second most common mistake is skipping duct inspection because it feels invisible. You cannot see a duct leak from your living room, so it does not feel urgent.
But a 15-minute inspection of your basement or attic ductwork can reveal gaps that cost you real money every month. I have seen homes where 20% of heated air escaped into the attic before reaching a single room. Metallic foil tape costs a few dollars, and that repair pays for itself in weeks.
Third, I push back on the idea that a smart thermostat alone solves your efficiency problems. It helps, but only if the rest of the system is in good shape.
A smart thermostat on a system with a dirty coil and a leaking duct is still an inefficient system. Get the fundamentals right first, then layer in the technology.
My honest advice: block two hours in late September, run through the DIY checklist in this article, and book your professional tune-up the same day. That sequence costs less than $200 total and eliminates the vast majority of winter HVAC emergencies I see every year.
— Xtreme
Ready to get your HVAC system winter-ready?
Xtremeairservices makes winter HVAC preparation straightforward for homeowners across the area. Our certified technicians handle the full inspection, cleaning, and tune-up so you do not have to guess what your system needs.
Our HVAC maintenance plans include scheduled fall and spring tune-ups, priority service scheduling, and discounts on repairs. You get consistent, professional care without scrambling to book a technician when temperatures drop.
If you are weighing whether your current system is worth maintaining or due for an upgrade, our repair vs. replace guide helps you make that call with confidence. Contact Xtremeairservices today to schedule your fall tune-up before the calendar fills up.
FAQ
How often should I replace my HVAC filter in winter?
Replace your filter every 60 to 90 days during heating season, or every 30 to 60 days if you have pets or allergy sufferers in the home. A visual check every 30 days takes one minute and tells you whether the filter needs to come out early.
What temperature should I set my thermostat to in winter?
The Department of Energy recommends 68°F when you are home and awake, with a setback of 7 to 10 degrees when you are away or asleep. Holding a consistent setting reduces wear on your system and cuts heating costs.
When is the best time to schedule a professional HVAC tune-up?
Fall tune-ups before heavy heating use are the standard recommendation, with September and October being the ideal window. Waiting until November or December means longer wait times and higher risk of going without heat if a problem surfaces.
Can I cover my outdoor AC unit with a plastic tarp for winter?
Plastic tarps trap moisture and create conditions that attract rodents and promote corrosion. Use a breathable, hard-top cover designed specifically for AC units and cover only the top of the unit, not the entire body.
How do I know if my HVAC problem needs a professional repair?
Banging, clanking, or squealing noises, persistent uneven heating after filter replacement, or a system that short cycles or runs continuously all require a professional diagnosis. The signs you need HVAC repair guide from Xtremeairservices outlines 10 specific warning signs and what each one typically means.