

The best spot for a thermostat is an interior wall in a central, frequently used room, mounted about 5 feet (52 to 60 inches) up from the floor. Keep it off exterior walls, out of direct sunlight, and away from supply vents. If accessibility rules apply, the operable controls need to sit no higher than 48 inches. Get those two things right and everything else about comfort and energy bills tends to fall into place.
TL;DR:
- Proper thermostat placement is on an interior wall in a central, frequently used room, about 52 to 60 inches high, and away from direct sunlight or exterior walls.
- Placing the thermostat near windows, vents, or drafty areas causes false readings, leading to inefficient heating or cooling and increased short cycling.
- Using remote sensors in rooms with poor thermostat placement can improve accuracy without relocating the main unit, especially for smart thermostats.
- Relocating a hardwired or multi-zone thermostat usually requires professional help to avoid wiring issues, zone imbalance, or new short cycling problems.
- Regularly revisiting thermostat placement after home changes ensures optimal energy use and comfort, with professional diagnosis recommended for persistent issues.
Table of Contents
- Thermostat Placement Guide: Finding the Best Location in Your Home
- The Worst Spots for a Thermostat and What They Do to Your System
- What Height Should a Thermostat Be Mounted?
- Can’t Move Your Thermostat? Here’s What Actually Helps
- When to Call a Pro for Thermostat Relocation
- Our Take: The Thermostat Rule Homeowners Skip
- Get Your Thermostat Placement Checked by a Pro
- Sources
- FAQ
Thermostat Placement Guide: Finding the Best Location in Your Home
Your thermostat is basically a thermometer that bosses your whole HVAC system around. Put it somewhere that doesn’t reflect how the house actually feels, and it will heat or cool based on bad information. That’s the entire logic behind every rule in this thermostat placement guide.
An interior wall works better than an exterior one because exterior walls run colder in winter and hotter in summer, skewing the reading toward the outside temperature instead of the room. Central location matters for the same reason: a thermostat tucked in a corner or an unused guest room measures that spot, not the house.
In a two-story home, first-floor placement is usually the smarter call. Heat rises, so upstairs rooms tend to run warmer, and a thermostat mounted downstairs avoids overcorrecting for that natural drift. This is one reason why placement quality shows up directly in short-cycling frequency more than most homeowners expect.
Good candidate spots share a few traits:
- A main hallway or living room wall that sees regular foot traffic and normal airflow
- A location away from windows, so afternoon sun doesn’t cook the sensor
- A spot with a clear line to the room, not hidden behind a bookshelf or door swing
- A wall shared with other conditioned space, not one backing onto a garage or attic
Airflow around the unit matters too. A poorly sealed interior door near your thermostat can let drafts skew its reading, which is worth checking before you assume the wall itself is the problem. Accessibility also deserves a seat at the table: a thermostat in a rarely used formal dining room might be technically central on a floor plan, but if nobody walks past it, you lose the chance to notice a stuck reading or a system running longer than it should.
The Worst Spots for a Thermostat and What They Do to Your System
A handful of locations cause the same basic problem repeatedly: they trick the sensor into reading a temperature that has nothing to do with how the room actually feels.
- Near a sunny window. Direct sunlight heats the thermostat casing itself, so it thinks the room is warmer than it is and cuts the air conditioning short. HVAC experts note this kind of poor placement forces the system to cycle unnecessarily, which wastes energy and adds wear to the equipment.
- Next to a supply vent, radiator, or fireplace. Blasts of conditioned or radiant heat hit the sensor directly, producing a reading that flips the moment the system kicks on.
- On an exterior wall. Outdoor temperature bleeds through, especially in older homes with thinner insulation.
- Near doors, windows, or drafty hallways. Every time a door opens, a gust of outside air throws off the reading. CNET’s rundown of the worst thermostat spots calls out drafty entryways for exactly this reason.
- In the kitchen. Oven heat and cooking steam are two of the most common culprits behind a thermostat that seems to have a mind of its own.
- In a room you rarely use. No one is around to notice if it’s stuck, miscalibrated, or reading eight degrees off from the rest of the house.
The result of any of these mistakes is what technicians call short cycling: the system turns on and off far more often than it should, burning more energy per hour of actual comfort and shortening the lifespan of the compressor or heat exchanger.
What Height Should a Thermostat Be Mounted?
Mount it at a height roughly corresponding to eye level for most adults, in a range that is commonly recommended for accurate temperature sensing. That height puts the sensor in the zone where air actually mixes, rather than the cooler air pooling near the floor or the warmer layer collecting near the ceiling. Warmup’s guidance on standard thermostat height lands squarely in that same 52 to 60 inch range for exactly this reason.
There’s an important exception. When accessibility rules apply, HUD guidance calls for a maximum height of 48 inches for the highest operable control, based on an unobstructed forward reach. This matters for multifamily housing and any home built or renovated to meet fair housing accessibility standards, not just federal buildings.
A quick reference: standard comfort height is 52 to 60 inches. ADA forward reach caps out at 48 inches. If both apply to your situation, the lower number wins.
A few mounting details that trip people up:
- Leave clearance on all sides. A thermostat crammed behind a curtain or tall furniture reads dead air, not room air.
- Watch for electrical boxes or metal wall plates behind the mounting spot. Metal can interfere with wireless signal on smart models.
- If you’re mounting a smart thermostat with occupancy sensing or “Follow Me” temperature averaging, going lower than 52 inches can actually help those features work better, since they’re designed to sense where people actually are.
- In rooms with high or vaulted ceilings, resist the urge to mount higher just because the wall allows it. The same air-mixing logic still applies at 5 feet, regardless of how tall the room is.
Can’t Move Your Thermostat? Here’s What Actually Helps
Relocation isn’t always practical, especially with hardwired systems where moving the unit means running new wire through finished walls. The good news: a bad spot doesn’t have to stay a bad spot.
A smart thermostat with remote sensors solves most of this without touching the main wiring. You place small battery-powered sensors in the rooms that matter most — the ones where people actually spend time — and the system averages or prioritizes those readings instead of relying solely on the wall unit. That’s often a stronger fix than any DIY adjustment to the main thermostat’s location.
Smaller fixes can help too, even without new hardware:
- Move lamps, space heaters, or other heat sources away from the unit
- Add a curtain or blind if the thermostat sits near a window that gets afternoon sun
- Weatherstrip a nearby door if drafts are hitting the sensor
- Clear anything blocking airflow directly in front of the unit
Connectivity is worth a second thought if you’re going the smart-sensor route. Placing a sensor or thermostat behind a large metal appliance, inside a metal enclosure, or too far from your Wi-Fi router can cause dropped connections that quietly disable remote scheduling and updates.
Pro Tip: If your Wi-Fi signal is weak near the thermostat, check connection strength with your phone standing in that exact spot before you commit to mounting anything there.
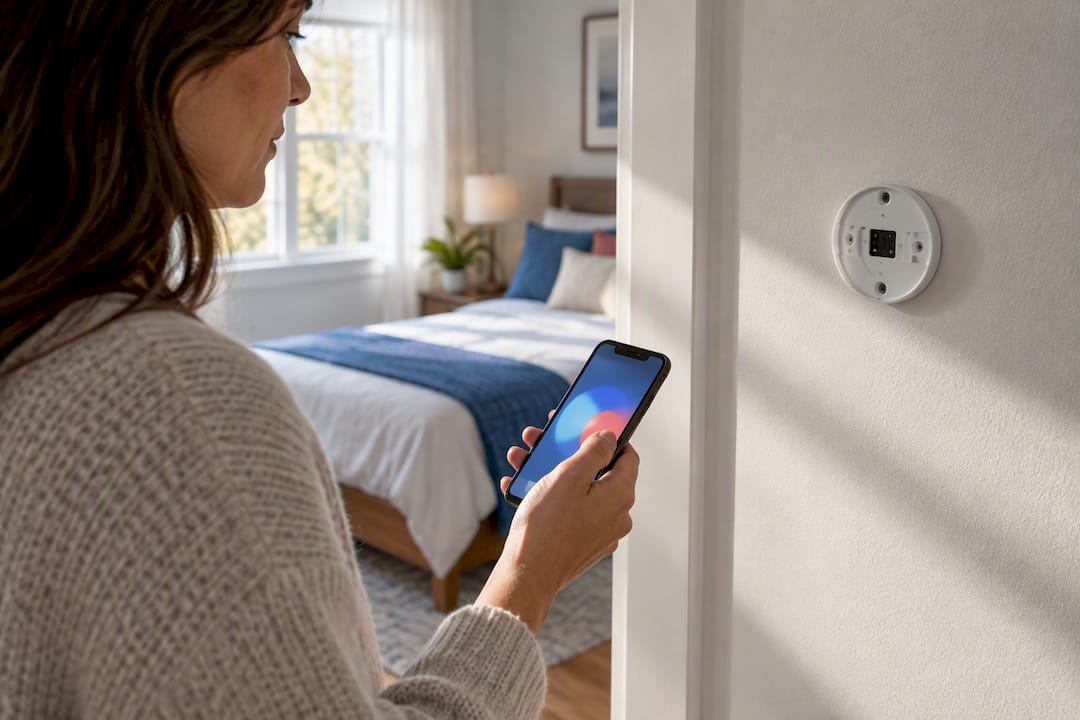
Remote sensors work as a genuine long-term solution when the room layout just won’t allow relocation. Treat wall-mounted fixes like curtains and heat-source removal as good stopgaps, but sensors solve the underlying accuracy problem instead of just masking it.
When to Call a Pro for Thermostat Relocation
Battery-powered thermostats that just need a new spot on the same wall are usually a fine DIY job. Anything involving hardwired control wiring, multi-zone systems, or moving the unit to a different wall entirely is where professional help pays for itself.
- Wire extension work. Moving a thermostat more than a few feet often means running new low-voltage wire through walls or attic space, which is straightforward for a licensed technician and a headache for anyone without the right tools.
- Multi-zone balancing. Homes with zoned HVAC systems need the thermostat placement coordinated across zones, since one badly placed sensor can throw off comfort in rooms it isn’t even controlling.
- Post-relocation testing. A good technician checks for short cycling after moving a unit, confirming the new spot actually fixed the problem instead of creating a different one. Installation guidance around wiring and clearance requirements also factors into where a relocated thermostat can legally and safely go.
Before hiring anyone, ask a few direct questions: Are you licensed and insured? What’s the estimated timeline for the job? Do you test for short cycling after the work is done? If you’d rather compare options first, a directory like Installer can help you find verified local professionals.
Our Take: The Thermostat Rule Homeowners Skip
Most placement advice stops at “avoid sunlight and vents,” which is true but incomplete. The bigger issue we see is homeowners treating the thermostat as a fixed fact of the house, something installed once and never revisited, even after a remodel changes airflow or a new addition changes which rooms actually get used daily.
A thermostat installed correctly ten years ago can become a bad thermostat today if a wall got insulated, a room got repurposed, or a new HVAC system replaced an older, less sensitive one. Building layout and insulation quality aren’t static, and placement decisions should get revisited when either changes. One of the most common fixes our technicians perform isn’t a full relocation. It’s extending a wire a few feet or adding a single remote sensor to a room that changed use since the thermostat went in.
The other overlooked point: mechanical, digital, and smart thermostats don’t behave identically in the same spot. A basic mechanical unit is more forgiving of imperfect placement, while a smart thermostat with occupancy sensing can actually underperform in a great location if the sensors aren’t sited well. Placement advice that treats every thermostat type the same is giving you half the picture.
— Xtreme
Get Your Thermostat Placement Checked by a Pro
Xtreme Air Services gives you something a general contractor or a DIY sensor kit can’t: technicians who diagnose your specific HVAC system’s cycling behavior before touching the wiring, so you’re not guessing whether a relocation will actually fix the problem.

If your energy bills have been climbing or one room never seems to match the rest of the house, that’s often a placement issue hiding behind what looks like an equipment problem. Our team handles thermostat installation and smart thermostat installation, including wire extensions, remote sensor setup, and full relocations for homes with zoned systems.
Browse our thermostat options or check out our full residential HVAC services to schedule a diagnostic visit and get a straight answer on whether your current thermostat spot is costing you money.
Sources
- HUD Fair Housing Accessibility Guidelines (Section on reach ranges)
- CNET: 3 worst places to put your thermostat
- UpCodes: Thermostat installation
FAQ
Where should I position my thermostat in my house?
Put it on an interior wall in a central room you use every day, such as a living room or main hallway, mounted 52 to 60 inches high. Avoid exterior walls, direct sunlight, and anywhere near supply vents or doorways.
Is 74 degrees too high for heat in winter?
It’s on the warmer end but not unreasonable, especially for households with young kids, older adults, or anyone sensitive to cold. The bigger question is whether your thermostat is reading accurately. If it’s placed near a draft or an exterior wall, the true room temperature could be several degrees different from the setting.
Where should you not place a thermostat?
Avoid direct sunlight, spots near supply vents or radiators, exterior walls, kitchens, and areas right next to exterior doors or windows. Each of these creates a false reading that causes your system to run longer or shorter than it should, a pattern known as short cycling.
Is 78 degrees too hot for a house?
It depends on the season and personal comfort, but common energy-saving setpoints for summer cooling vary when people are home. If a room setpoint still feels noticeably hotter or colder than others, that’s usually a placement problem rather than a thermostat setting problem.
How much does it cost to have a thermostat professionally relocated?
Cost depends on wiring complexity, wall access, and whether you’re upgrading to a smart model at the same time. Xtreme Air Services provides pricing after a quick on-site look, so ask for a quote through our thermostat installation page rather than guessing based on a general estimate.